
Making Halloween costumes has been a tradition in our family since our oldest was 2 years old. It took me a bit to get motivated and inspired in the realization that “Ooooh I can make that, hold on … I can create my sons ENTIRE Halloween costume” lol…
Read MoreWOOD PINEAPPLE DECOR DIY! 🍍
You might've noticed by now that we have a thing for pineapples in our house. Or I definitely do! I love how cute they are…
Read MoreFLAMINGO DIY + PRINTABLE 🦩
A few years back, we went on a school field trip to the zoo with my sons' pre-school class…
One of my friends oldest little girl was so excited to see the flamingos…
MINI SCARECROW DIY 🍂
When I was thinking about a great Fall DIY to create ... one that would also serve as a great Thanksgiving accent or decor; the idea of a small, adorable hand-held scarecrow came to mind. A really stylish one! The more I thought about it, the more I knew it needed to be a reality! The boys were really excited about them too! So I set out to make our scarecrow(s) come to life!
MESSY LEVEL: 3
There is a good amount of gluing and lots of cutting of different materials.
SUPPLIES:
• Body •
Cardboard (for head + torso)
5/16 x 36 wood dowel (can get these at any craft stores)
Cardstock in color desired for details
Small cup + pencil for tracing
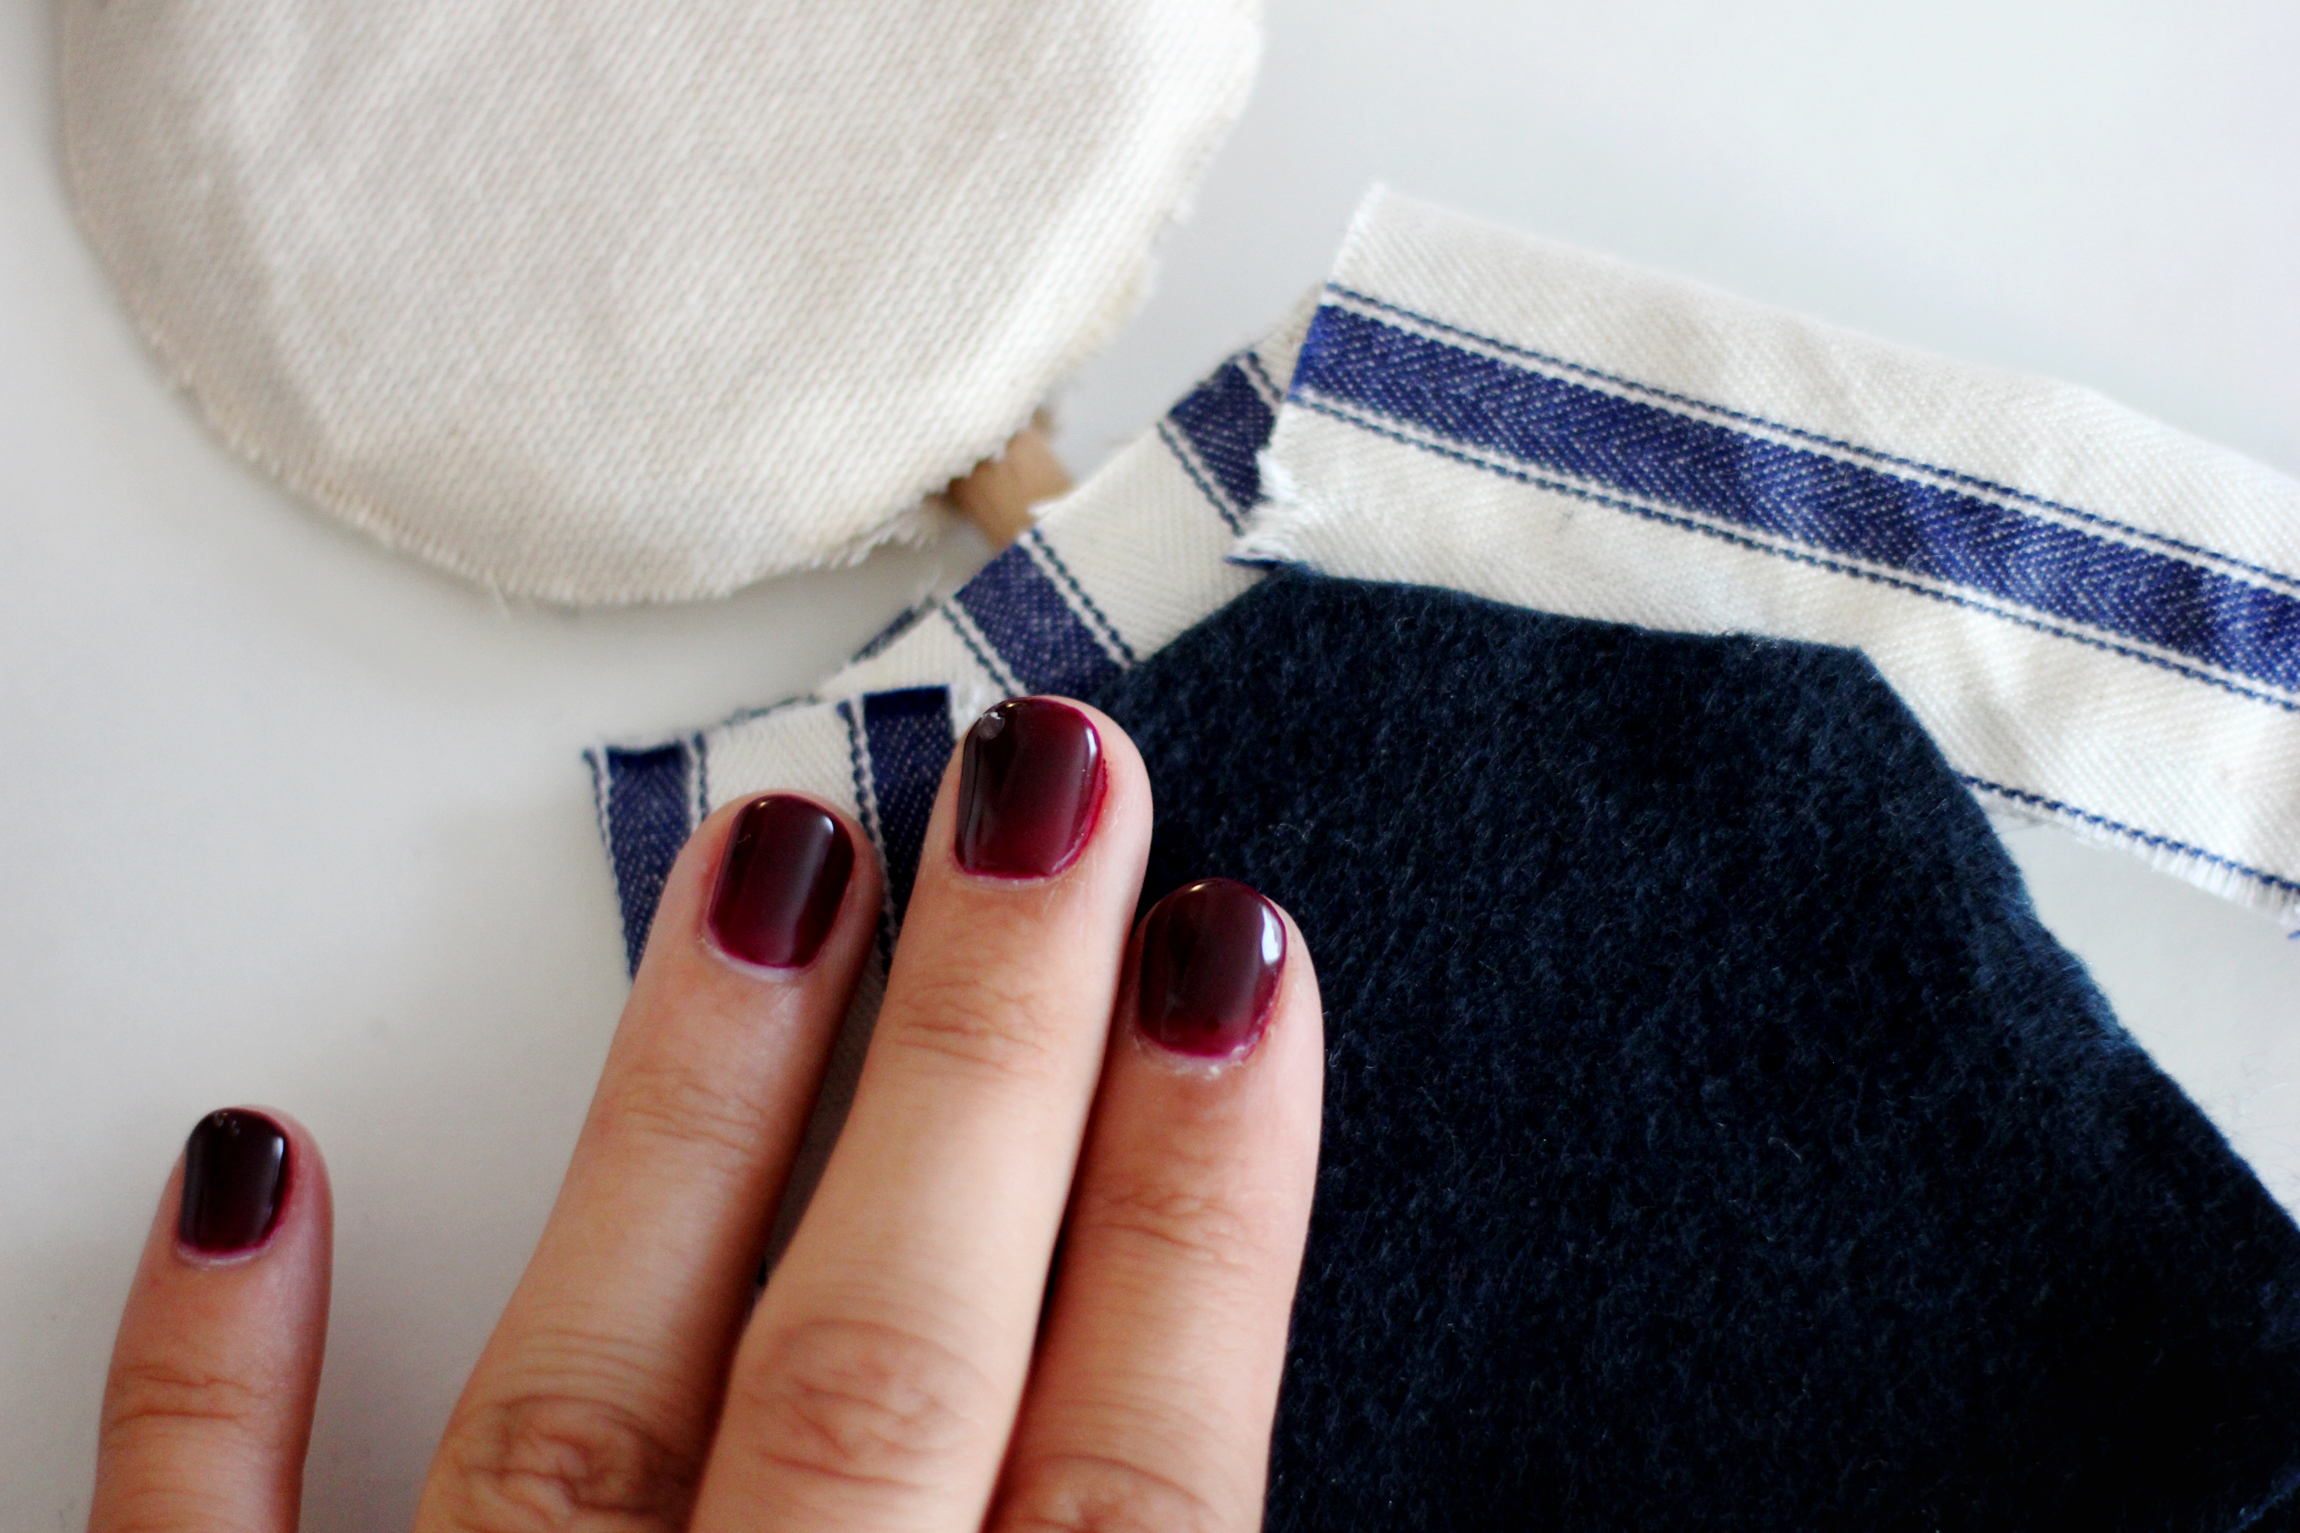
Canvas fabric
A bag of Aspenwood excelsior you can purchase HERE or locally in any Joann store.
Glue gun and/or E600 glue
Scissors
Ruler
Sharpie and/or acrylic paint
Clear prepping gesso / gloss to seal canvas fabric
• Outfit •
Felt fabric in color desired (we wanted a "denim" look so we went with navy blue)
Plaid fabric (or whichever pattern or look preferred for scarecrow shirt)
Fun patterned fabric for scarf + leggings (optional)
Wire for glasses (optional)

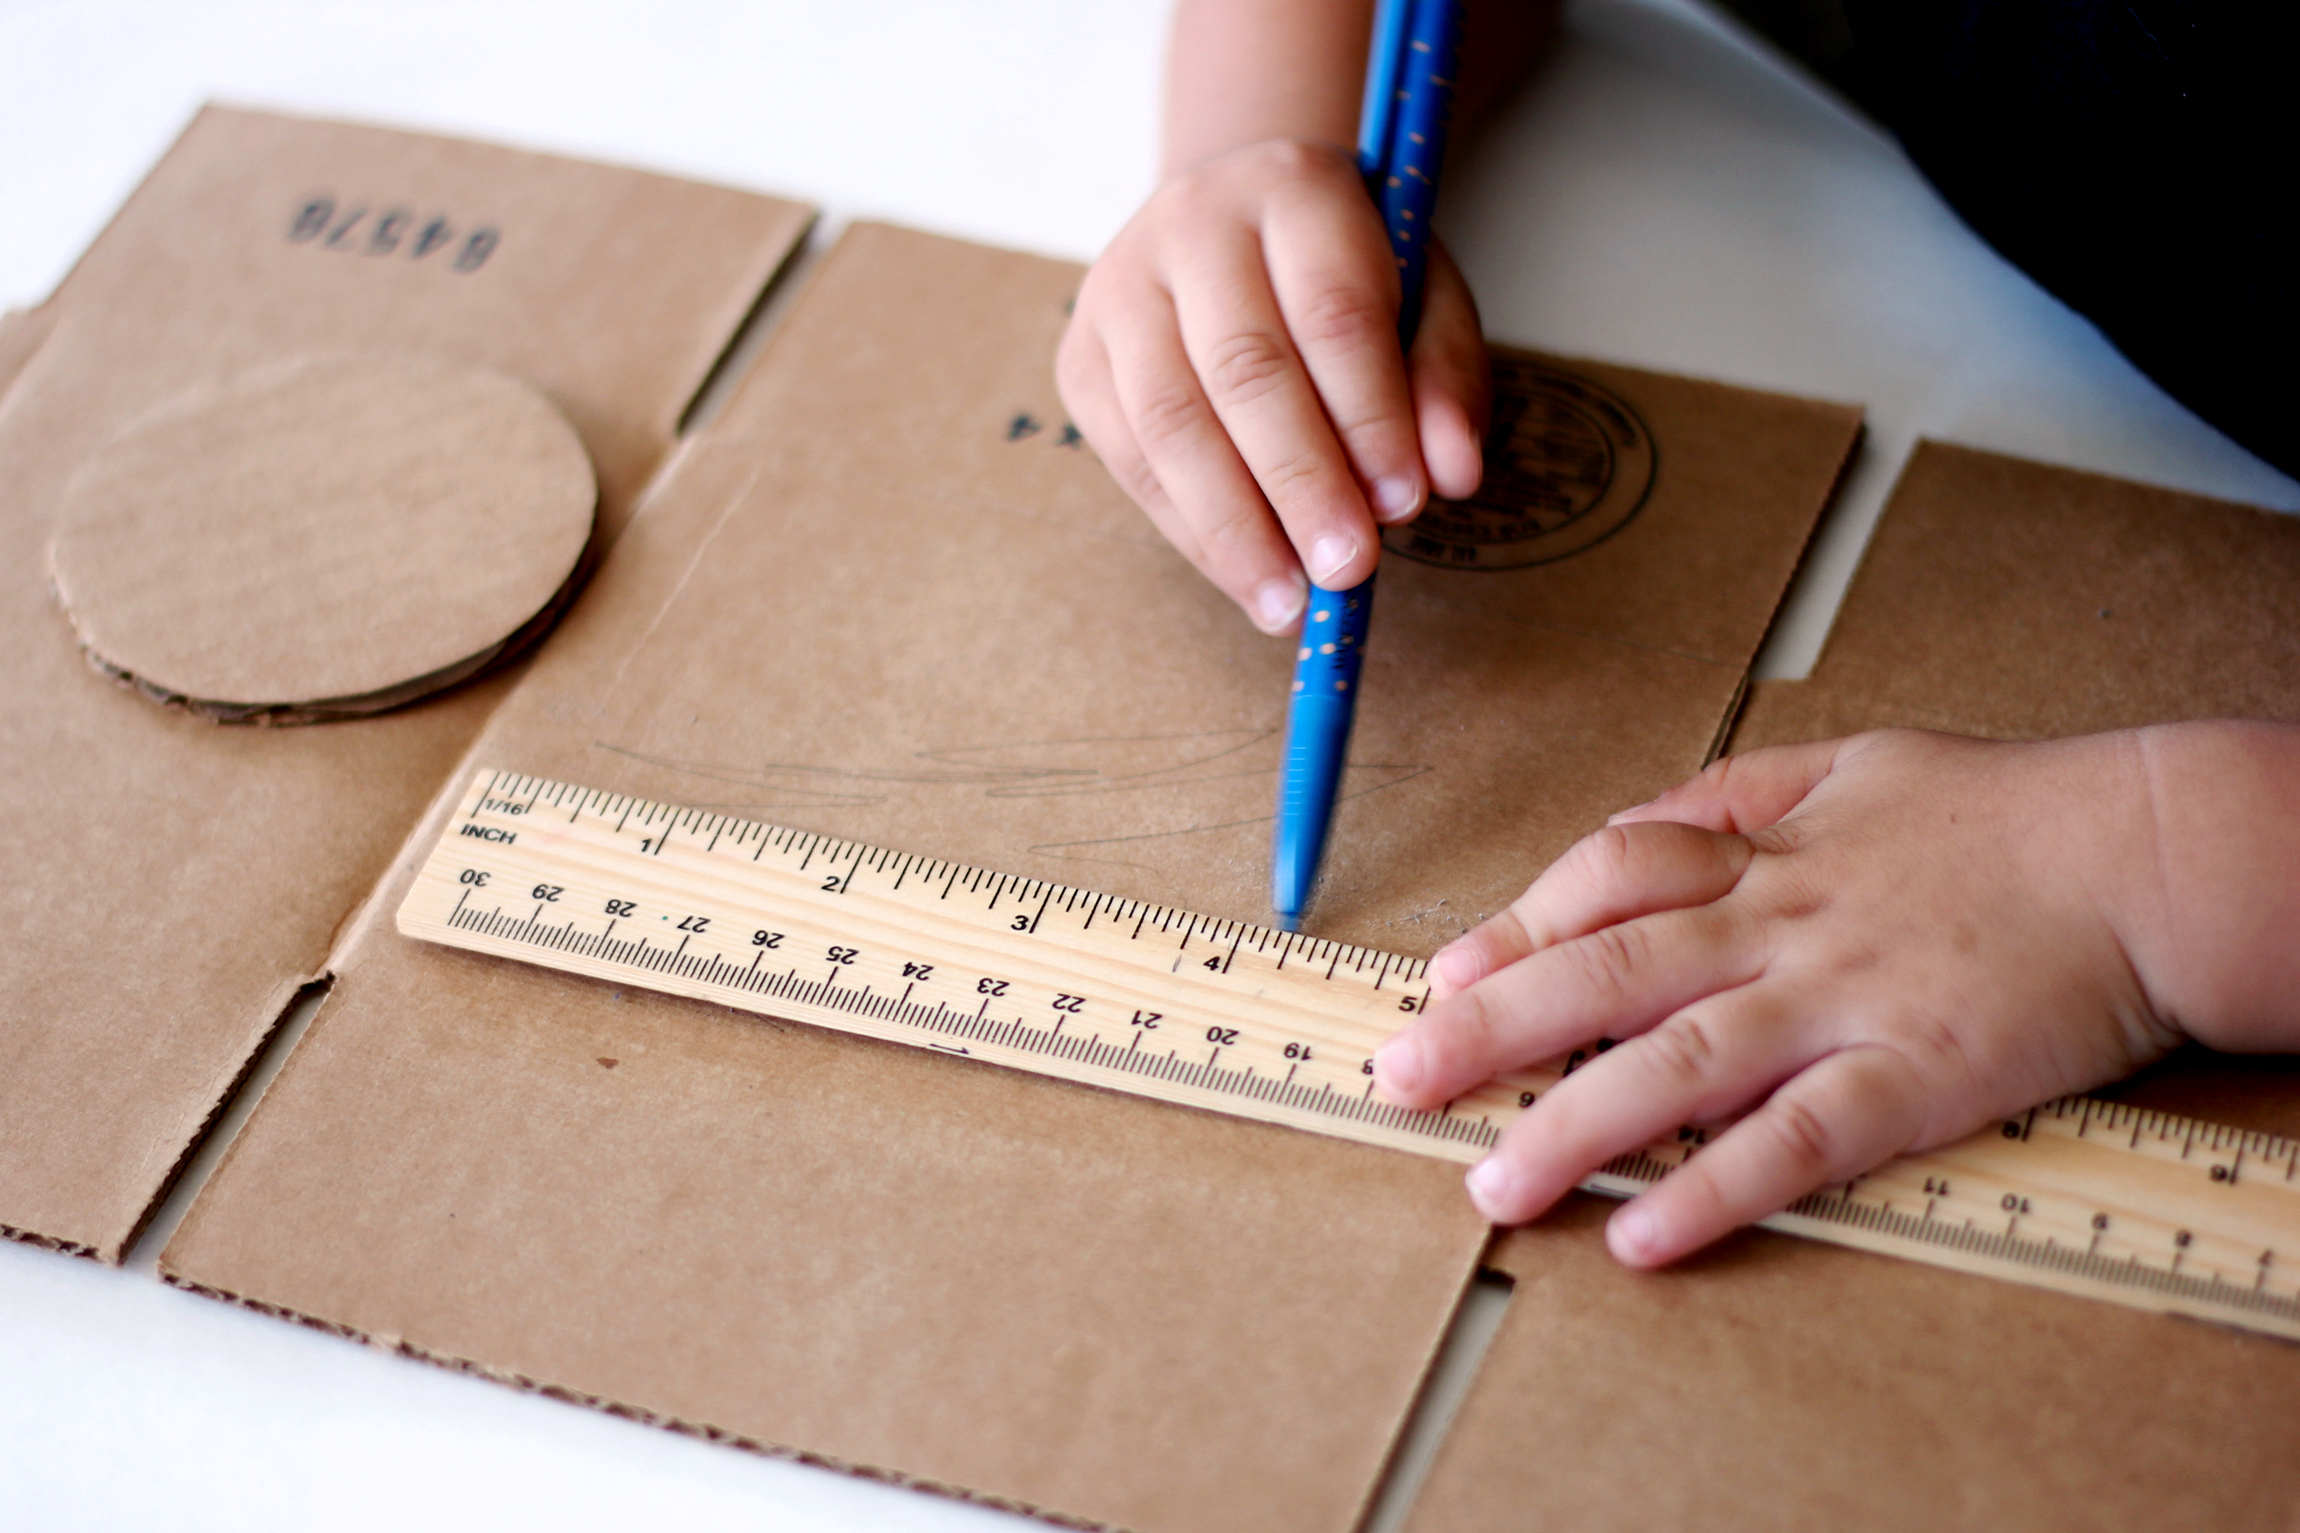
1.) First you're going to create a circle that will be the head of the scarecrow. The size will differ depending on how big you want your scarecrow to be. We traced around a kids cup which is 3 inches wide at the top. Then you'll make a rectangle for the body. We made ours to be 3.5 x 5 inches. After you're done tracing, cut your shapes.


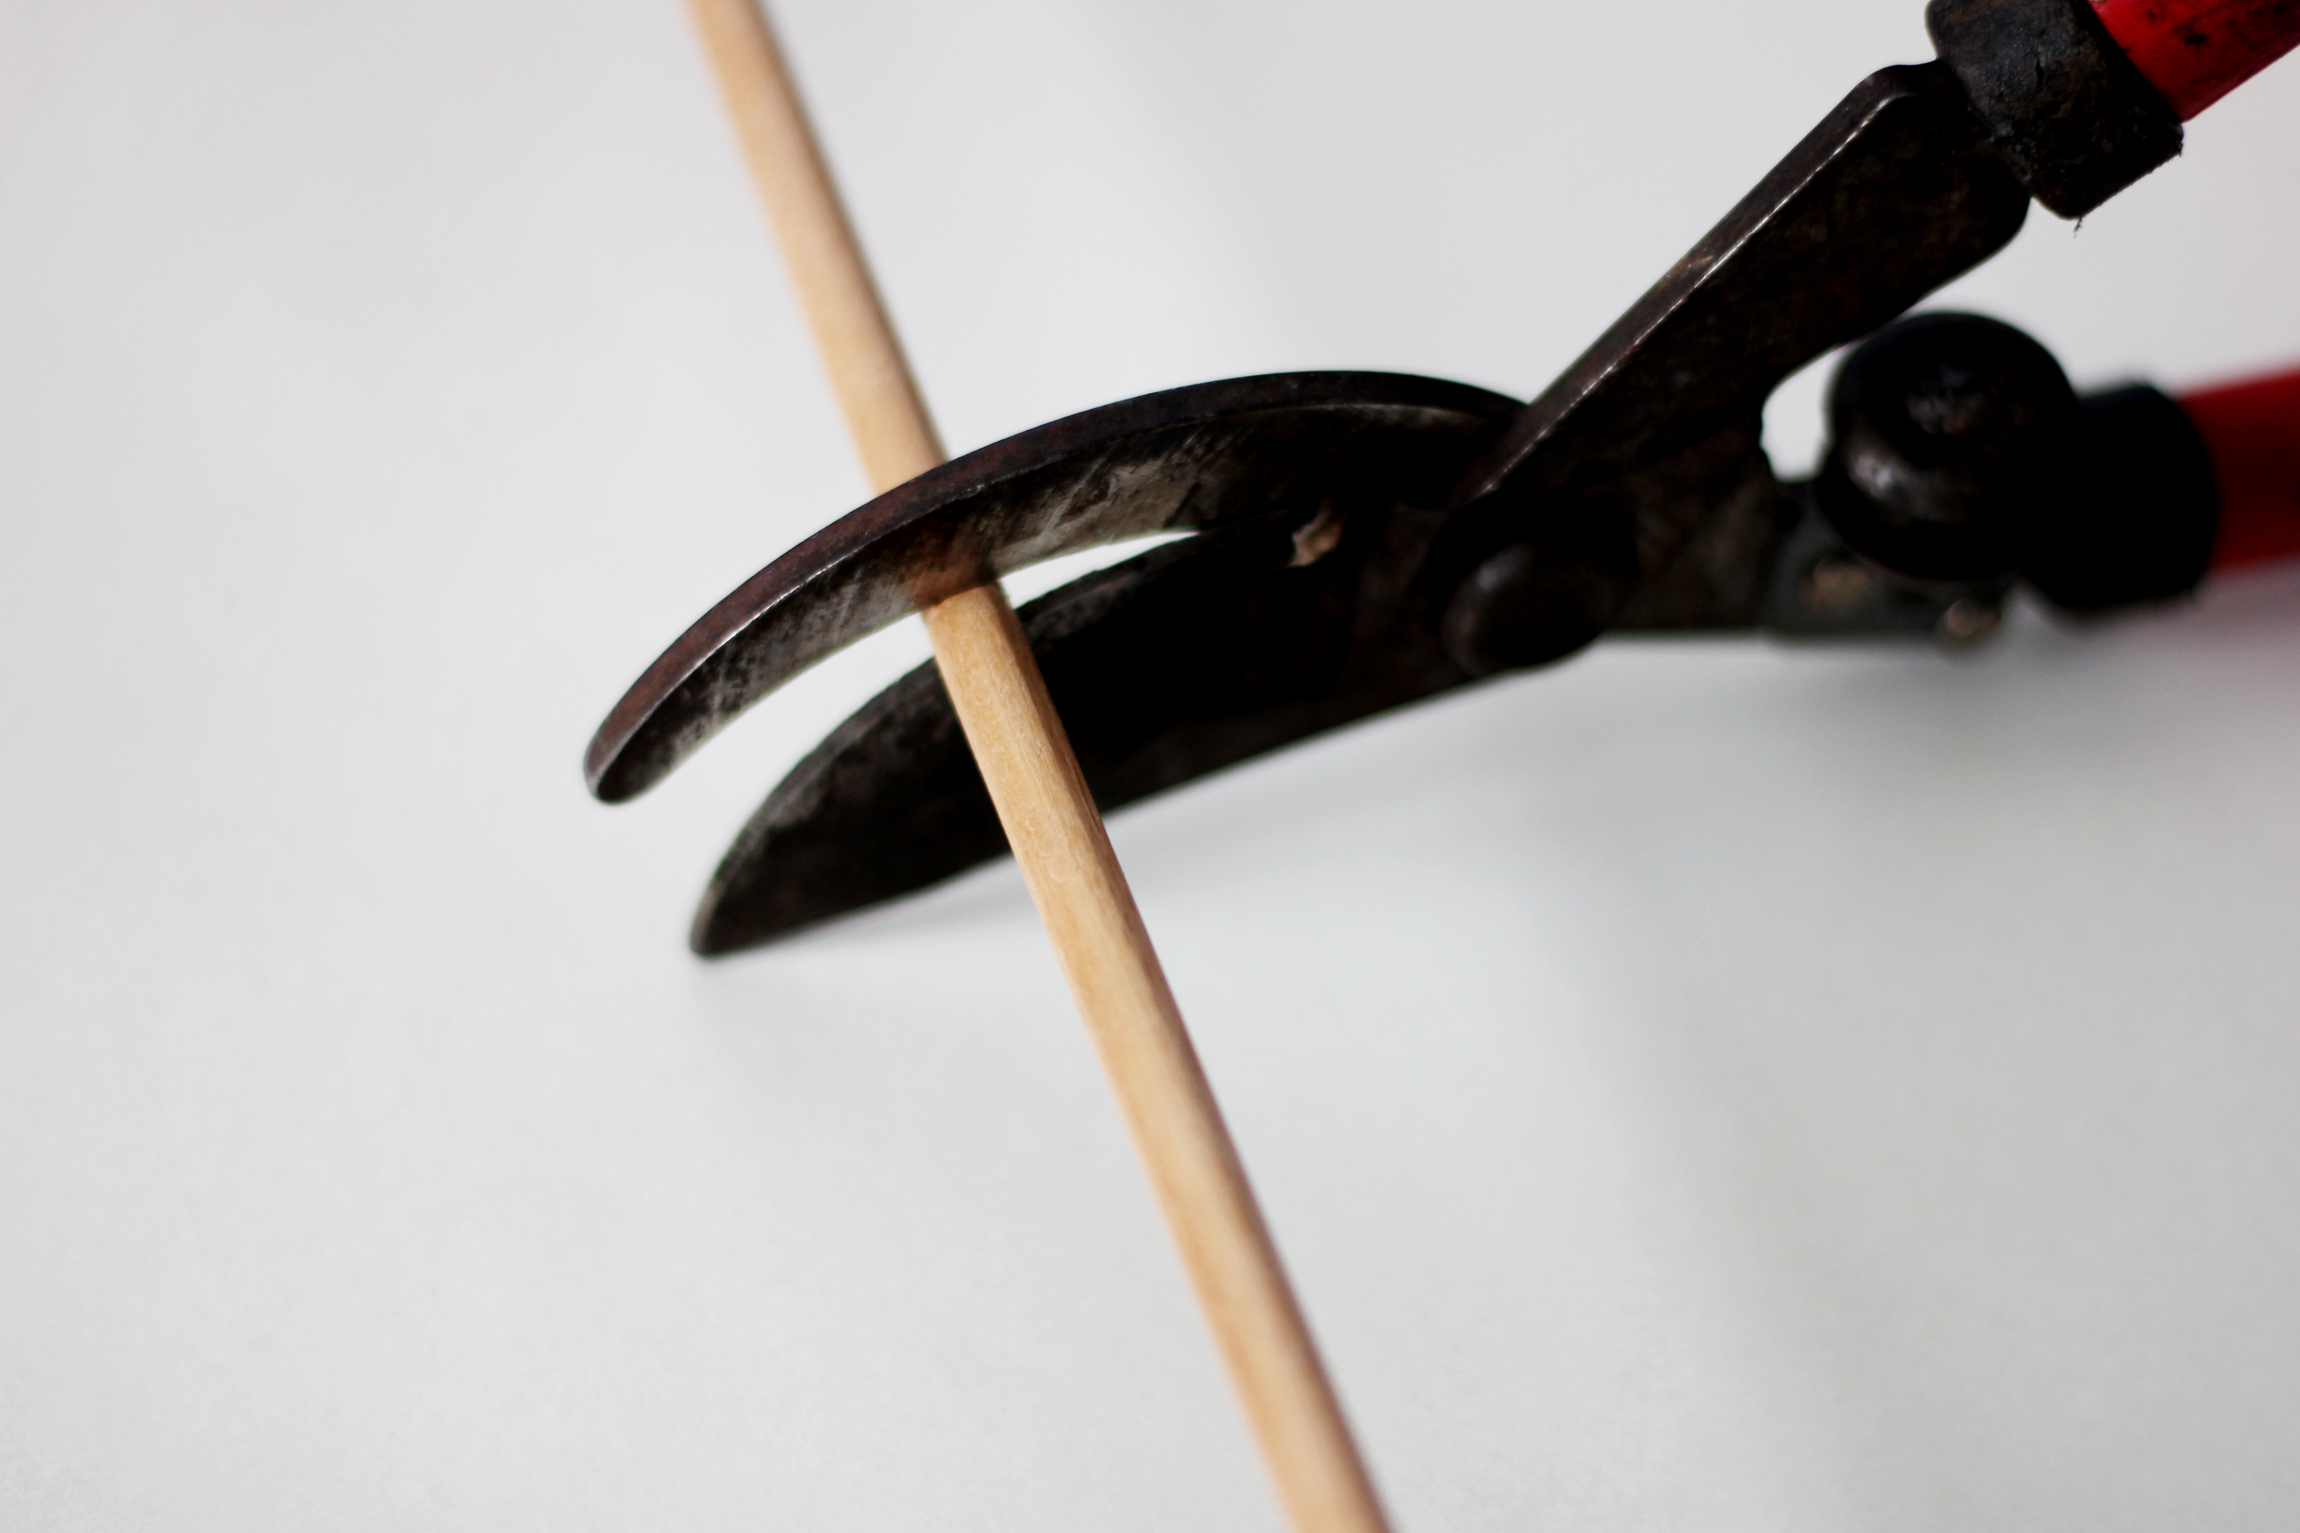
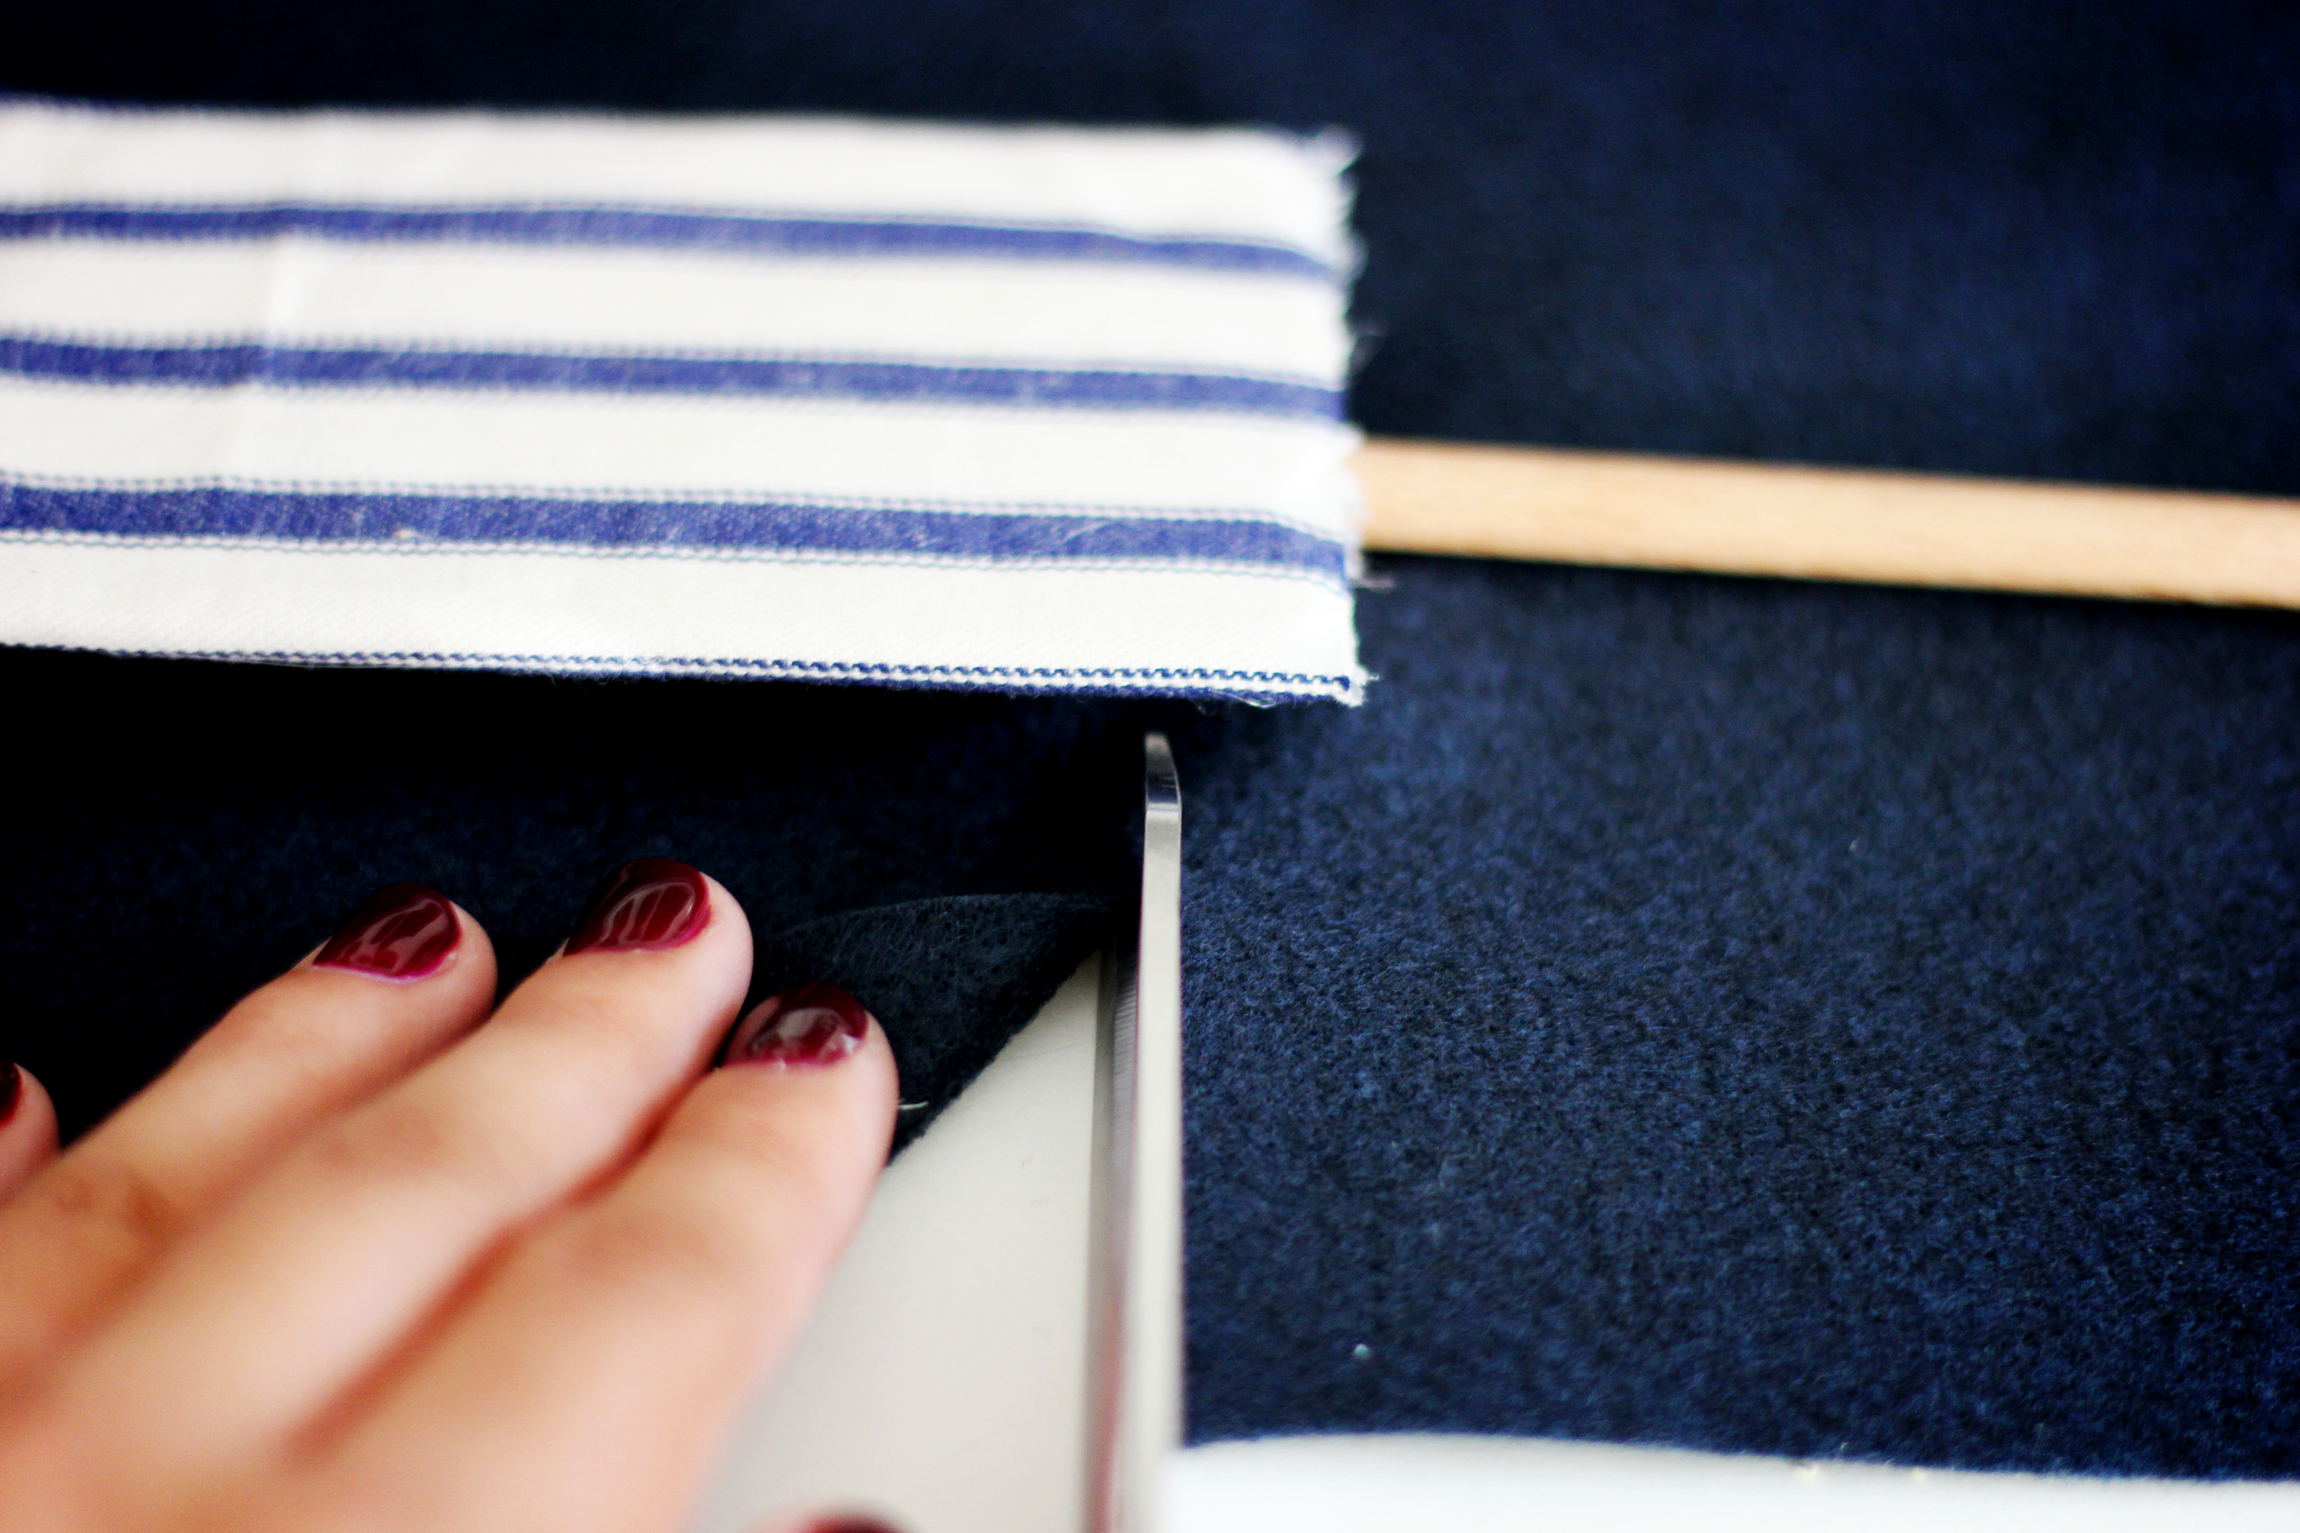
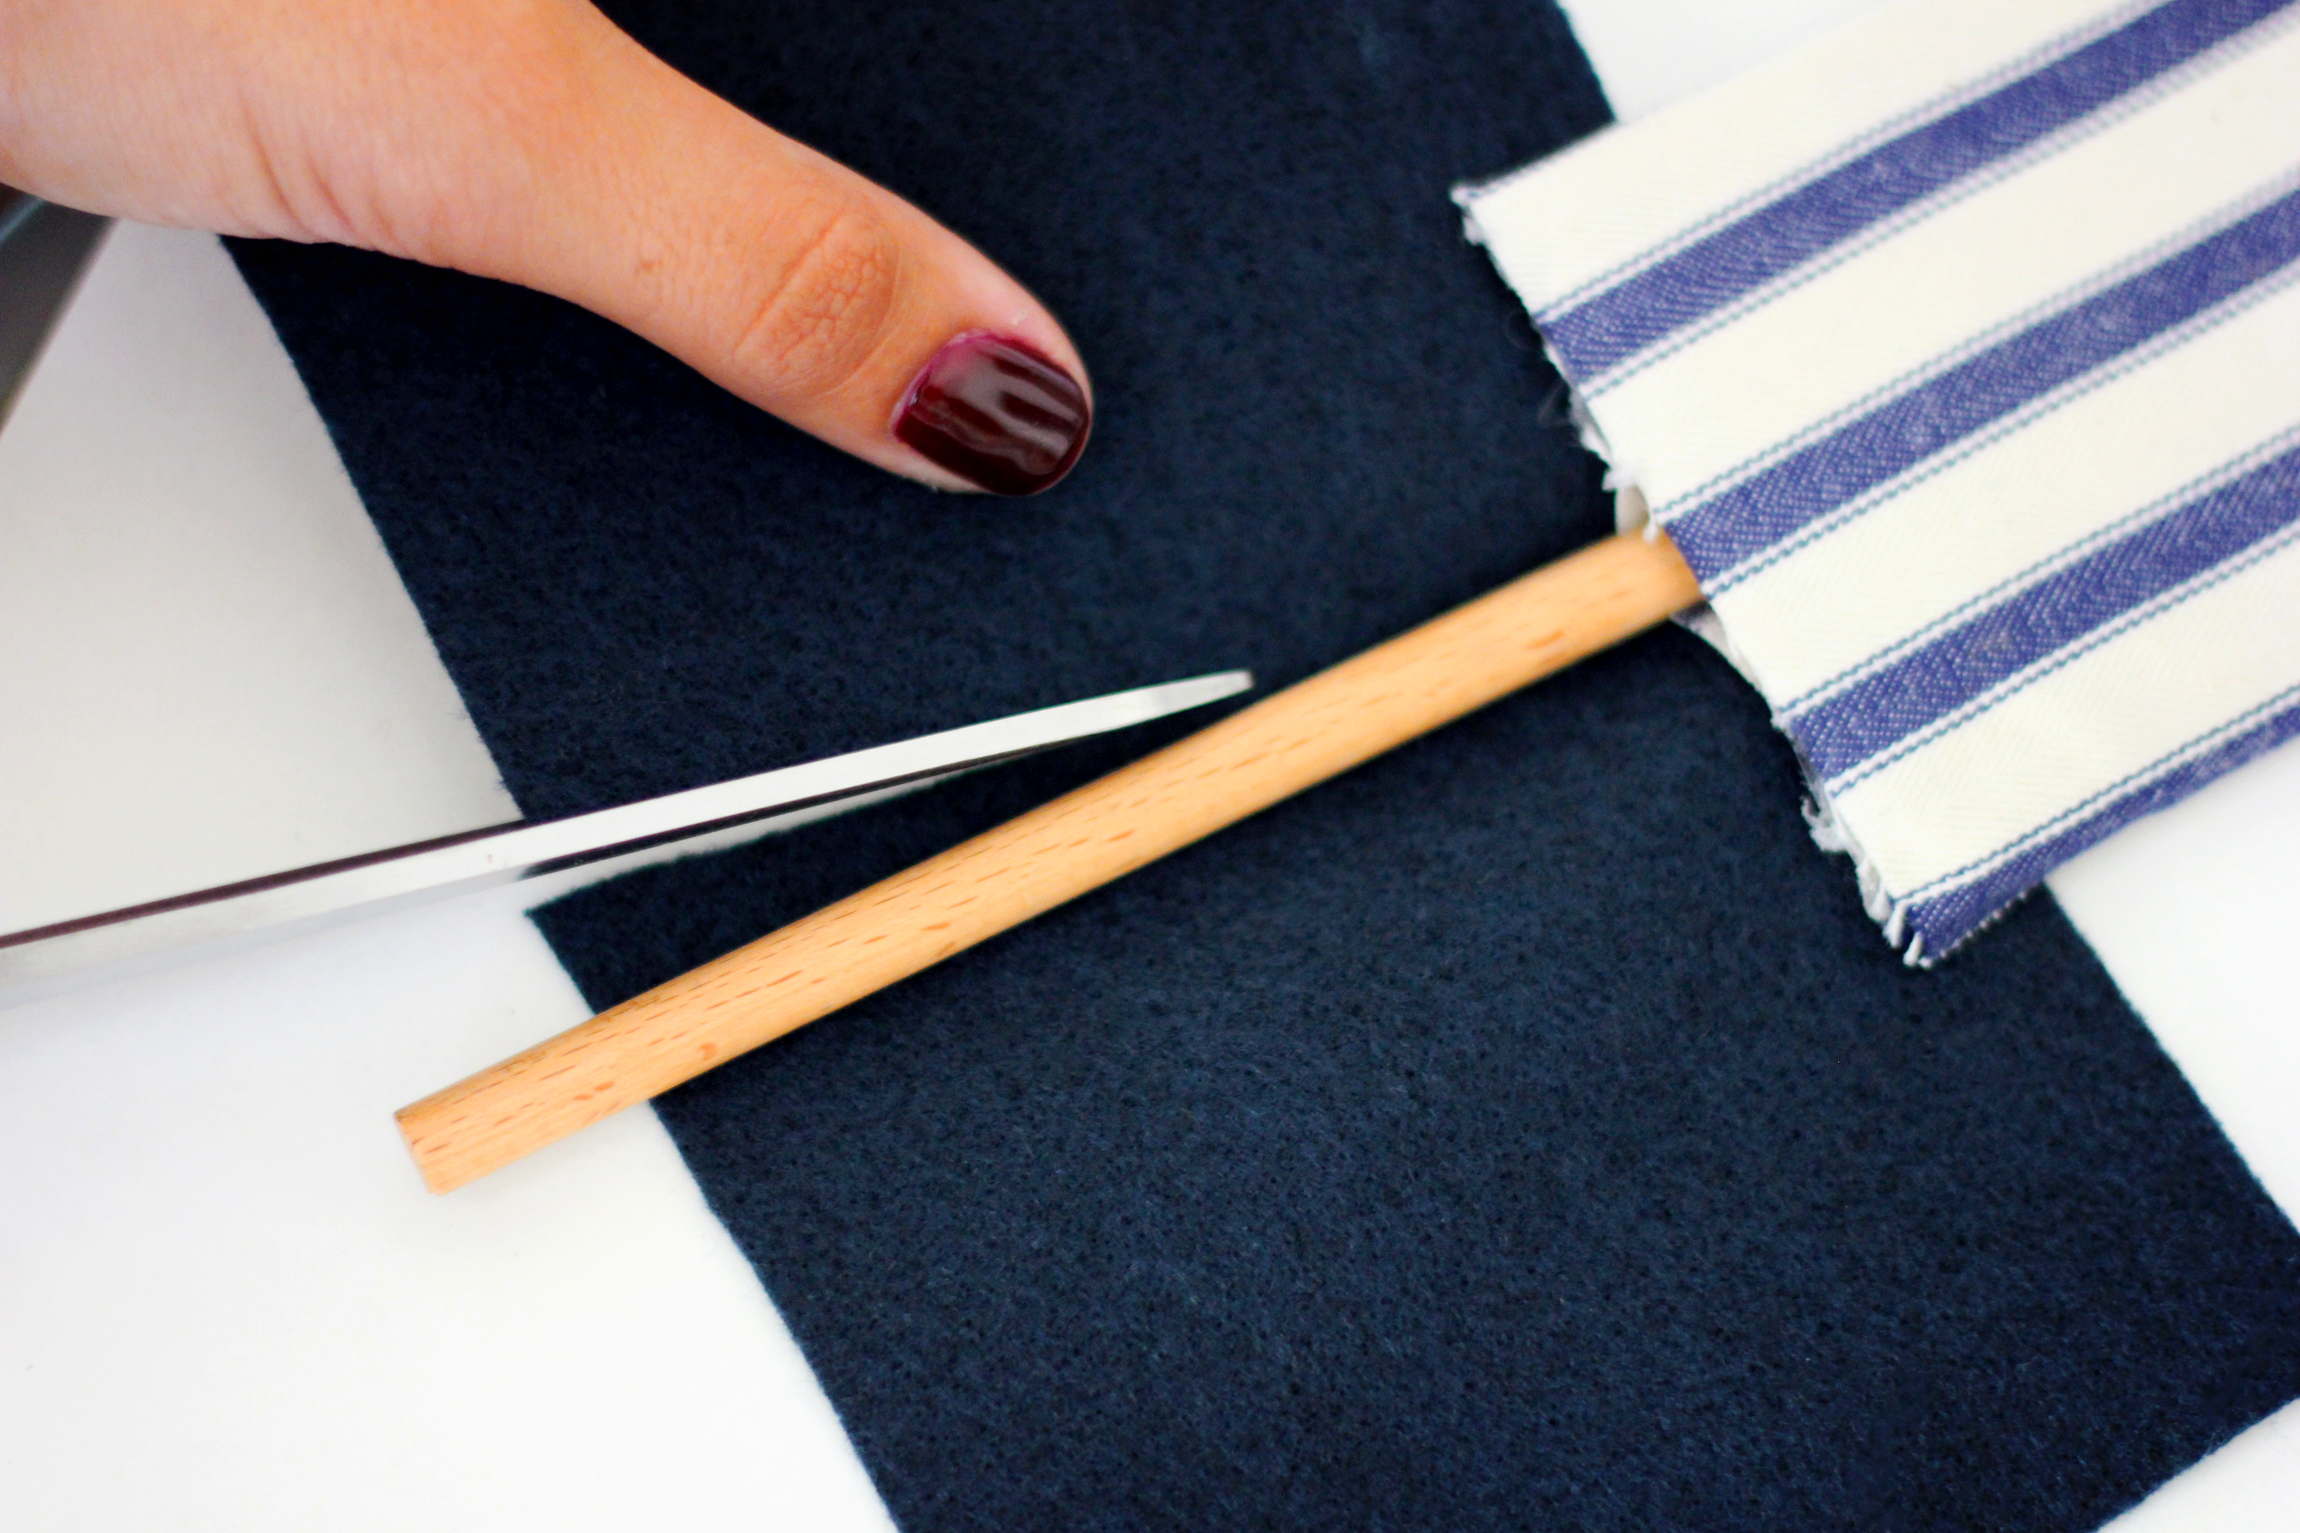
2.) Next you're going to measure and cut your wood dowel, we made ours out to be 10 1/2 inches long. After cutting it, we glued it down to the head and body of the scarecrow. We used E600 glue which you can find HERE, but a glue gun will work as well!


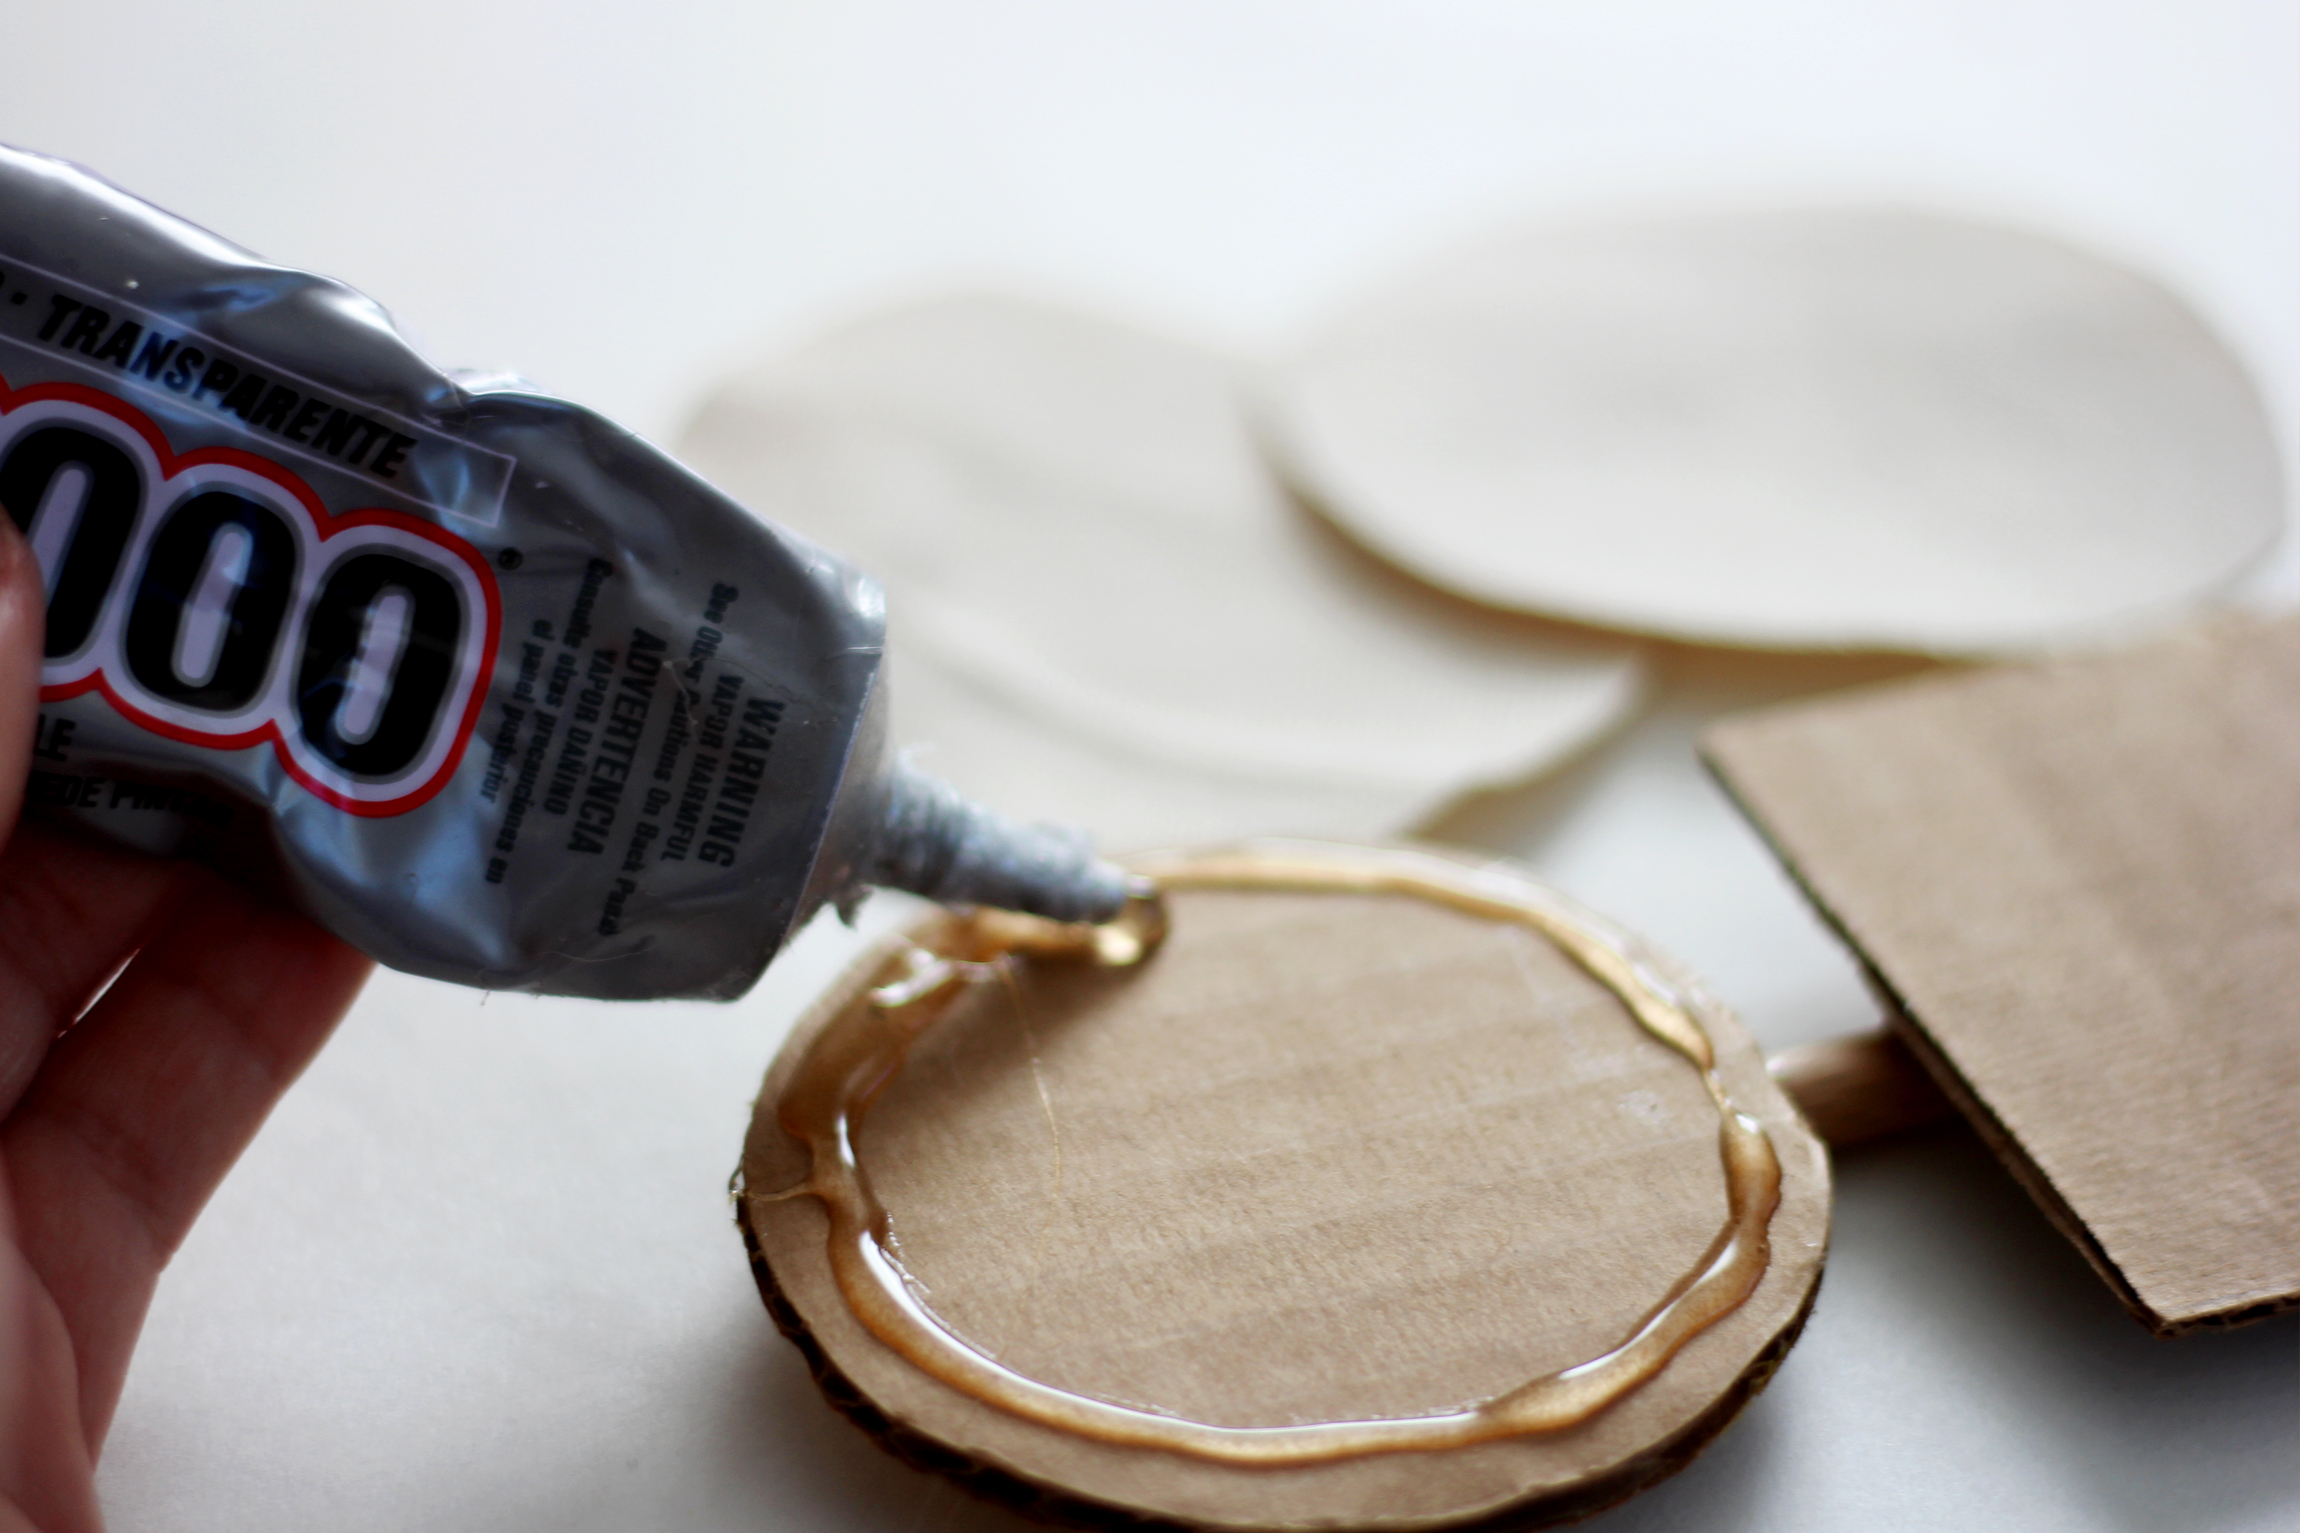
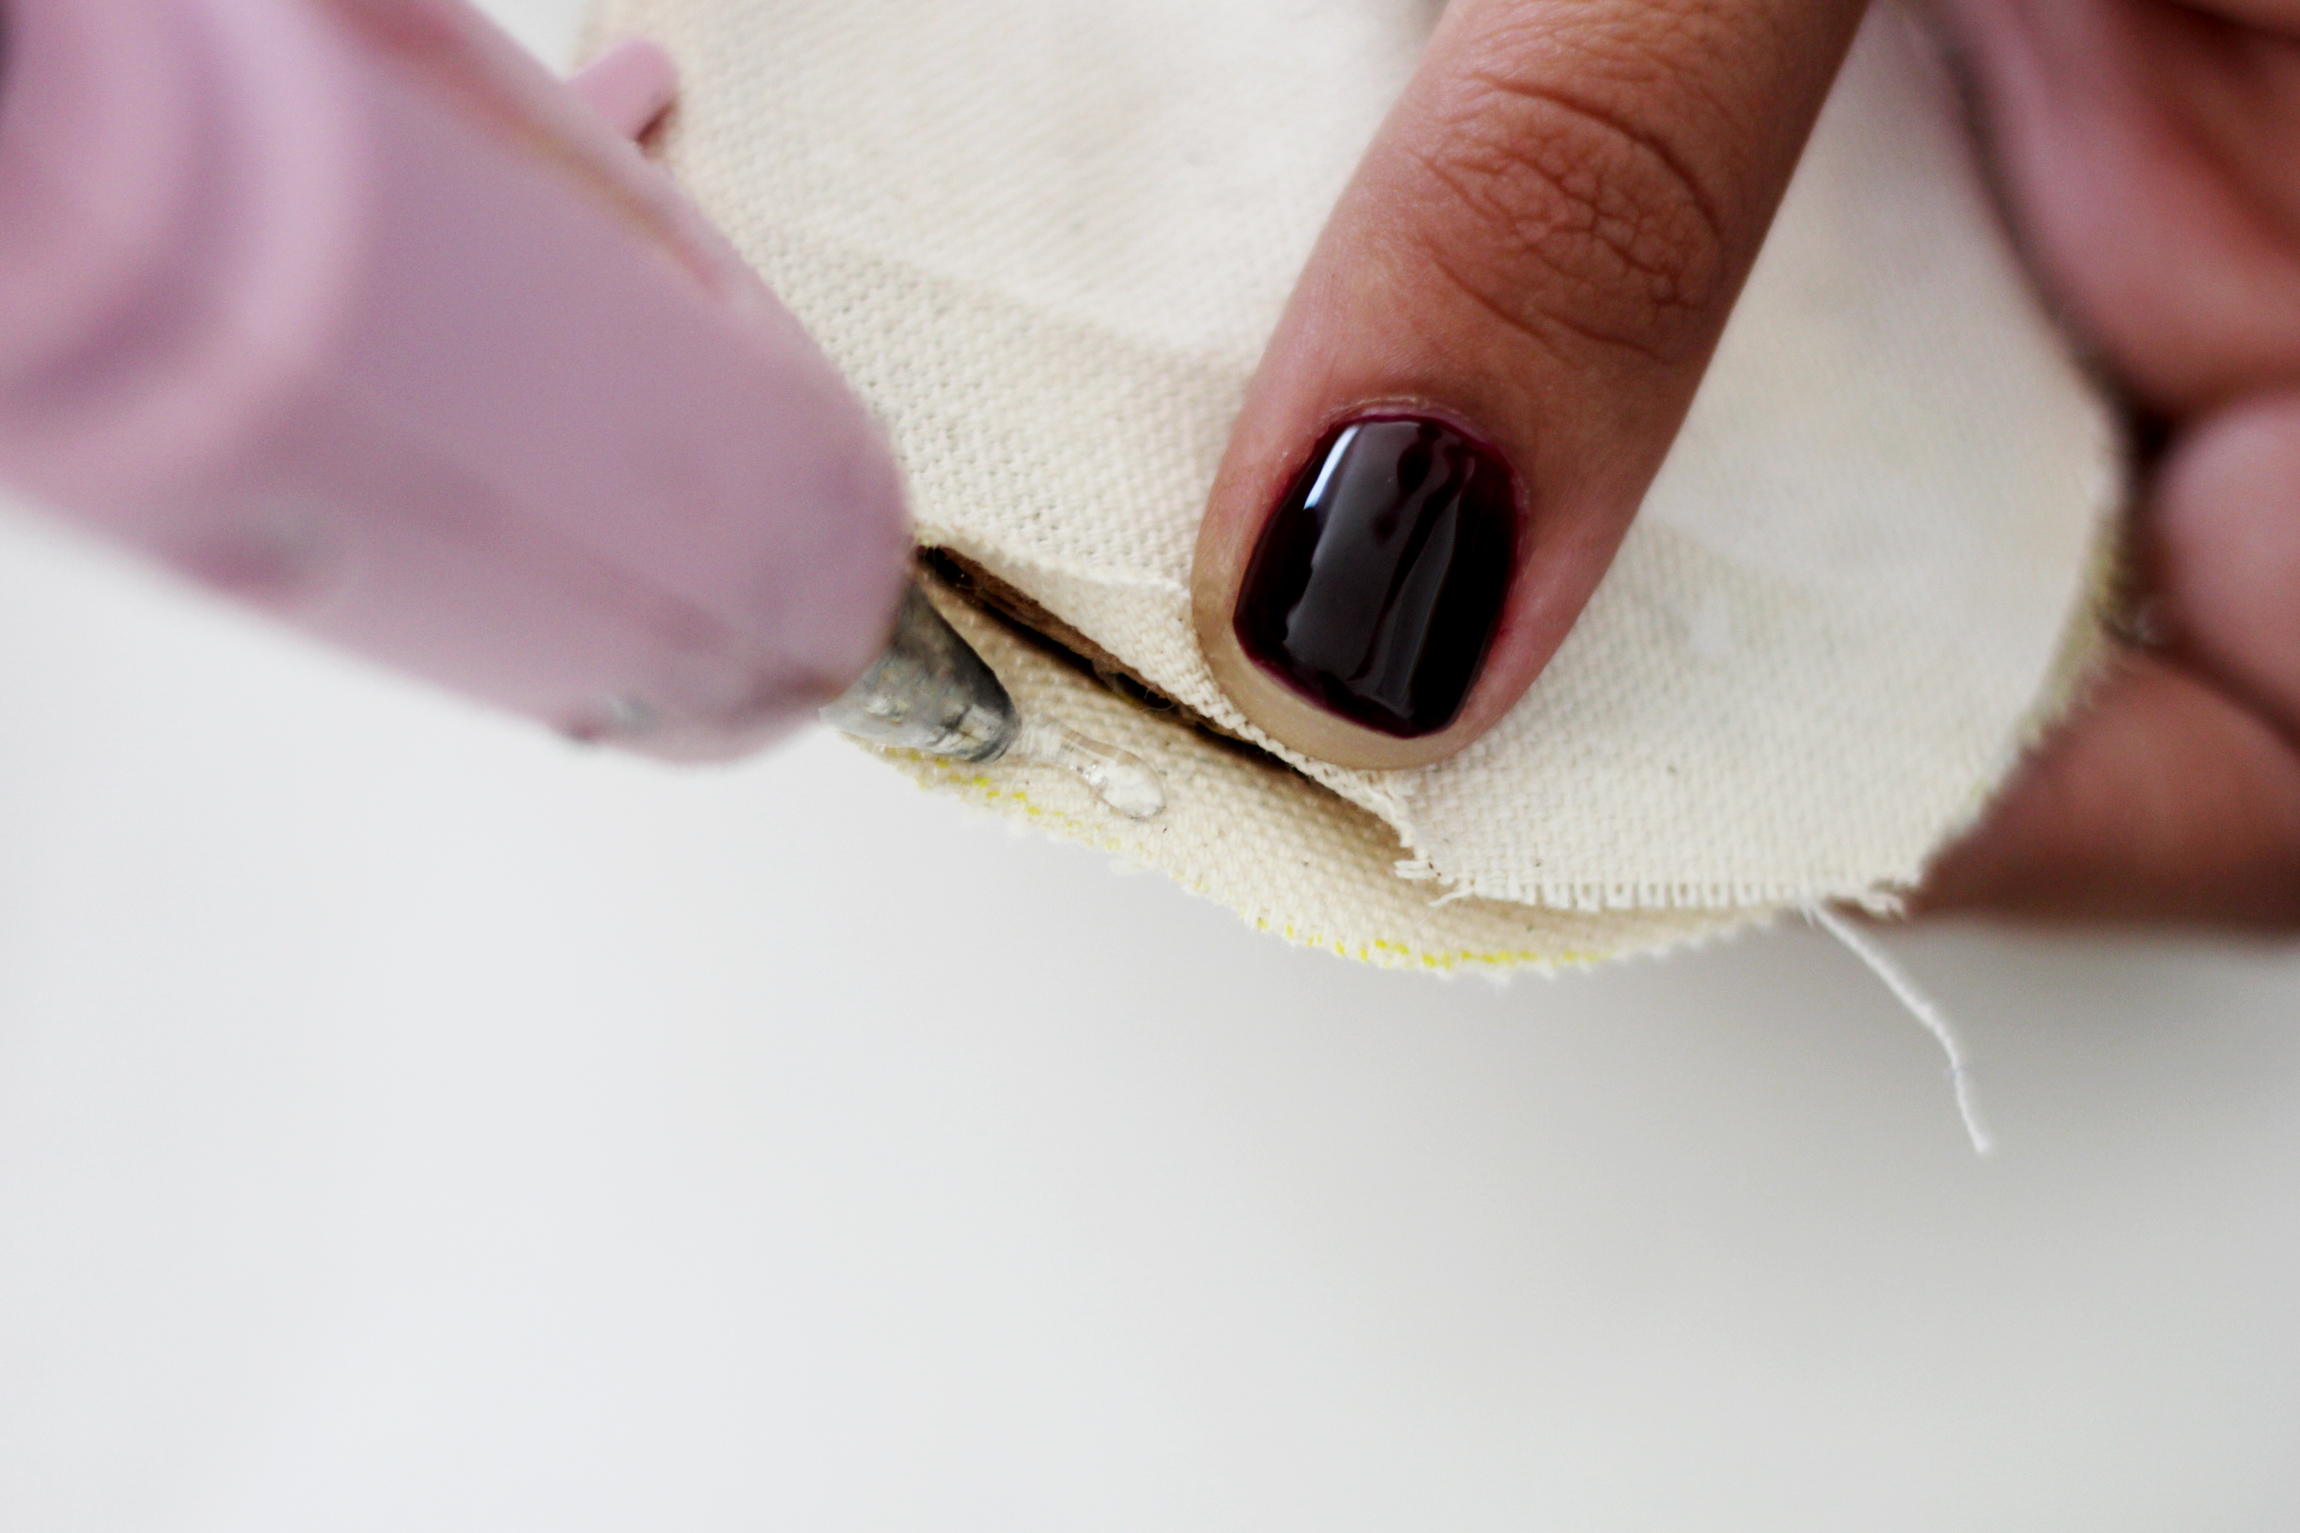
3.) After that, you'll be tracing the head of your scarecrow onto your canvas fabric twice for the front and back of your scarecrow's head and then cutting them out. You'll be left with 2 circles in the same size. We used a canvas fabric and that worked really well! Once you cut your circles out you'll be gluing them to the front and back of the cardboard that makes the scarecrows head.

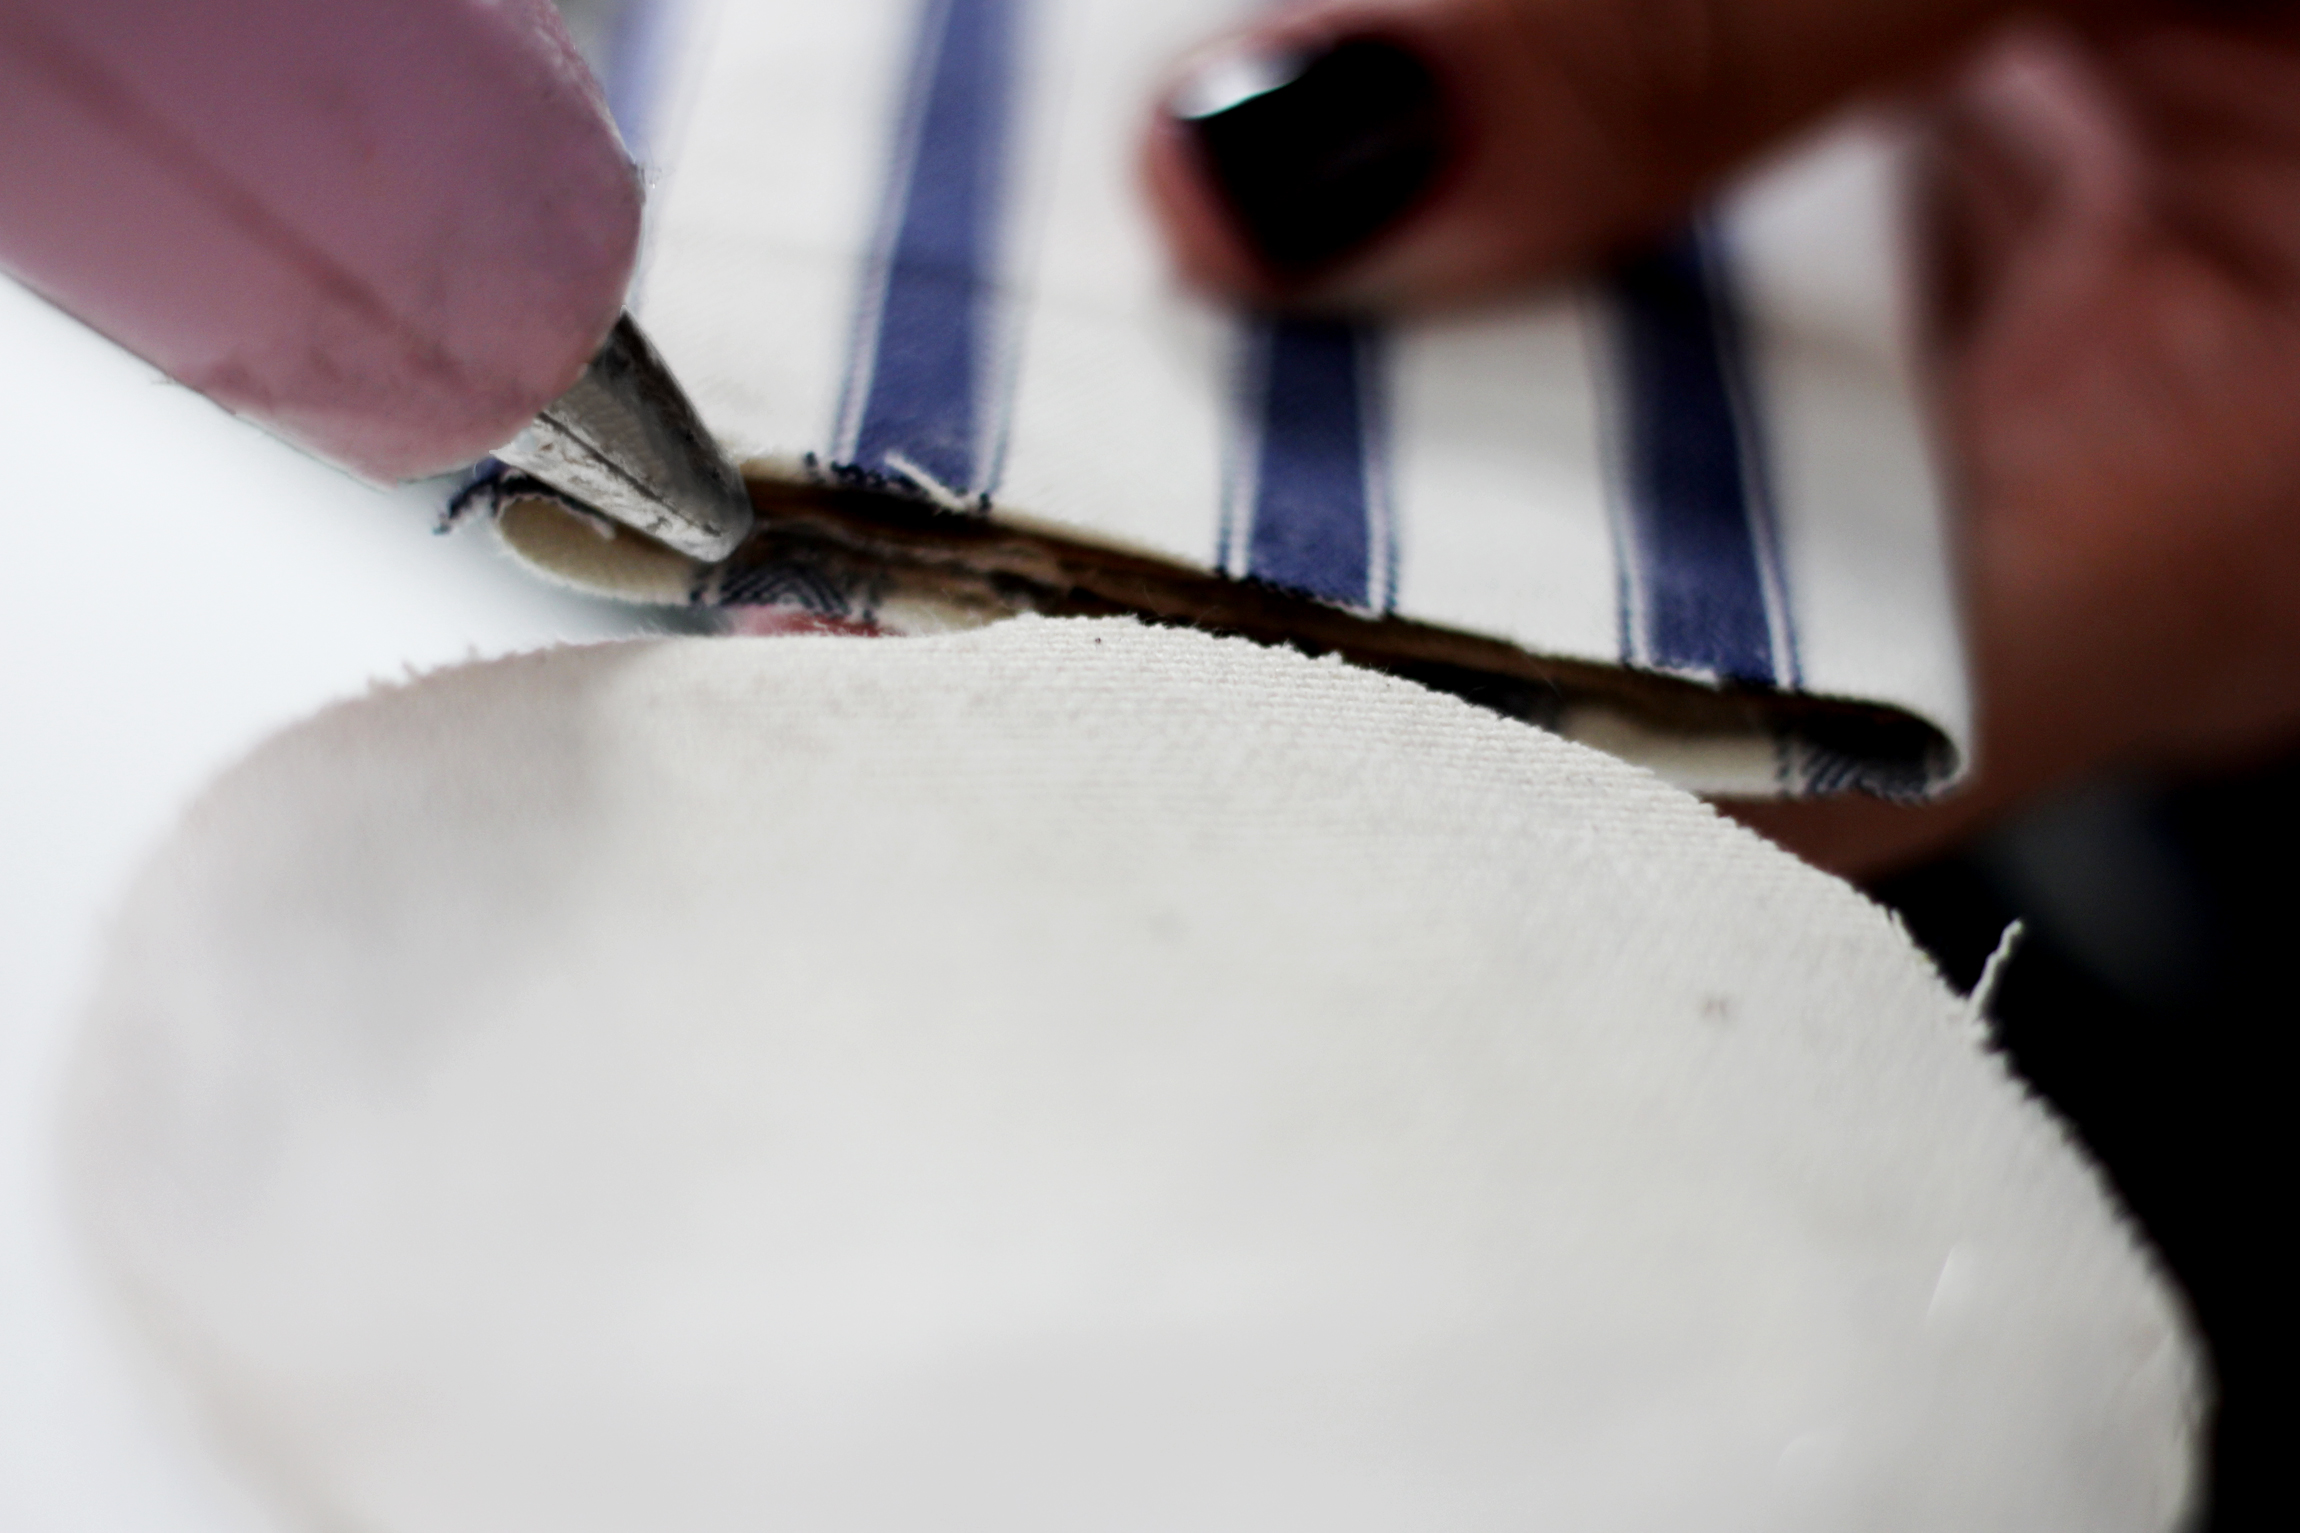
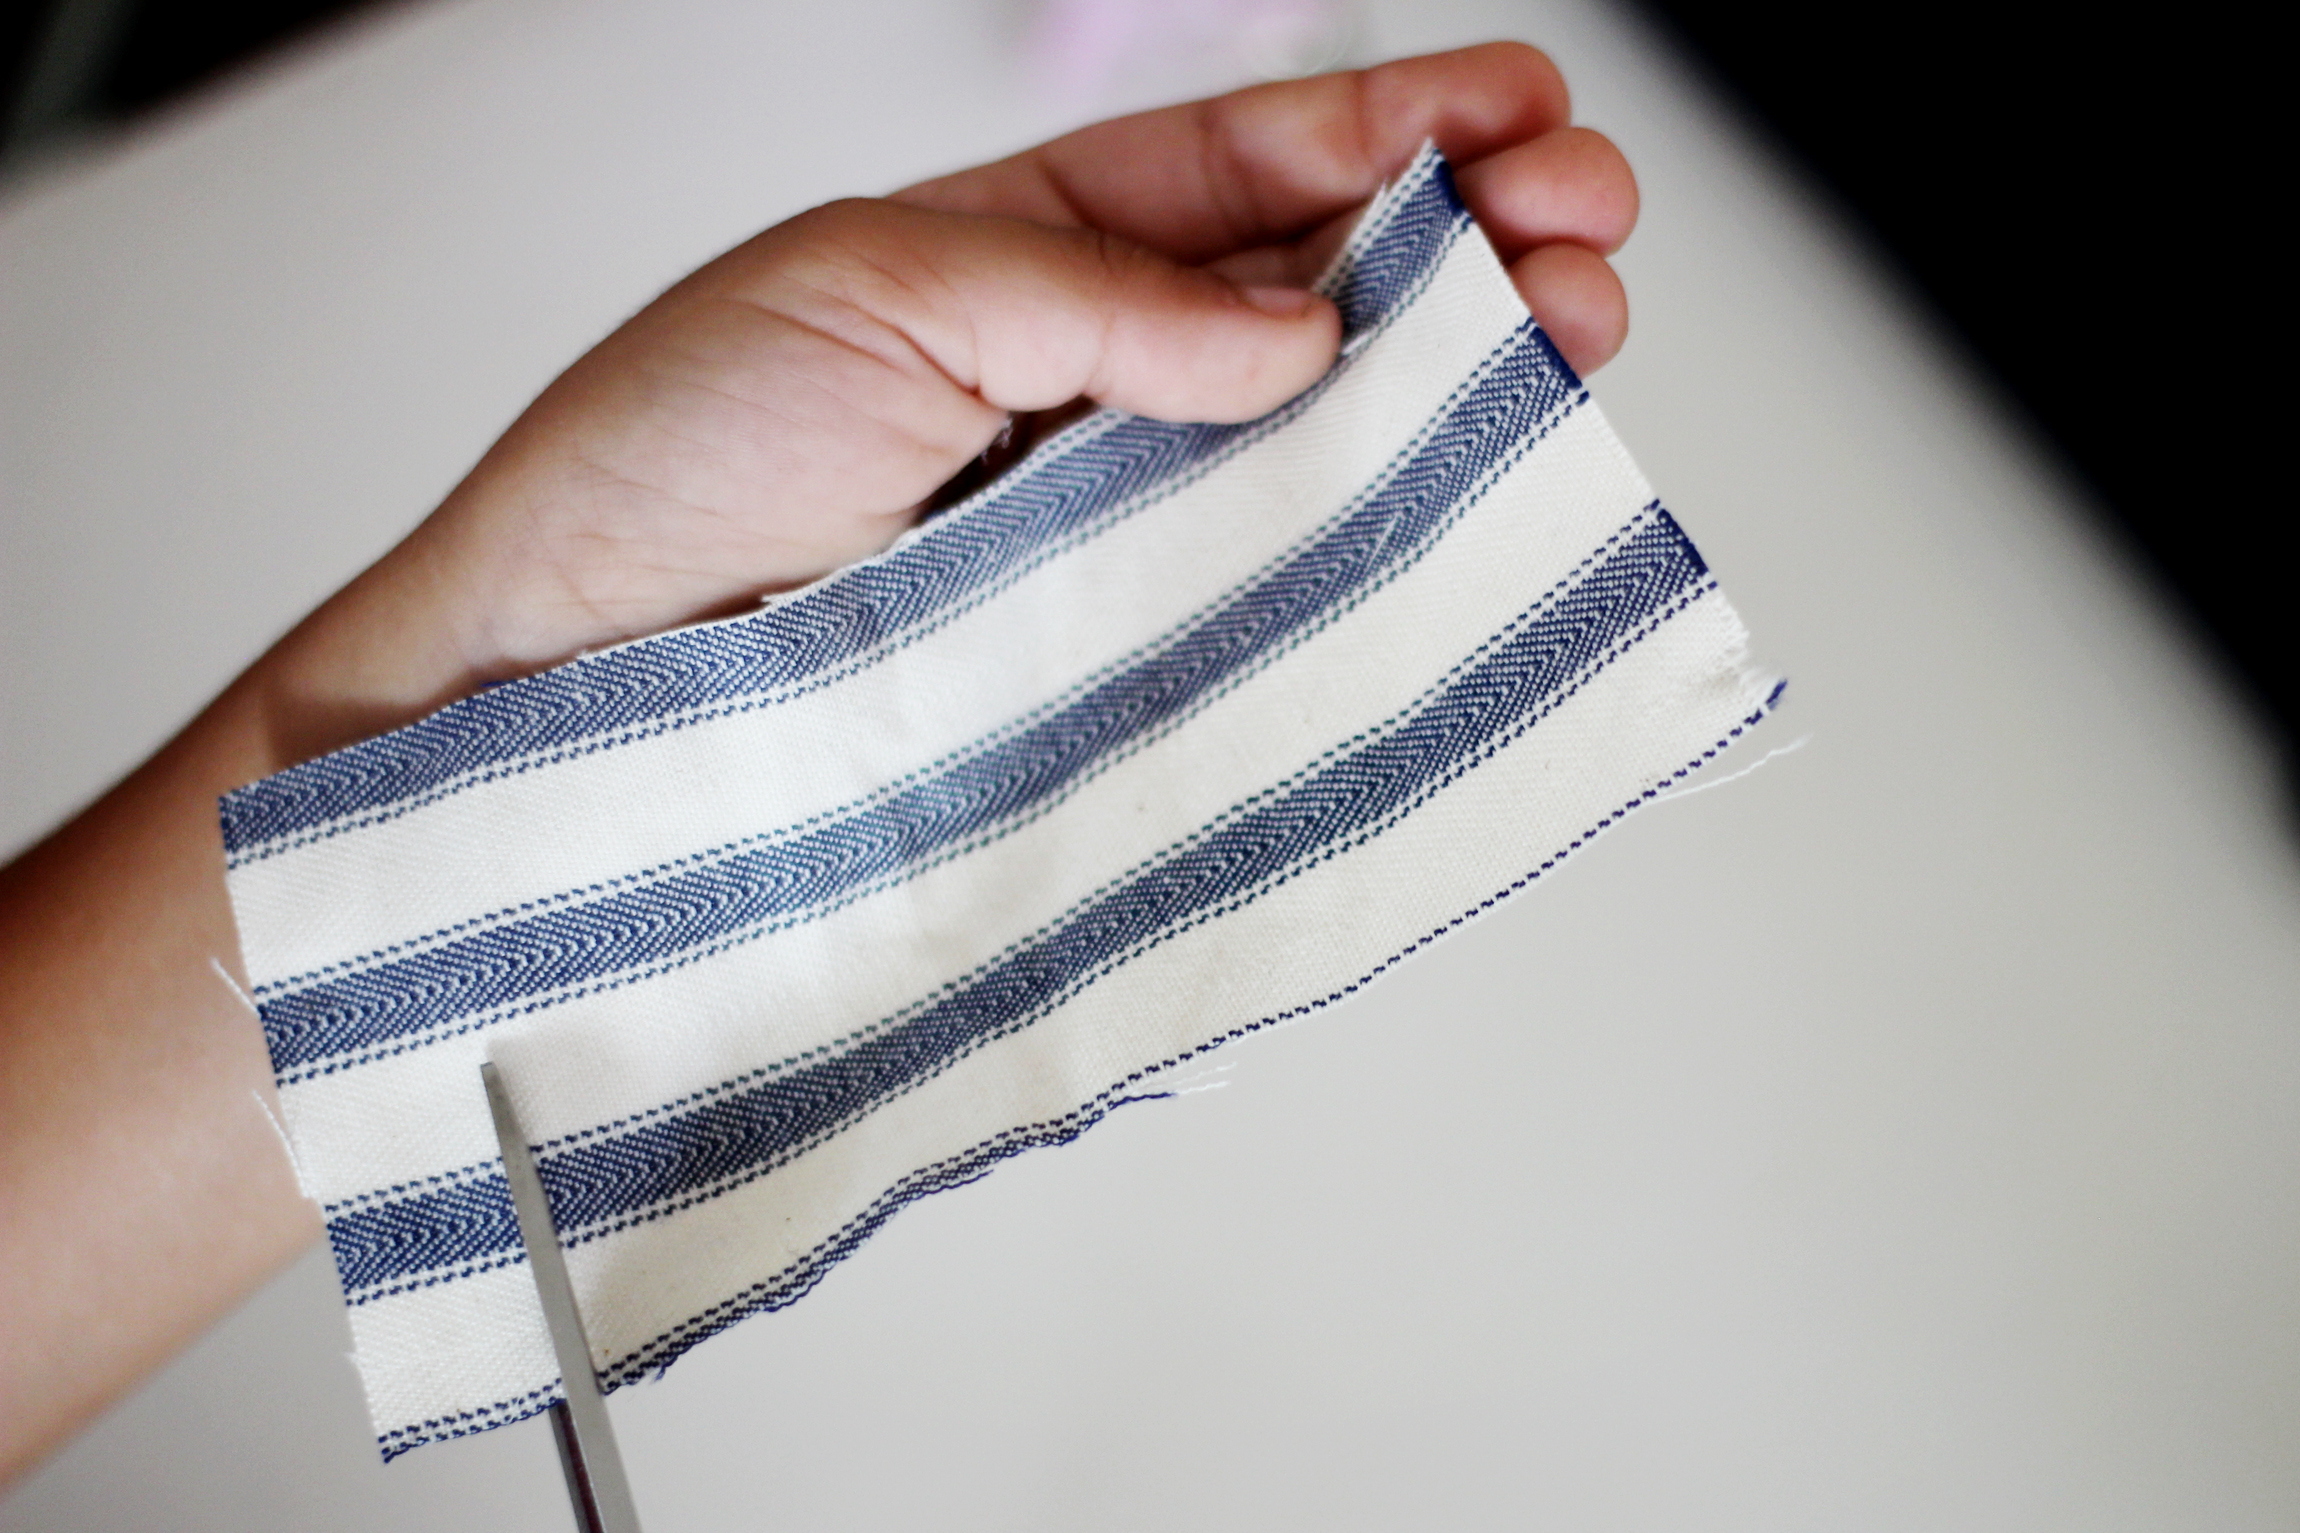
4.) Then it's time to dress your scarecrow! We measured our fabric to the length of our scarecrow's "torso" then folded it over a bit longer. This will hide any raw edges, now cut your fabric. After that you'll want to glue the fabric down. Also make sure you glue down the raw edges that will be visible and cut any loose threads on the fabric and scarecrow's head as well.


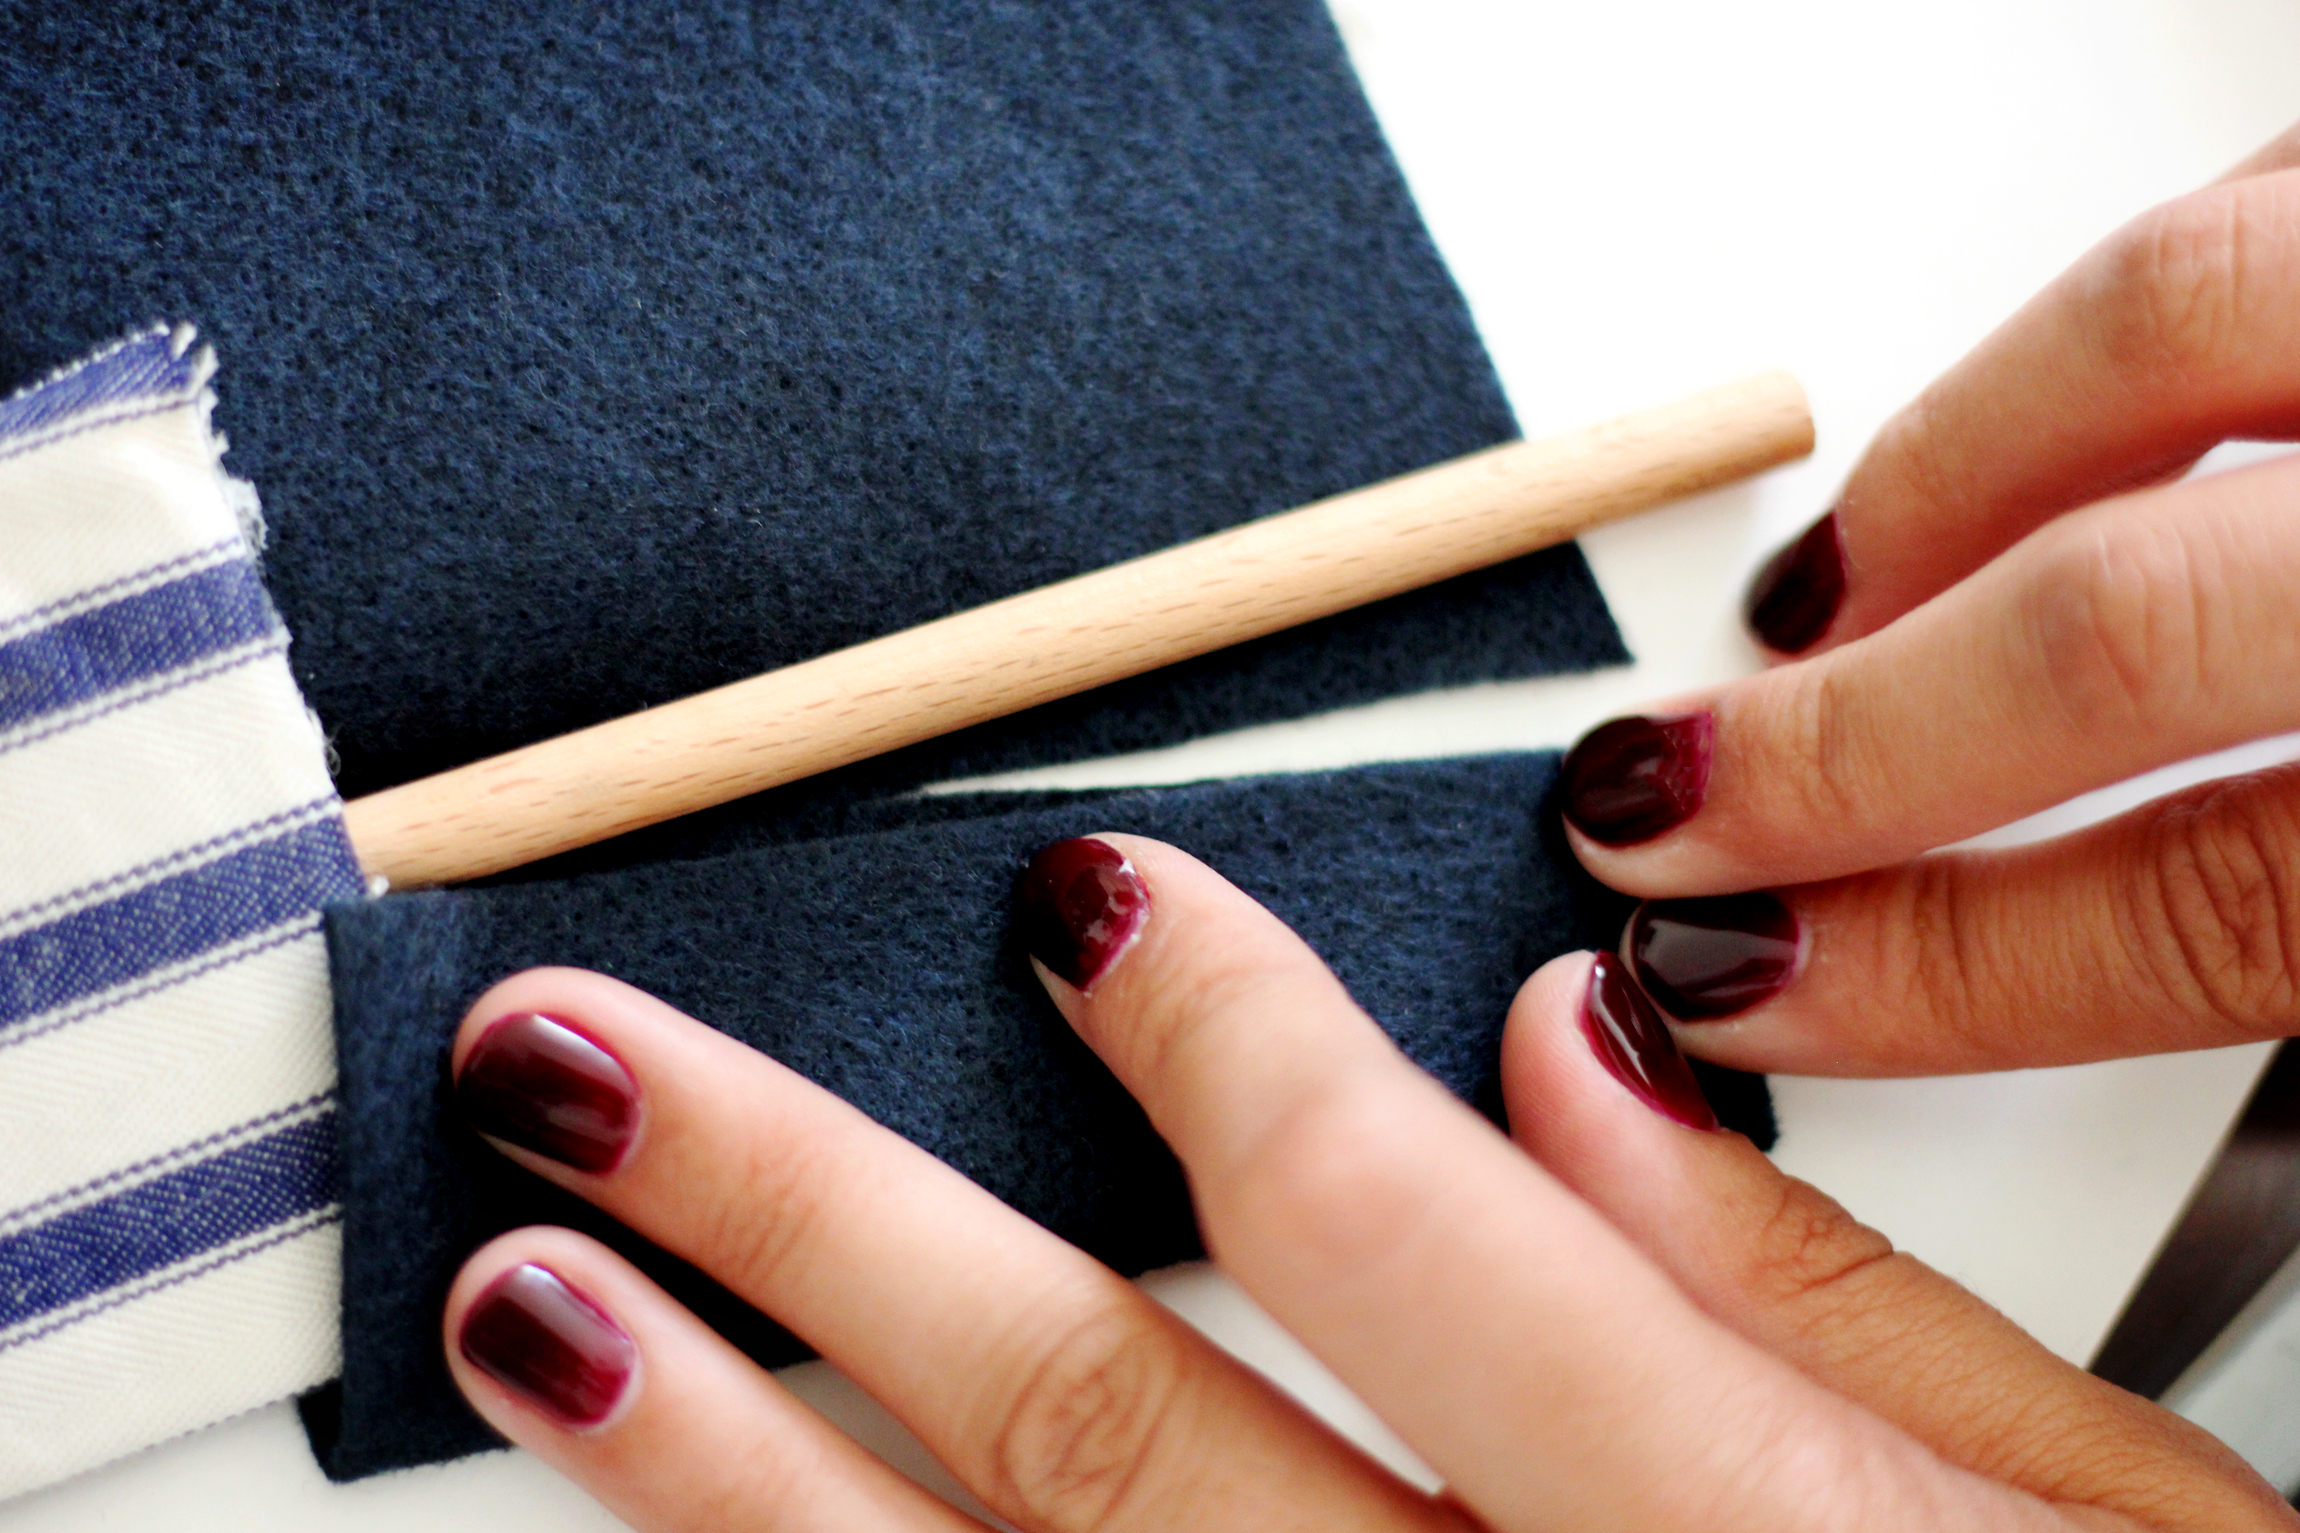
5.) Next are the bottoms, we decided to do " skinny jean overalls". We cut a rectangle wide enough to be able to fold towards the center where the wood dowel is ... from both sides. Basically you'll want to measure so that both the right and left flaps can meet in the middle at the wood dowel. Then we cut the waist of the overalls by making the felt fabric overlap a little with the shirt. We glued the felt fabric down a on the back of the waist so that it wasn't moving around during the next step.


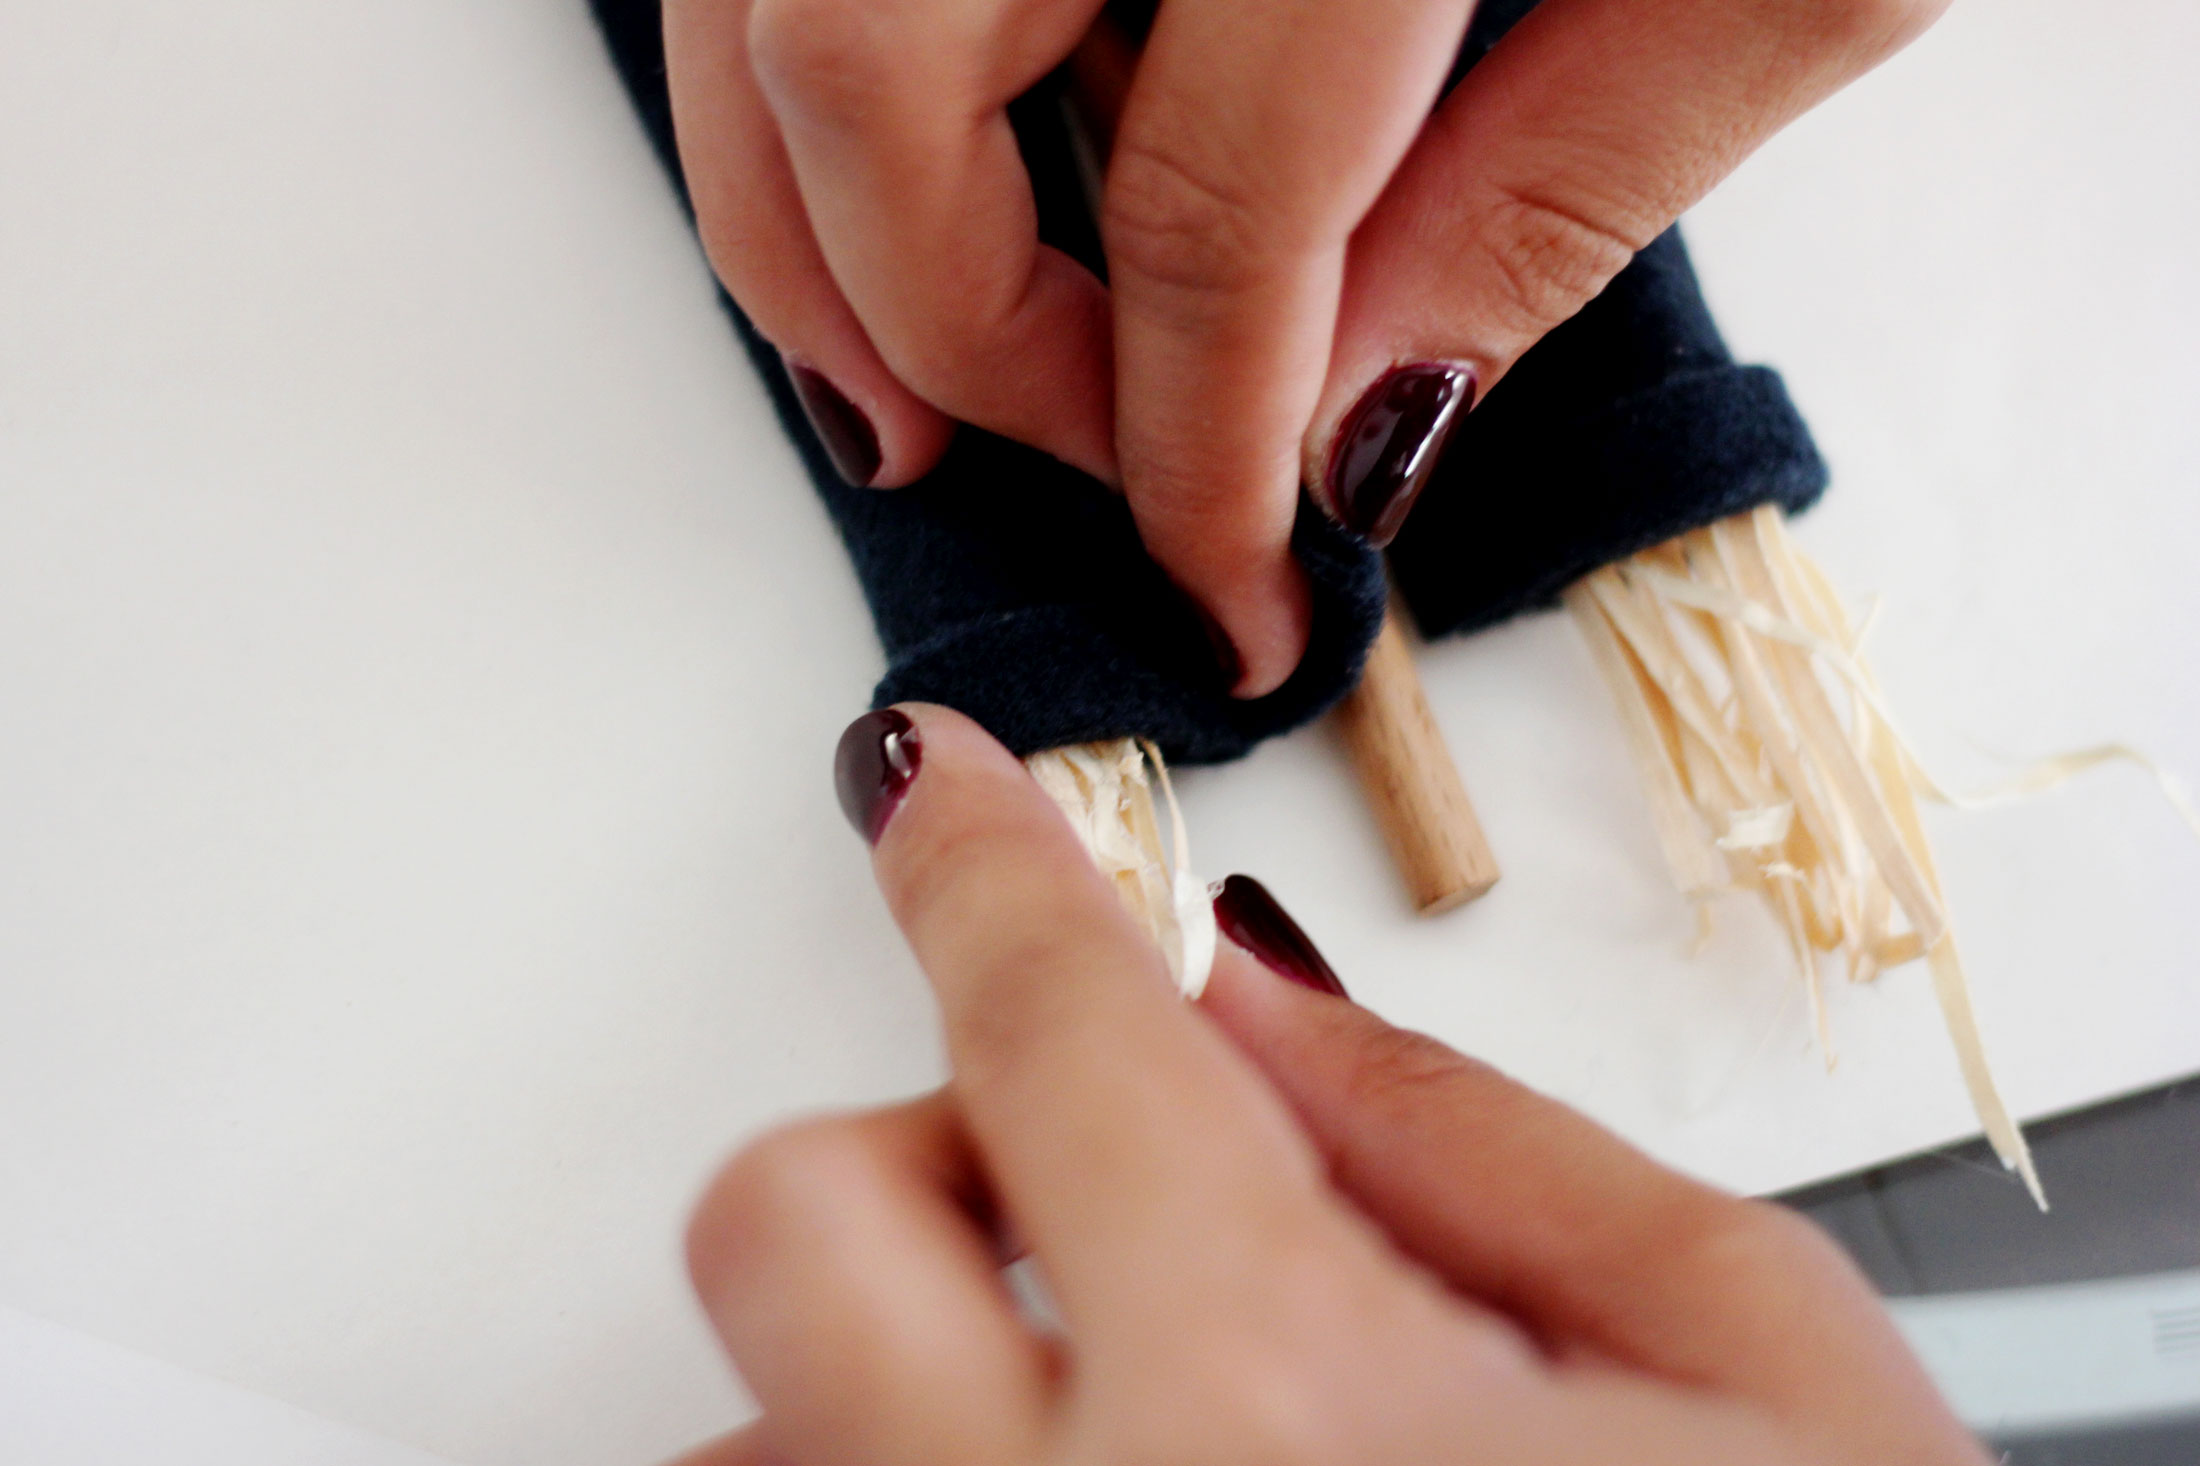
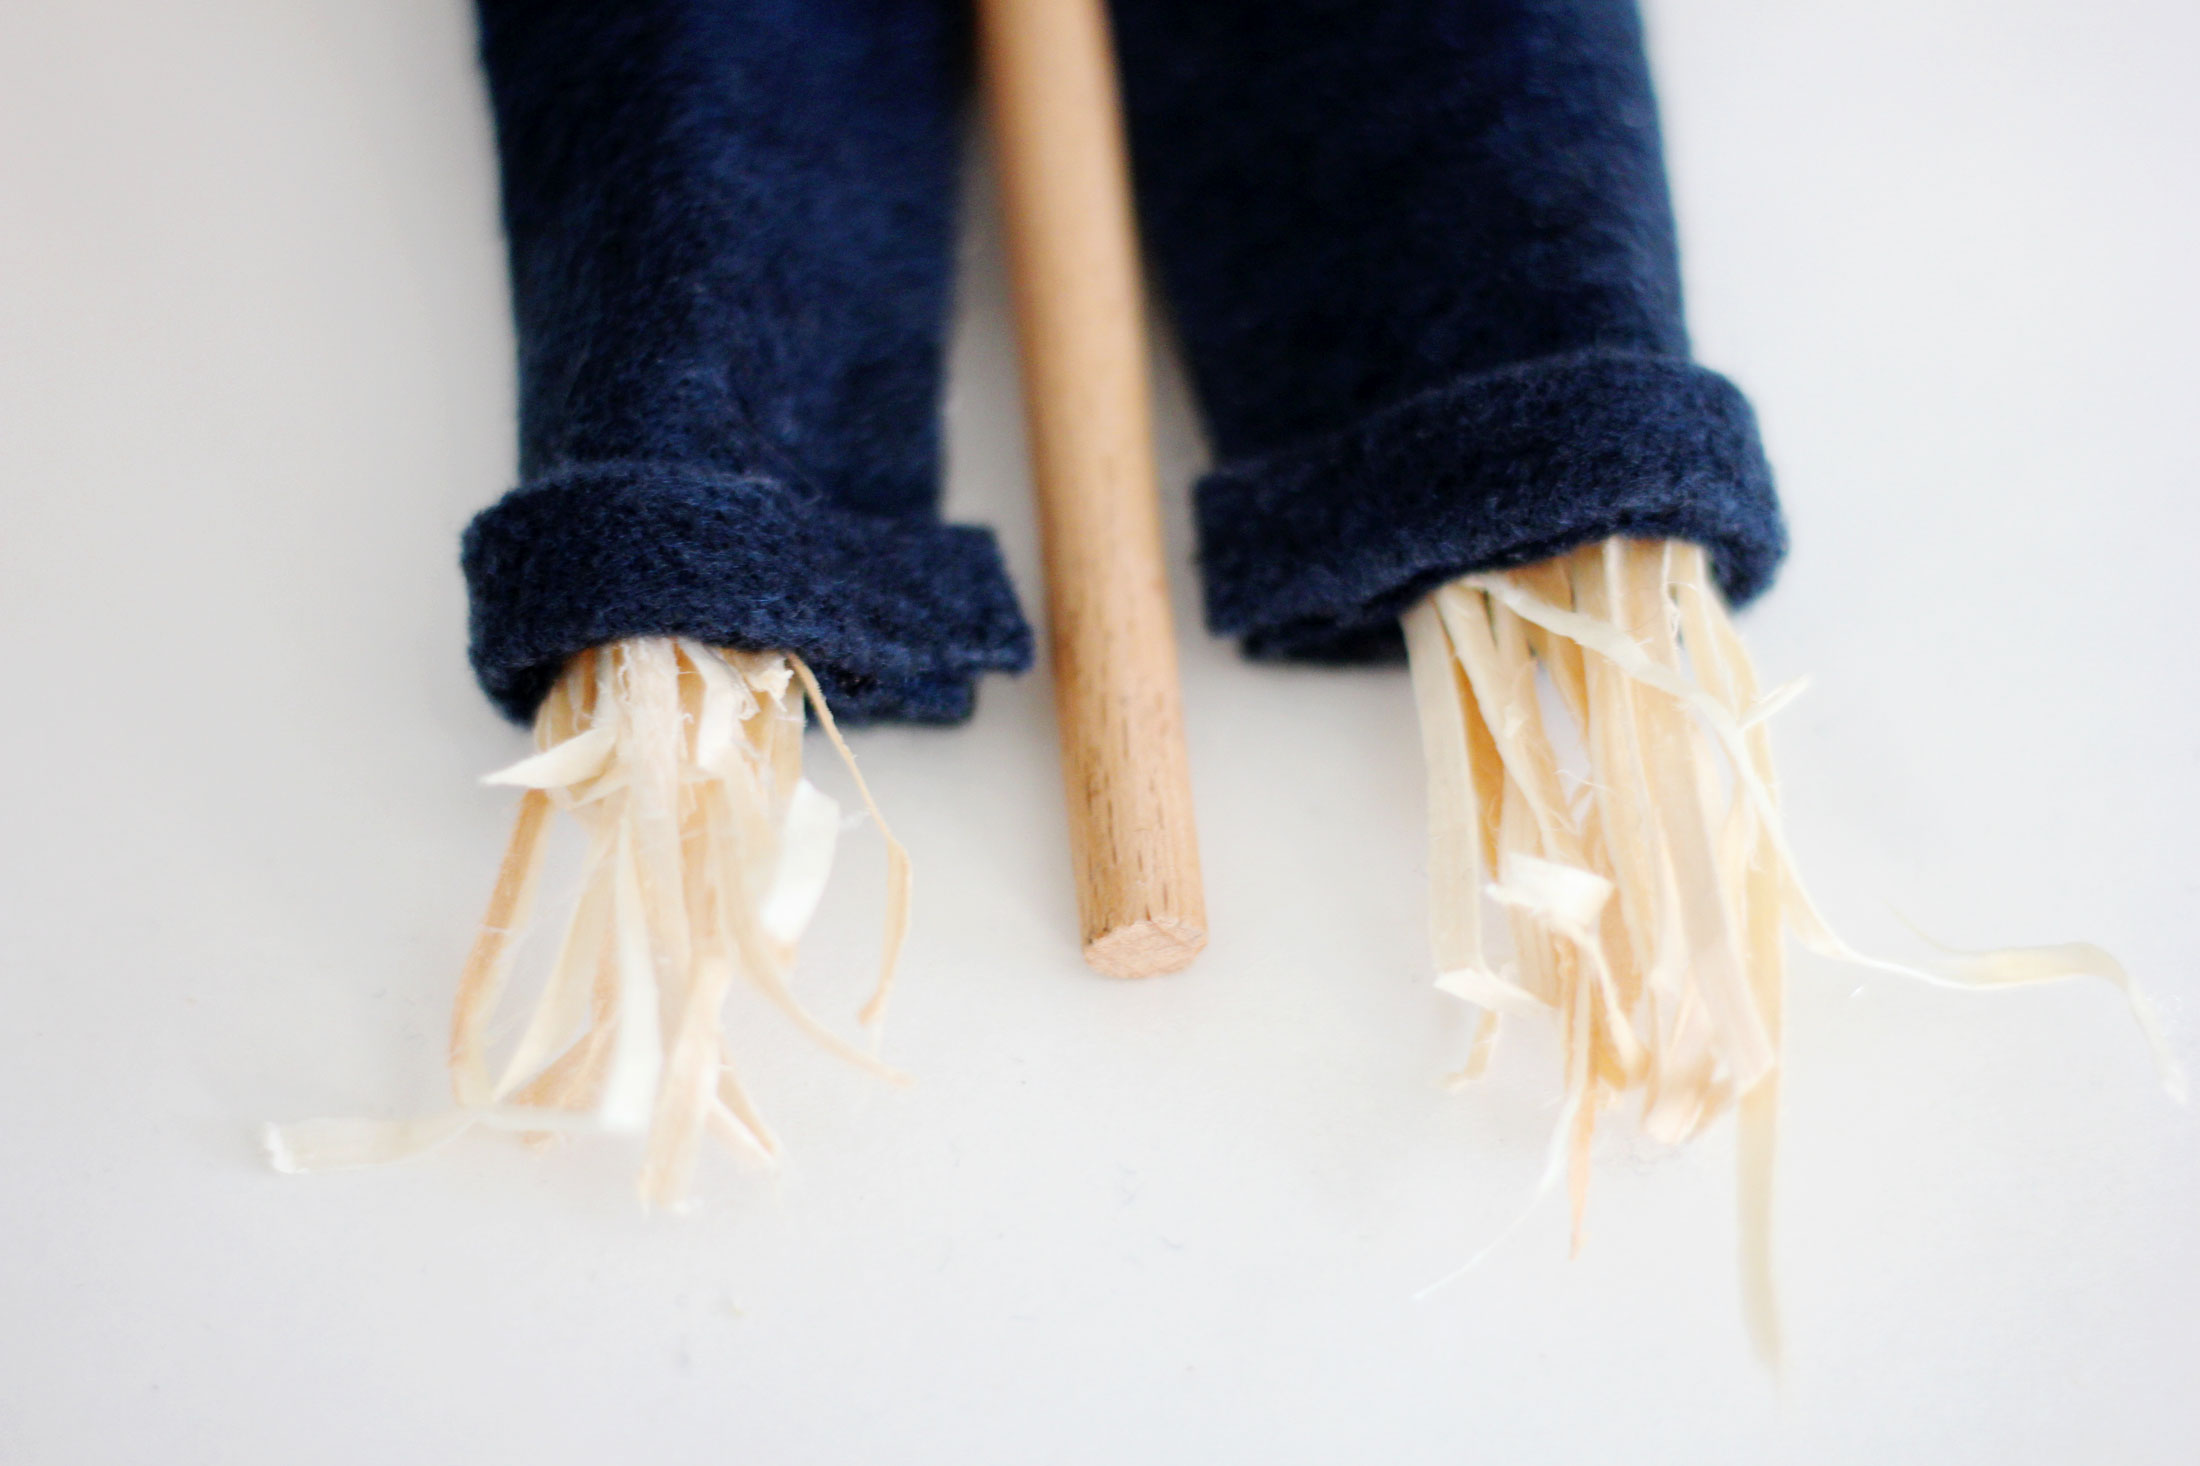
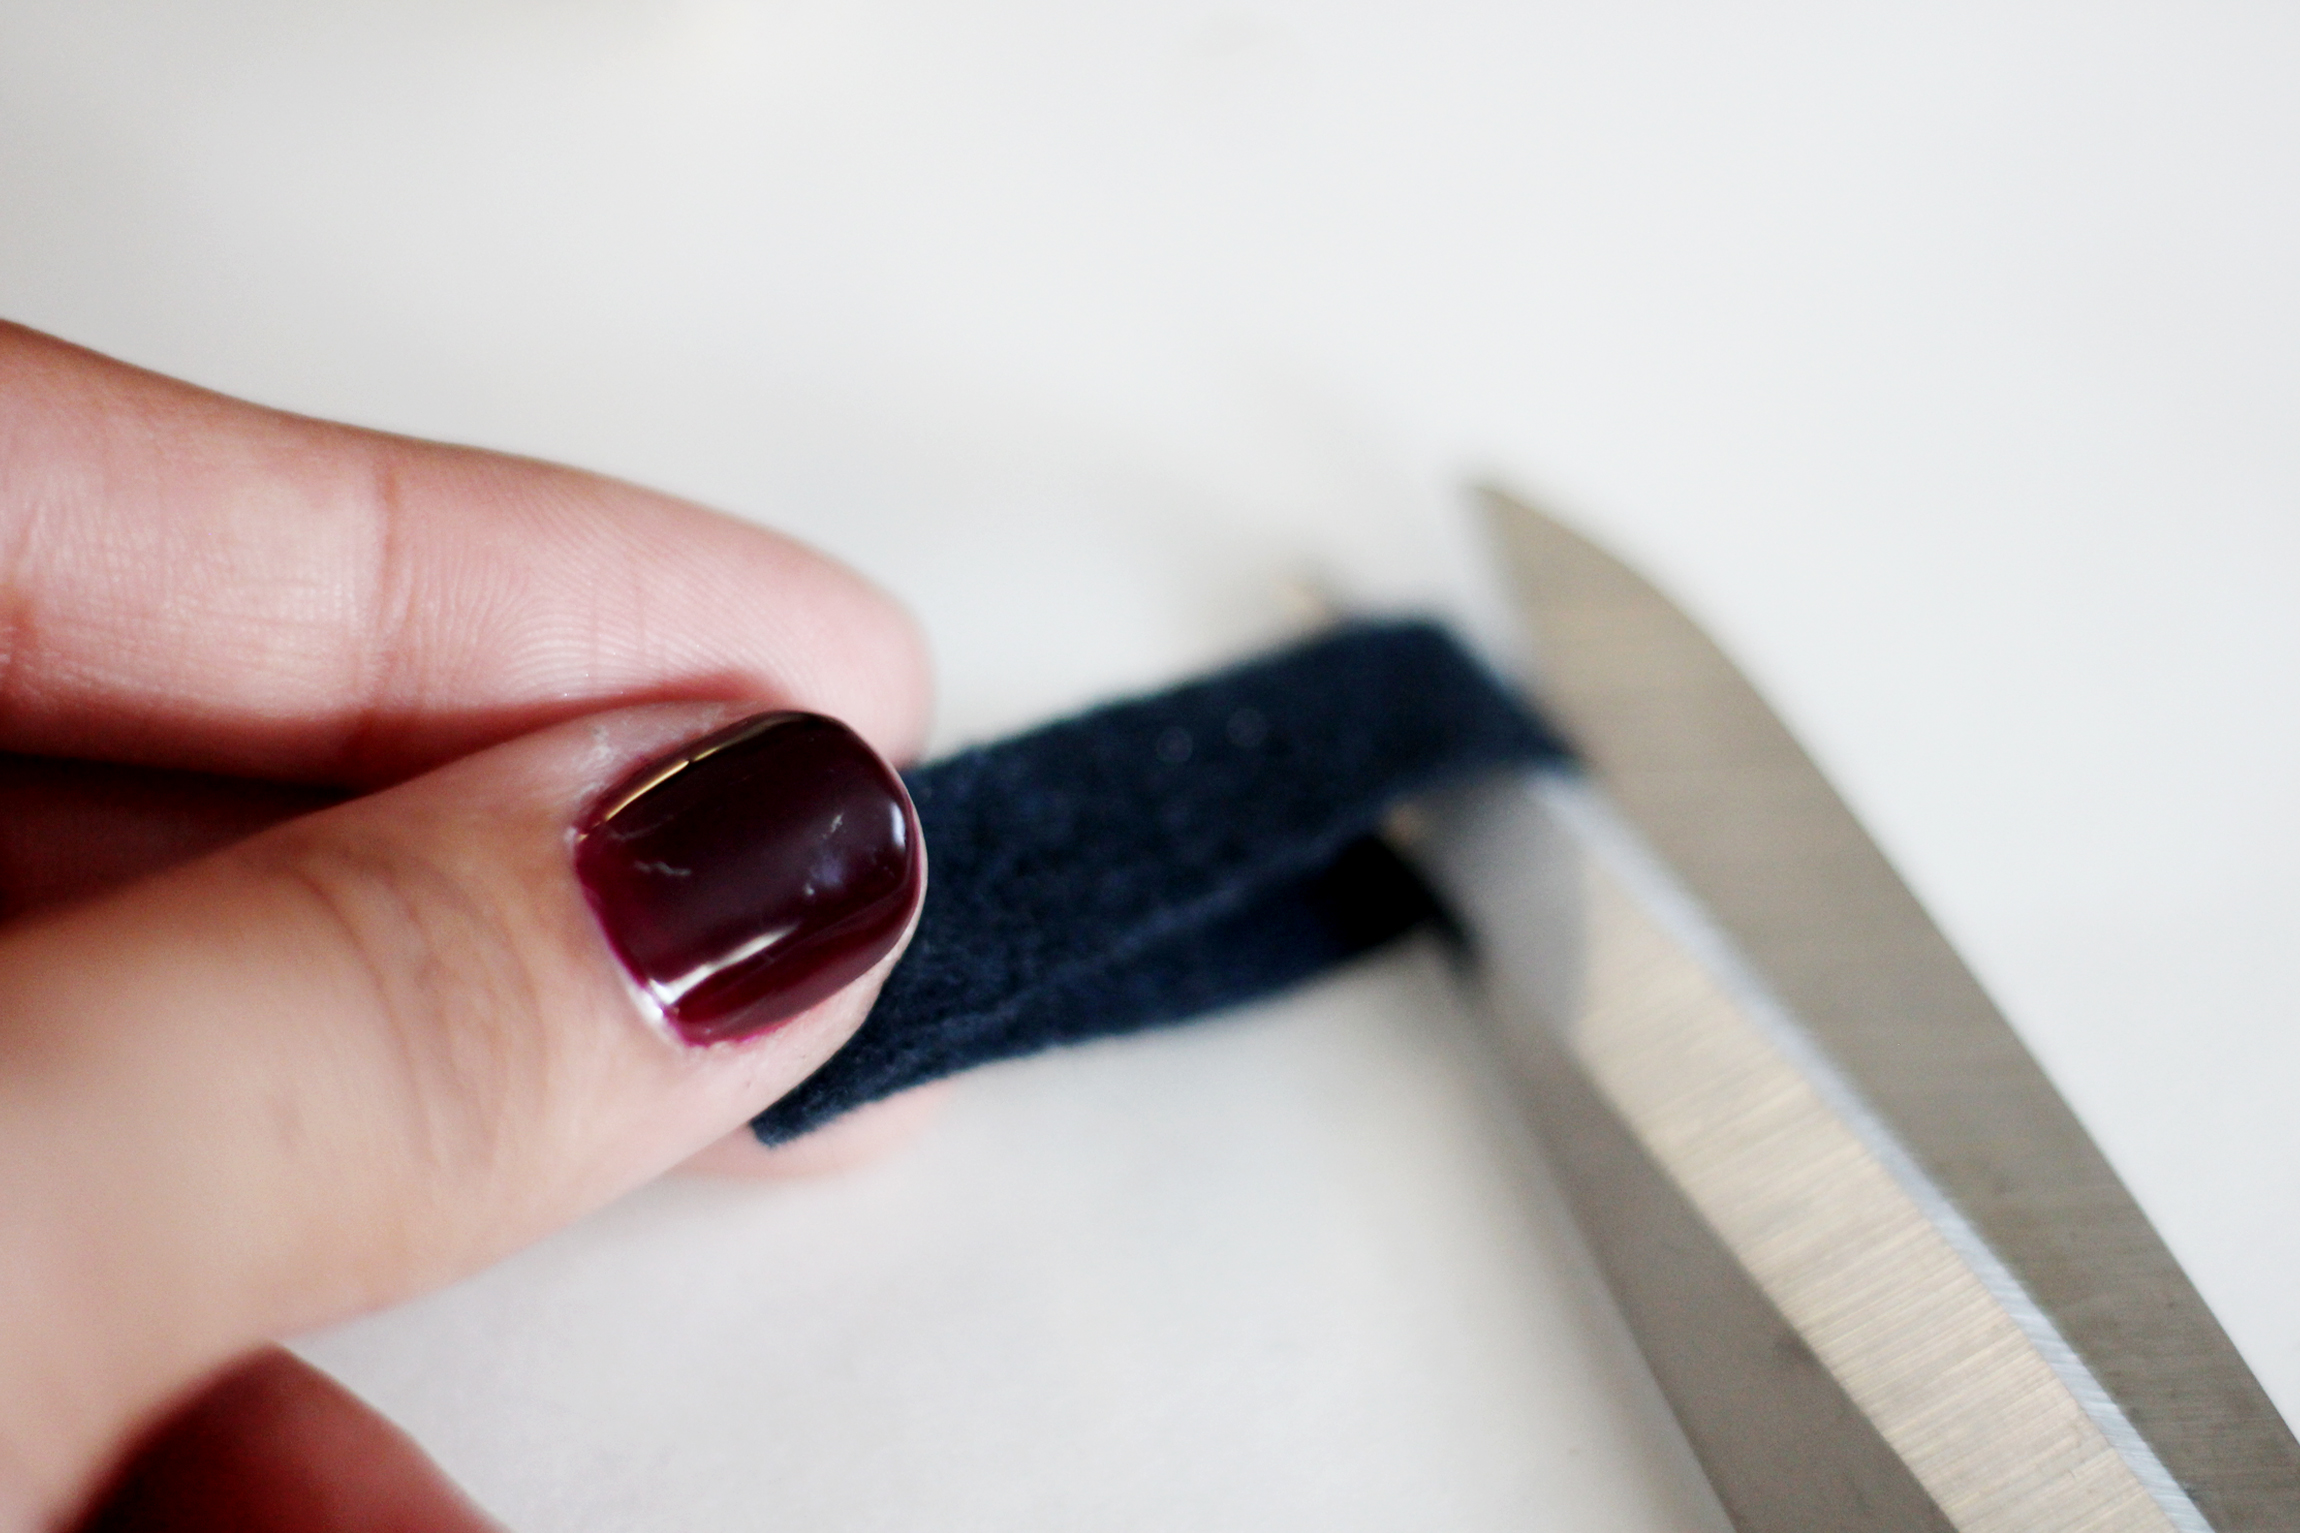
6.) Cut a slit at a small angle as you can see below. Fold the left side of your jeans to meet that cut. Before gluing, take a piece of your Aspen wood excelsior and bunch it up. You will glue this to the inside of your pant leg as modeled below, these will be the scarecrow's feet. Once you've repeated these steps on the right side, cut the excess fabric in the middle, this will form a sharp triangle. Then voila!! You have scarecrow legs and feet wearing stylish skinny jeans :) .


7.) Since we LOVE cuffed skinny jeans, I cut a small strip of felt to glue to the bottom of each pant leg to form a cuff. This step is completely optional and if cuffed jeans aren't your thing, go ahead and skip ahead to the next step!


// Aren't they SO cute?! 😍
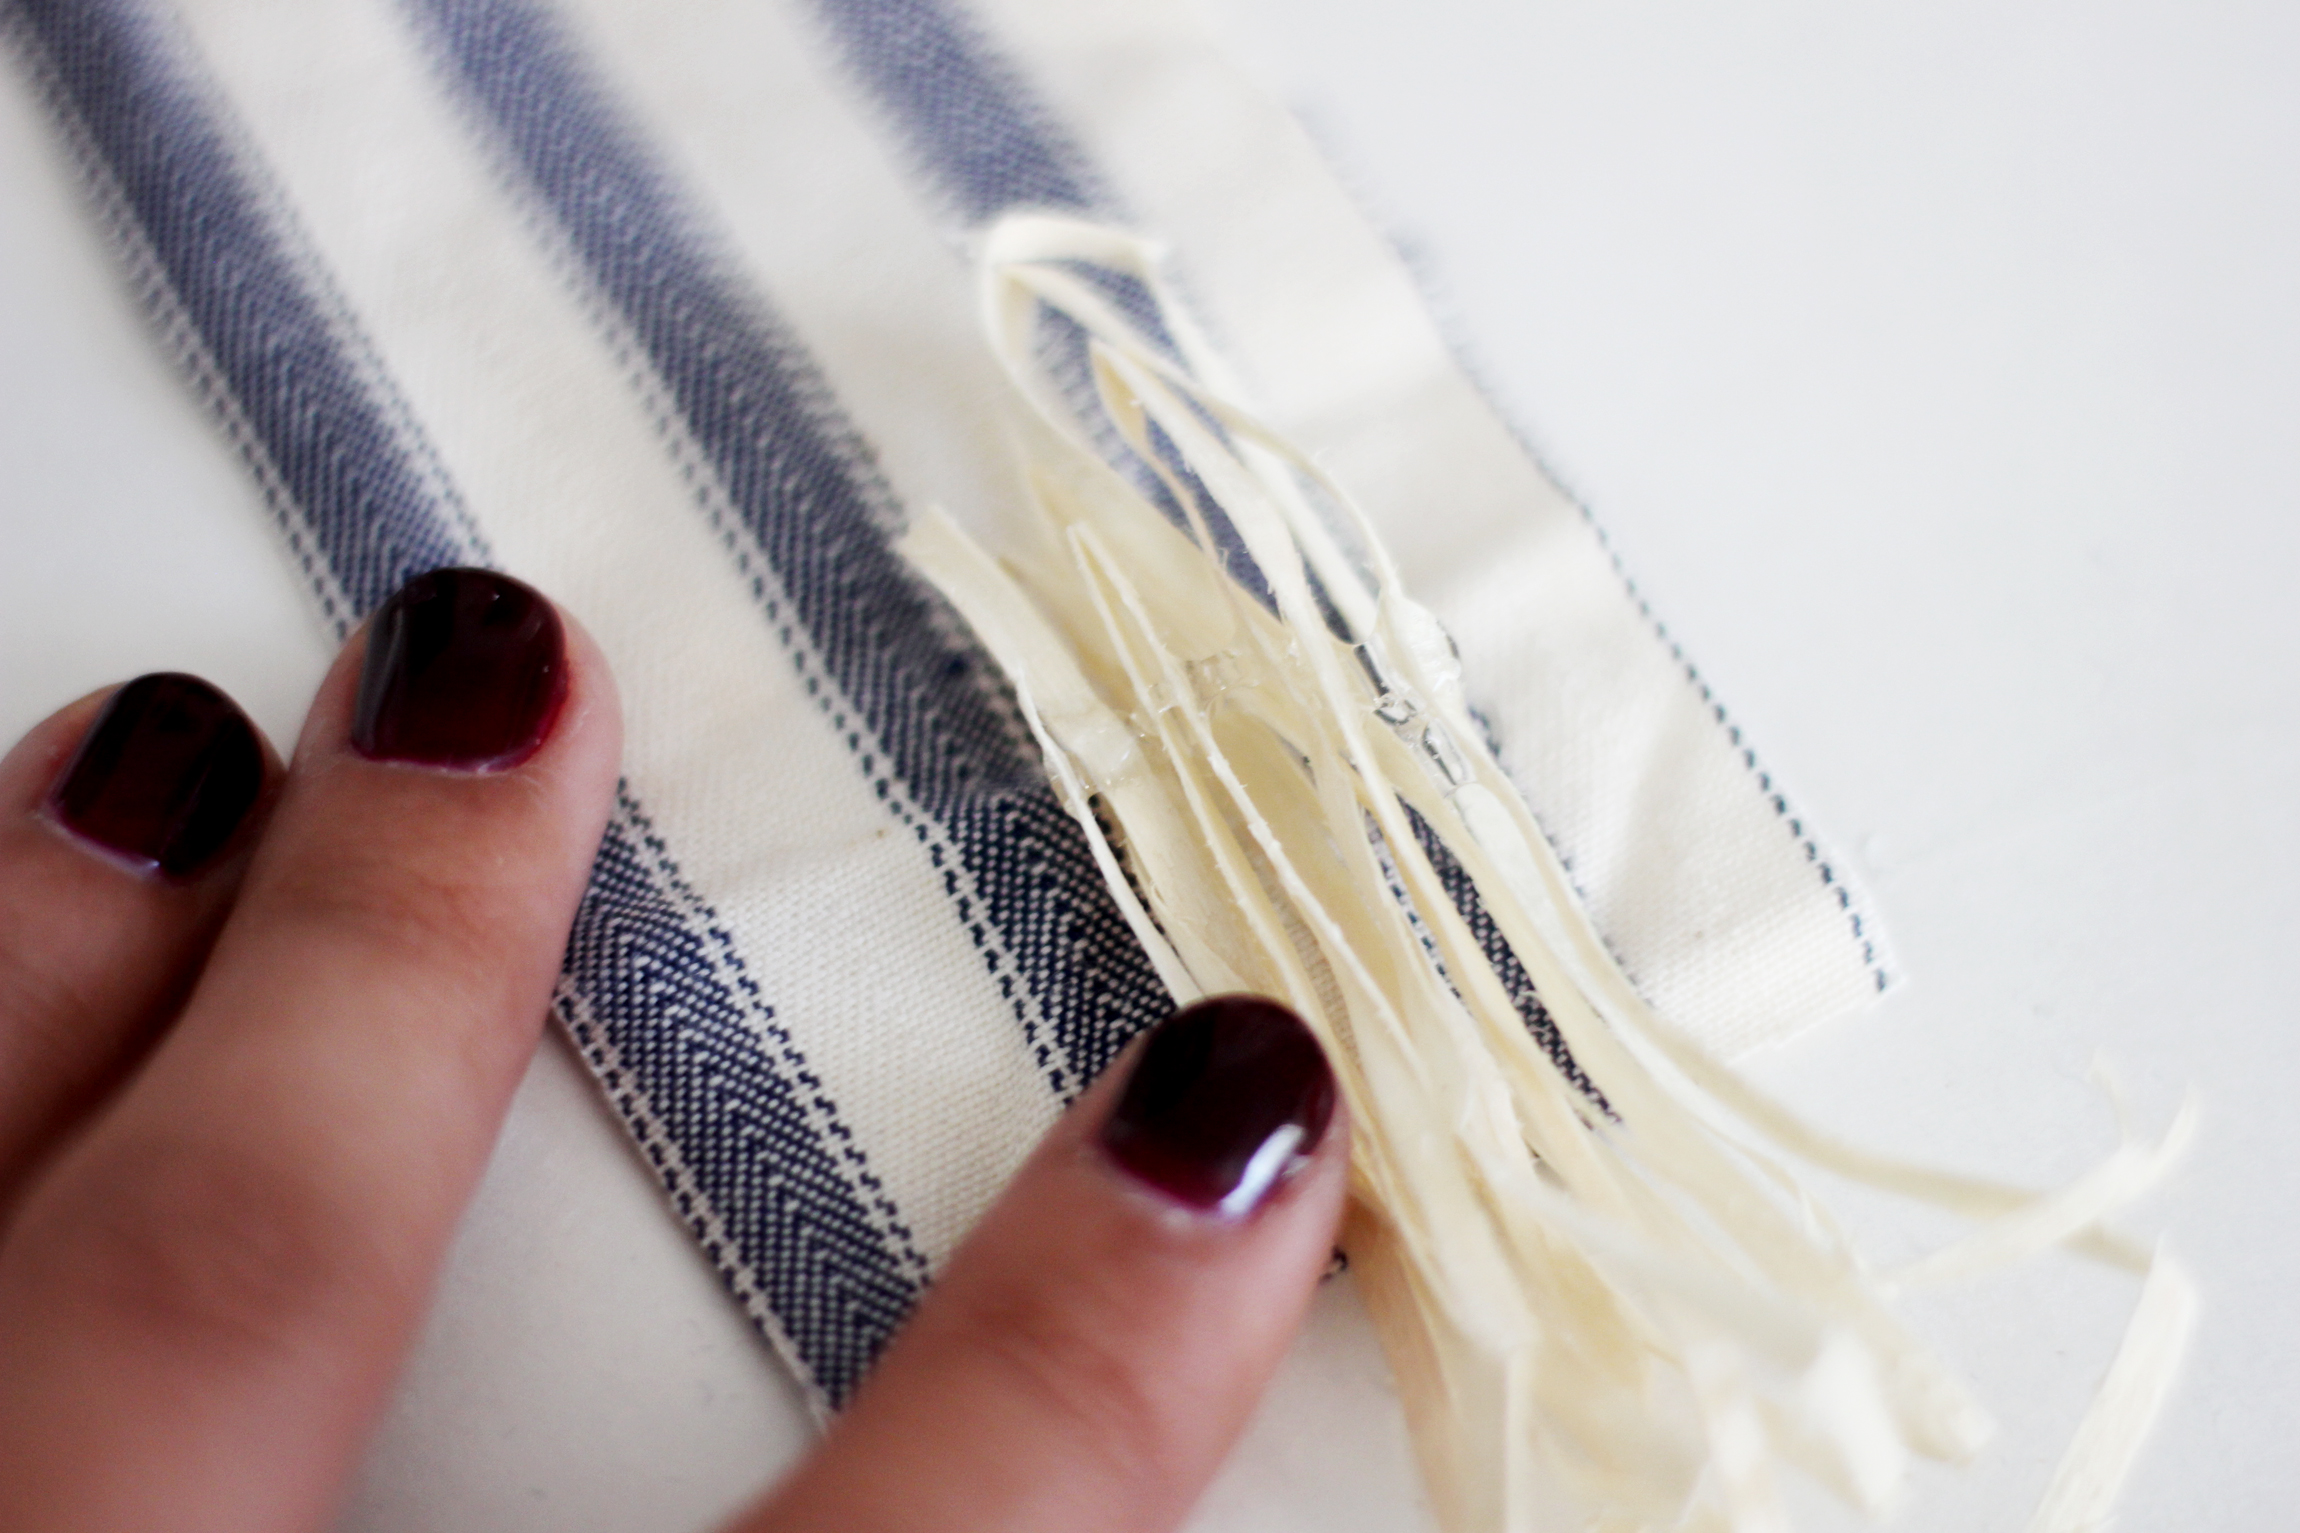
8.) For the scarecrow's shirt sleeves, you're basically going to do the same thing that you did for the pant legs except for you're just going to cut 2 rectangle pieces, ours measured out to 4 1/2 x 2 inches. Then you'll just insert the wood excelsior for the hands and for the sleeve over in half + glue it shut except for you'll leave the top inner part unglued. That will be glued to the top of the rectangle that makes the scarecrow's torso. You open it, put glue in the gap with your glue gun and slide the top corner of the torso into the slit which ends up gluing the "arm" to both the front and back of the scarecrows' torso, creating a "shoulder". Do this to the other arm as well.


9.) Now you're ready to create the top part of your scarecrows' overalls! If you like how your scarecrow looks wearing the skinny jeans and top then you're done with this part. You can scroll down to creating your scarecrow's face. If you want to create the overalls then continue on ... measure a rectangle that will cover the front of the shirt and cut the corners so they get more of an "overall" look. Do the same with another piece of felt for the back of the overalls as well. Then glue them down to the front and back of your scarecrows' shirt.

10.) We created overall straps by cutting thin pieces of felt that are 1/2 and inch wide and about 2 inches long. The straps measured out to reach both the front and back of the overall tops. Cut any excess fabric and glue those to your overalls as well.


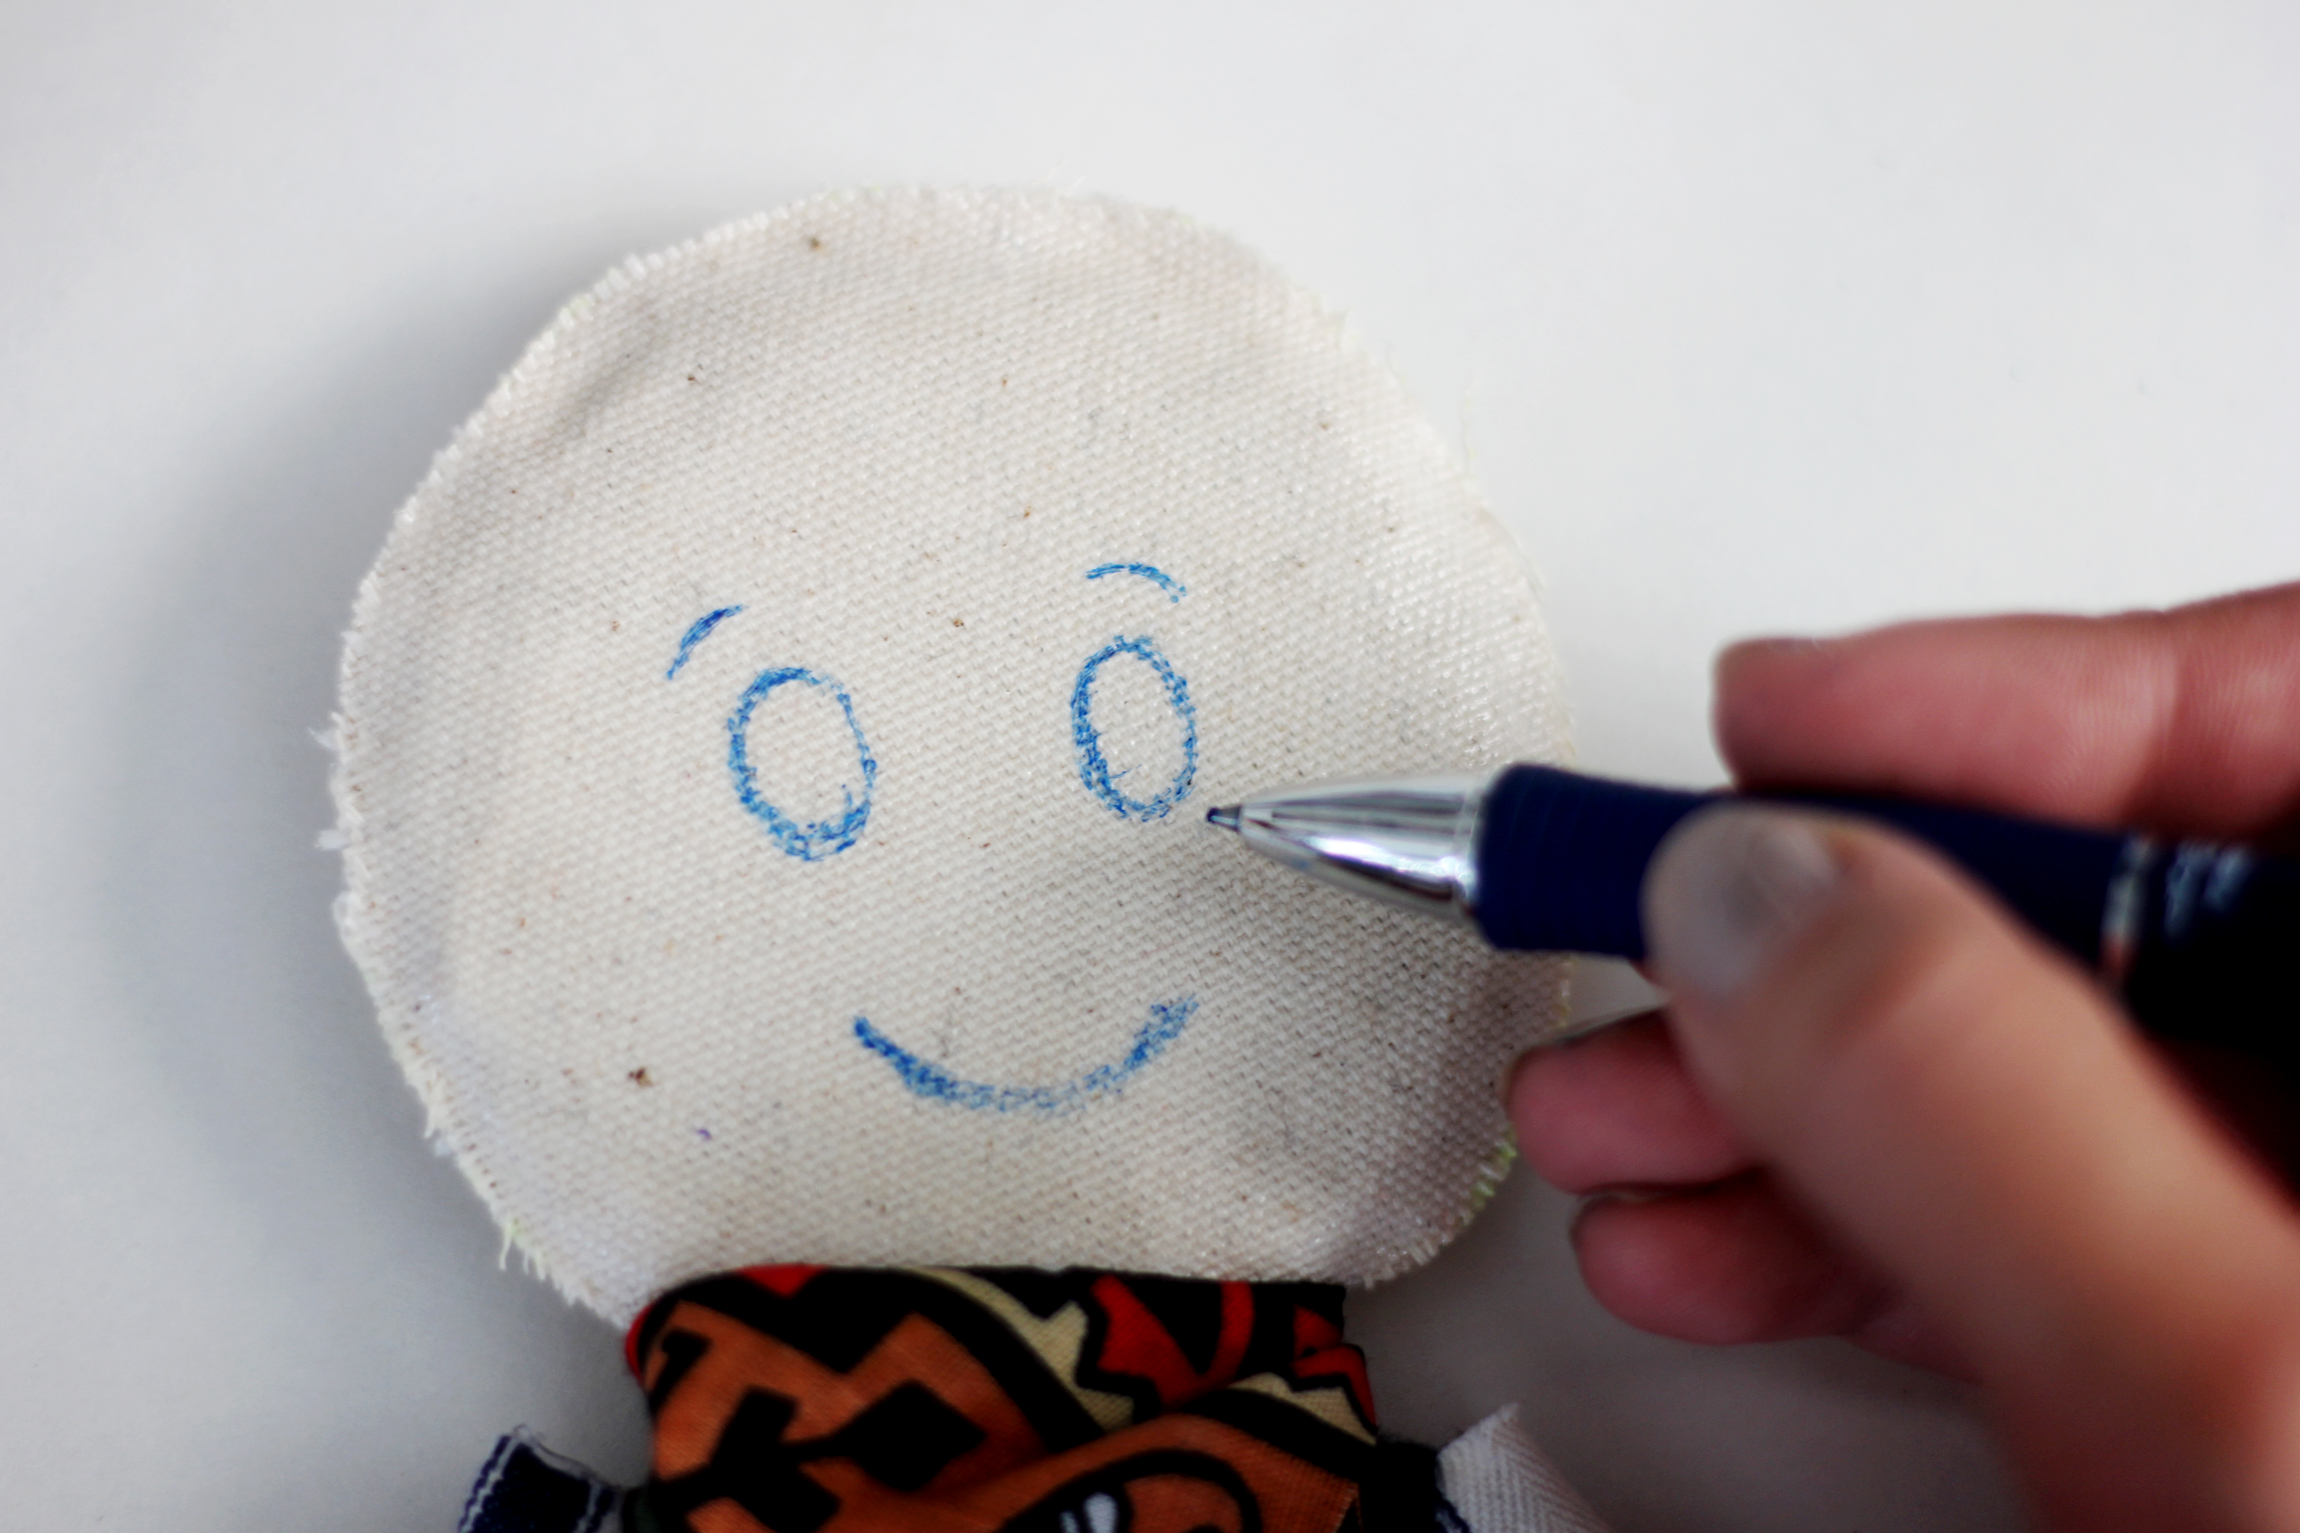
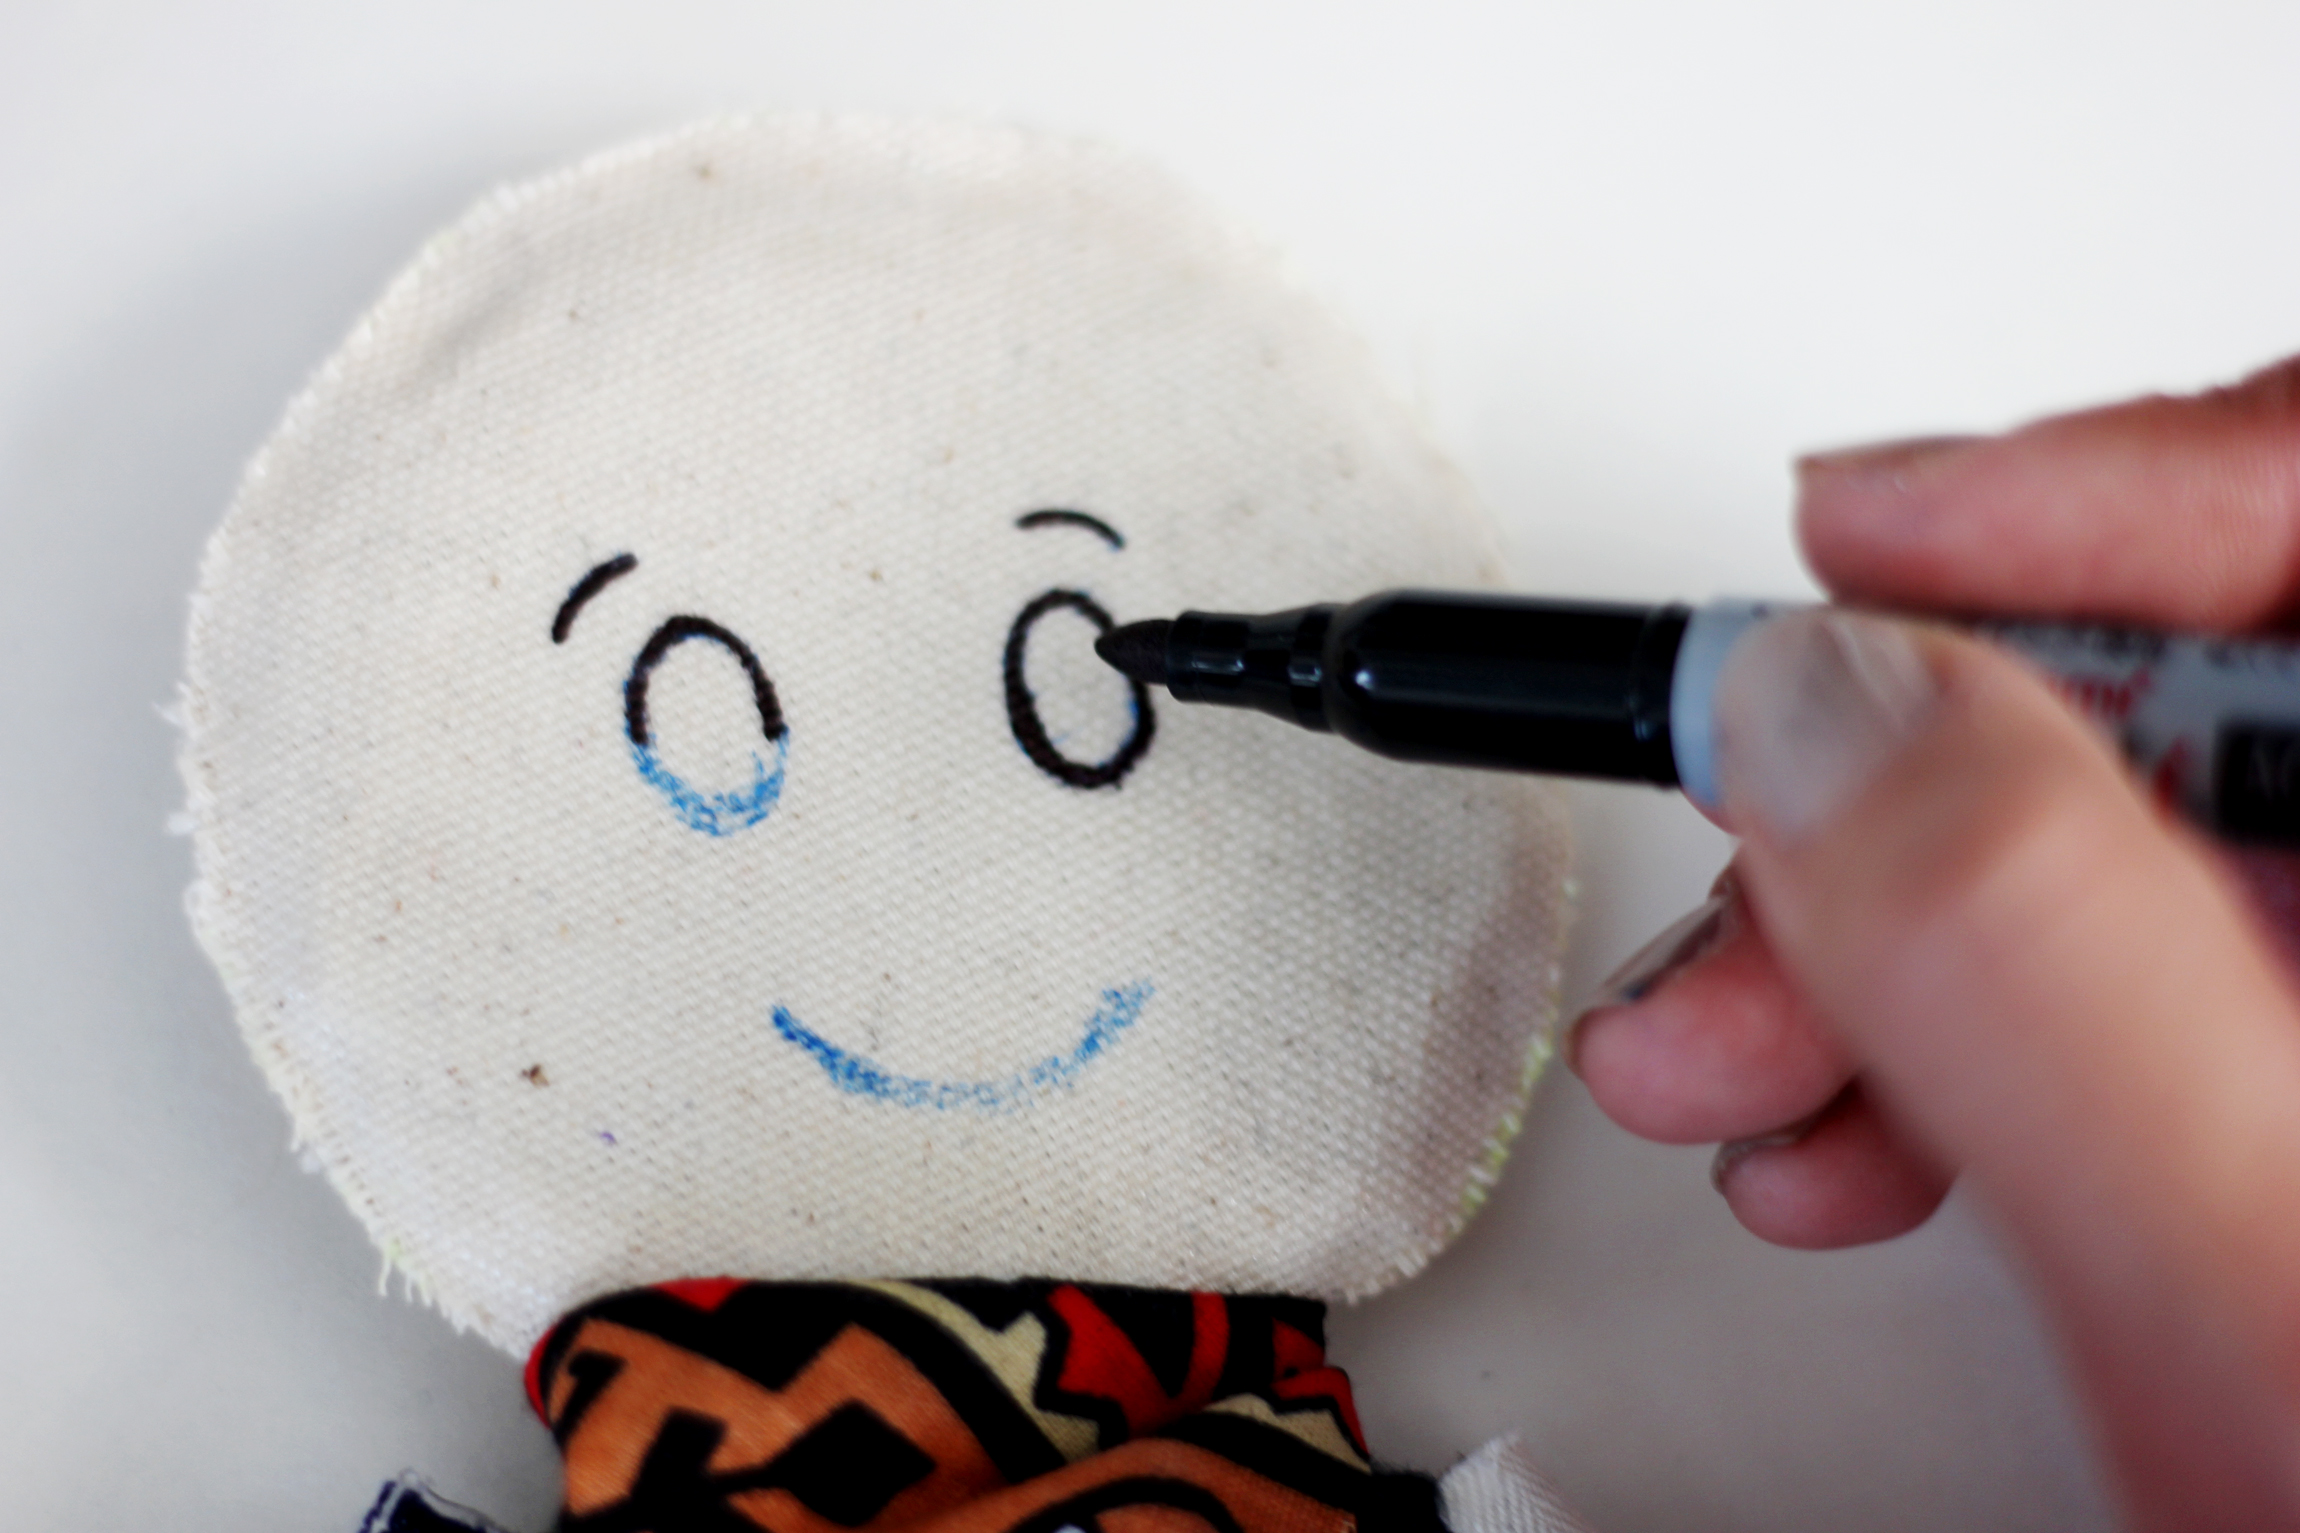
11.) How fun is it to draw scarecrow faces?! This is the part where you get to make your scarecrow look however you want! We prepped our canvas with two layers of an acrylic polymer so that it wouldn't bleed when we drew or painted our faces on. You can use a clear gesso or any transparent paint prep liquid as well. Paint one coat on, let dry well and do the same to the second coat. Now you have a prepped surface that won't create ink or paint bleeds on your scarecrows' face. If you don't mind that effect, then you don't have to prep it. What worked really well for us was drawing the face first then filling it in with a sharpie. We also painted over the sharpie with black acrylic paint for a darker look!

12.) Now the funnest part: accessorizing your scarecrow! We added hair, a beanie, an overall pocket to the top of his overalls and a neck scarf! We also made our scarecrow a friend! She has bangs, a bob haircut, cool glasses, rosy cheeks, a neck scarf and wears a denim vest and skirt with cool patterned leggings! We love our little hipster scarecrows and hope that you love the ones you create too!


HAPPY DECEMBER! It looks like so many have been getting ready for Christmas earlier this year—putting up Christmas trees, decor, etc. and I ABSOLUTELY LOOOVE this!