
Styling littles is one of my absolute FAVORITE things to do. I mean, come on! The clothing is so tiny and I’ll take all the buttons, zippers, + accents too. I’m always on the hunt for cool + comfy pieces for my kiddos/to give as gifts…
Read MoreVALENTINE'S DAY PORTRAIT MAILBOXES 📬
I wanted to throw an idea out there that I came up with starting from my husband and I's very first Valentine's Day together. Before my husband and I had our boys I would set up a little mailbox for each of us where we would write fourteen things that we loved about each other, fourteen things for the fourteen days in February before Valentine's Day. It became a fun little thing to open on Valentine's Day either before our date or after, I myself was excited to see what what he would come up with on those little notes.
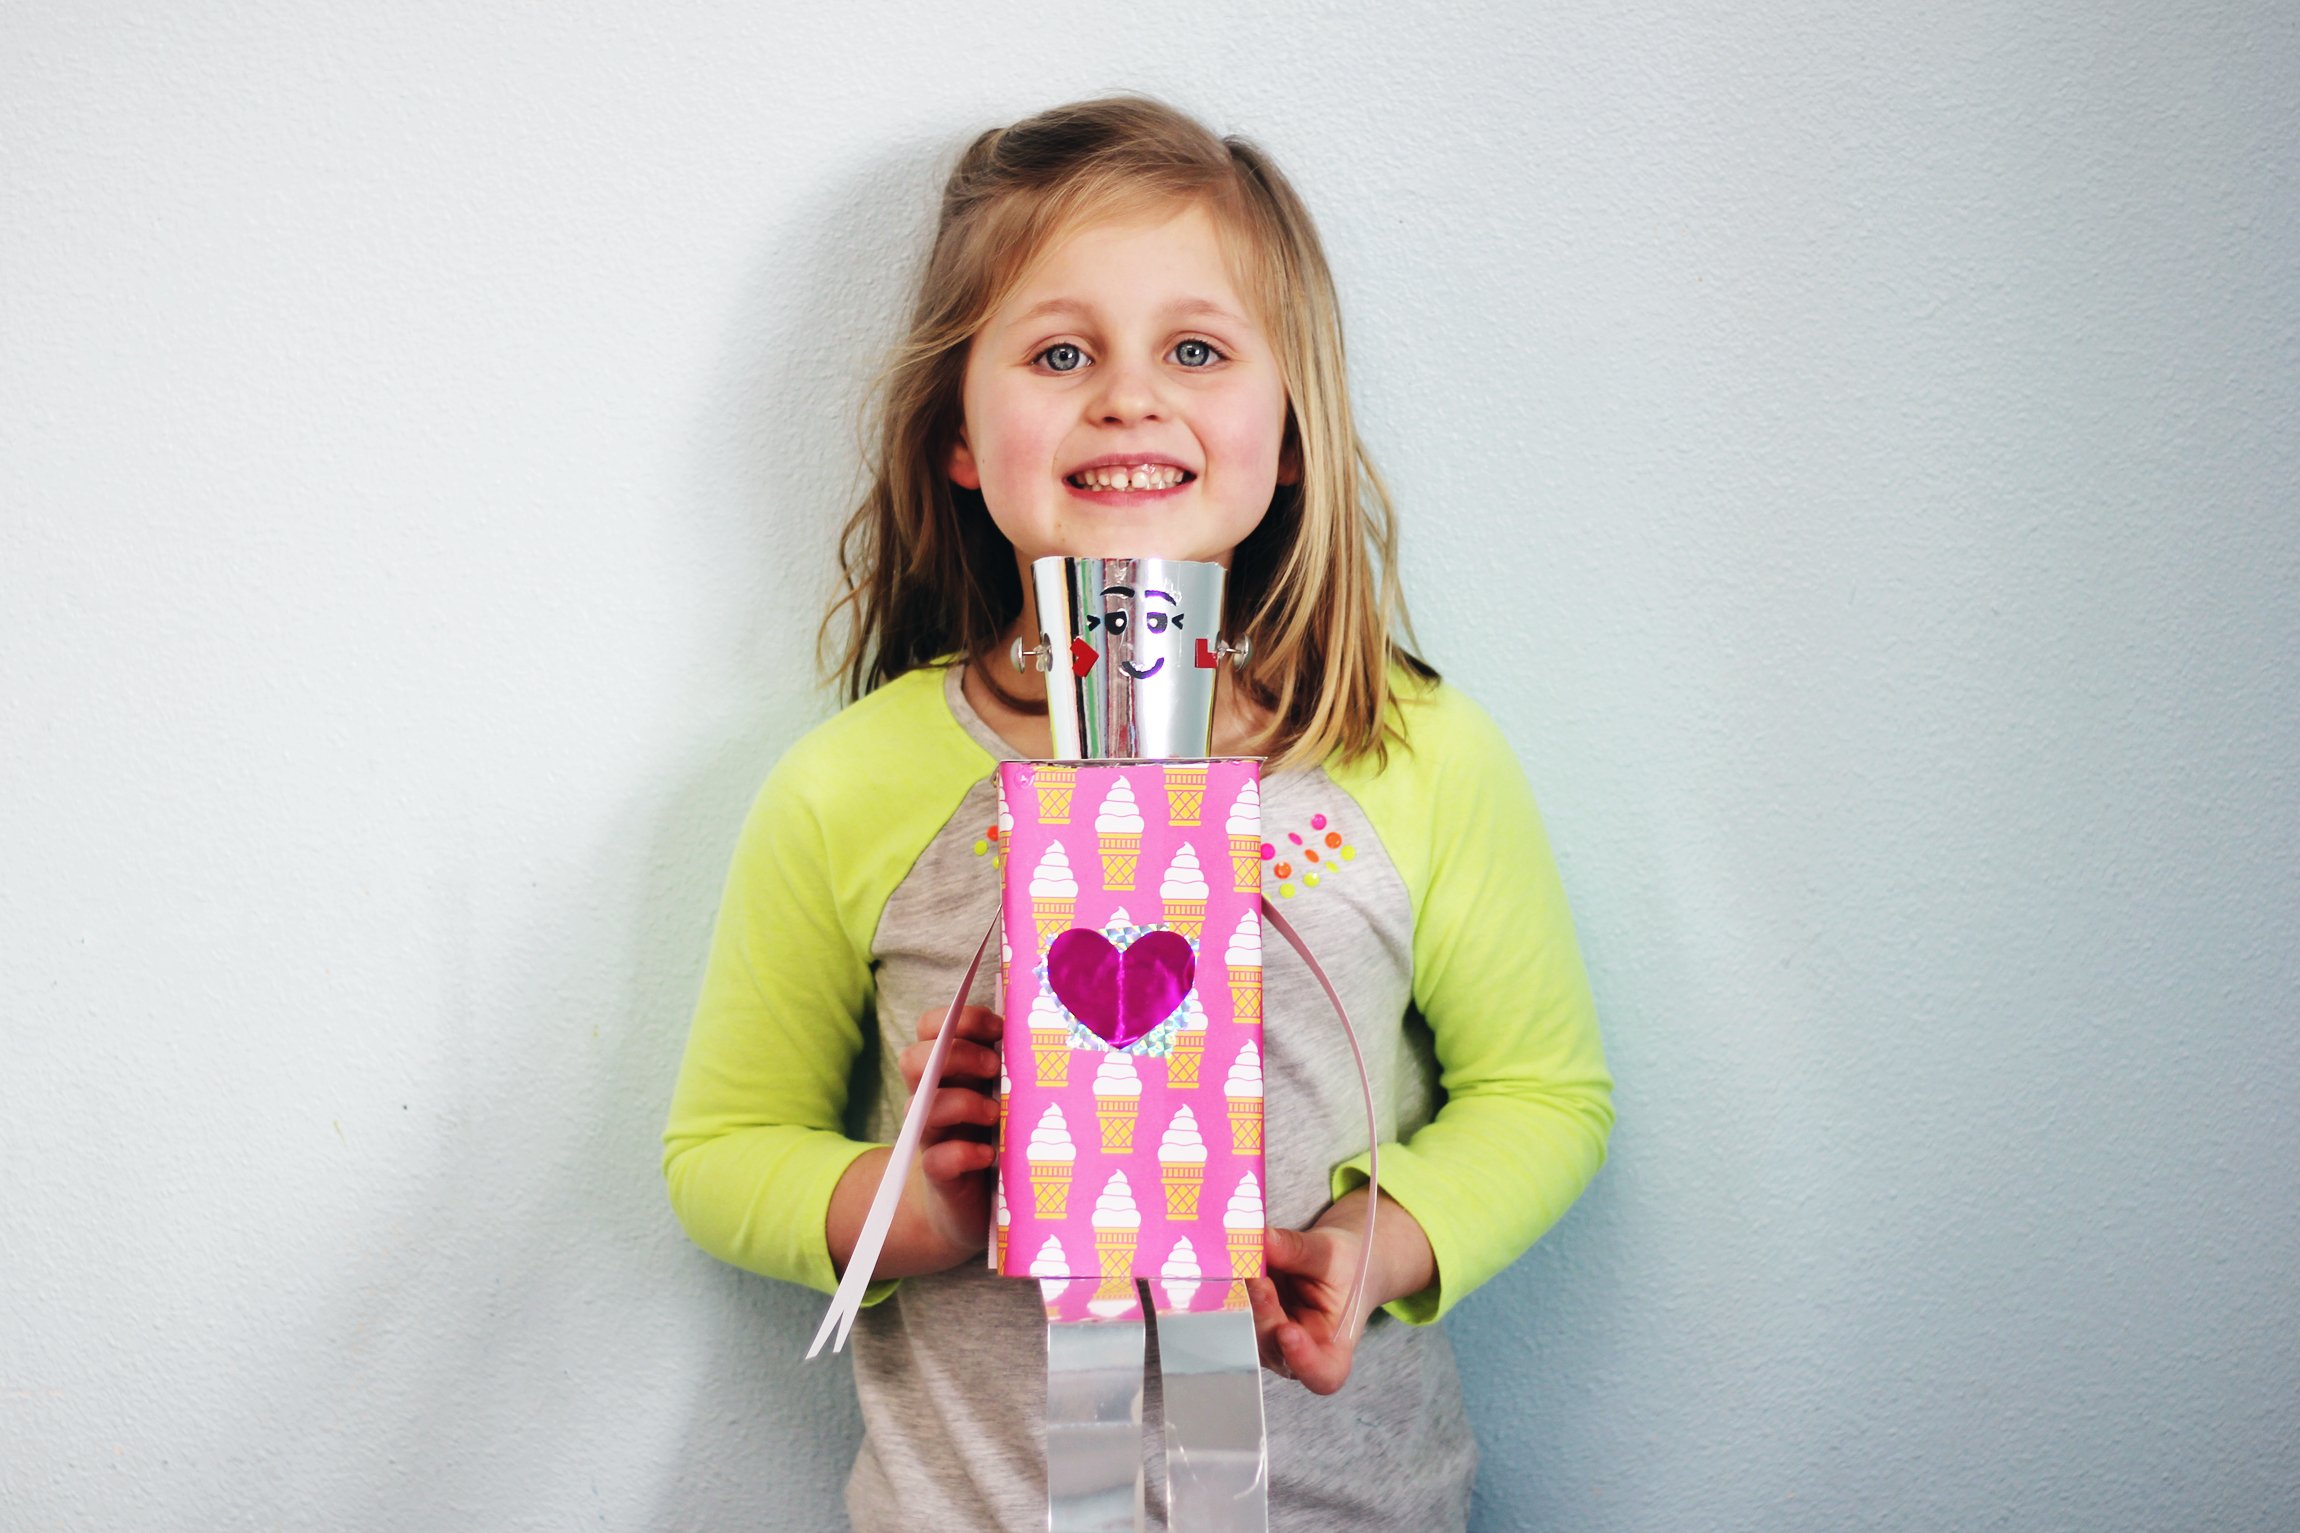
Read MoreVALENTINE'S DAY ROBOT MAILBOX DIY ❤️
This super cute Valentine’s Day Robot DIY is a pretty easy Kids’ DIY to make with an adults help, and it will help you start decorating for Valentine’s Day! This projects is also a good idea if you’re a teacher needing a project for your class ... what better to collect adorable Valentine's from your classmates with than these Valentine’s Day Mailboxes? Have fun making these and getting ready for LOVE month!

❤️Check out our Youtube video of our Valentine’s Day Robot Mailbox below, or scroll down to see the written + photo step by step.
MESSY LEVEL: 1
This project isn't very messy, there is some gluing with the hot glue gun and paper cutting.
SUPPLIES:
1/2 gallon juice / milk container [ cleaned out ]
16 oz to-go coffee cup [ re-use / reduce?! we did! ]
Scissors
Ruler
Glue gun + glue sticks
Card stock [ in whatever color you choose for robot body ] + mirror card stock [ robot head, arms + legs ]
Foam / cardstock sheet [ robot face details ]
Decorative Tacks [ robot face details ] You can purchase in bulk HERE
Any other metallic supplies you have laying around [ we used New Years noise maker ribbon which was a perfect metallic detail, metallic tape works well too! ]

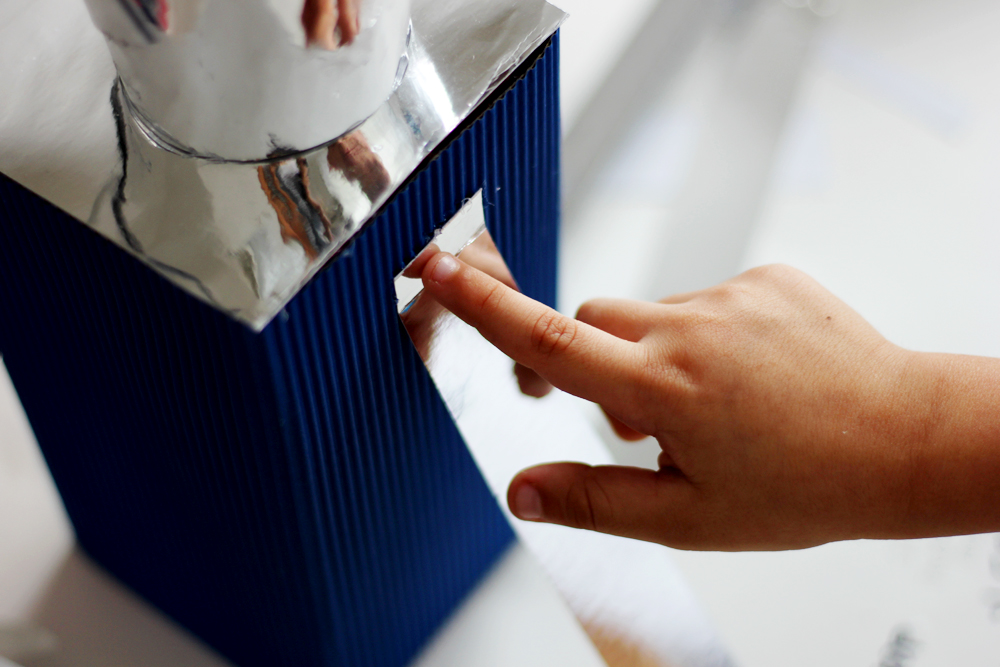
1.) Taking your clean 1/2 gallon container, you will help your little one cut the top part off along the line (unless he/she is an expert with the scissors, they can do it themselves.) Then, you are going to choose what the “back” of your robot mailbox will be and you are going to cut a square starting from the top, down to a little above the halfway point of the gallon. You will work your way across and back up to the top of the gallon forming a square. This will end up being the slot for Valentine’s do go into.
**TIP: I used a pencil to draw a line about halfway down the back of the container.

See example:
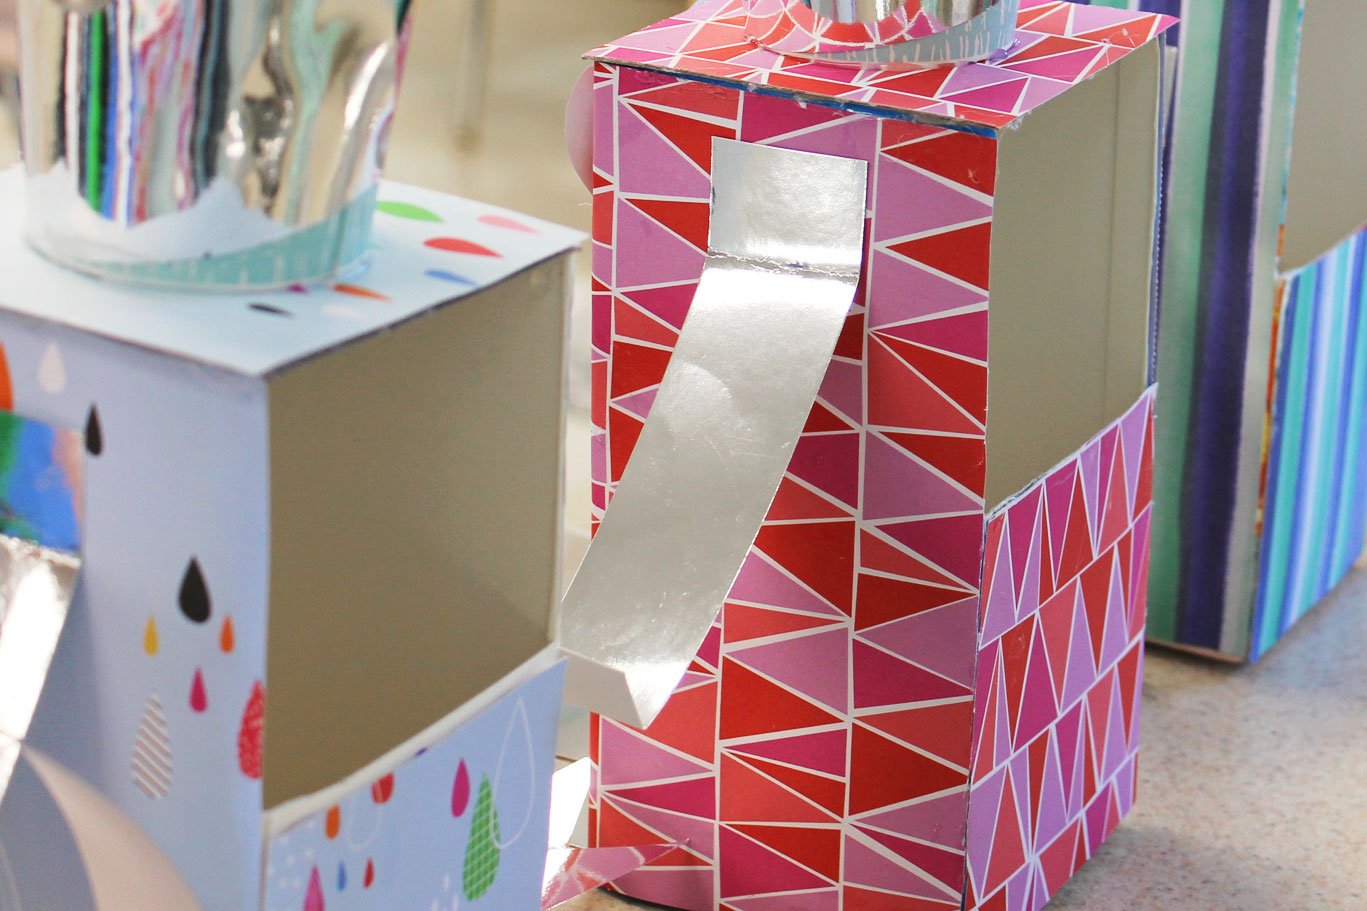
Here is what the back of finished your mailbox cubby will look like on back of robot:
2.) Next measure and cut a thick card stock square to fit over the top opening. You can even use the remaining square that you just cut out to create the mailbox opening on the back of the robot. You won't see this piece in the finished product, it's just to close the opening and for re-enforcement. Glue that down with the hot glue gun.

3.) After that, help your little one measure a card stock piece in the color you want the robots' body to be and cut it out. We used a 12 x 12 card stock piece, so the piece we measured wrapped around 3 sides of our container and we used the remnants of the card stock to cover the shorter back side.

4.) Then wrap your card stock around the container, gluing it down as you go.

5.) The next thing we did was measure, cut, and glue a square piece of the mirror card stock to go over the previous layer of card stock square that covered the top. This will end up being the Robots' shoulders.

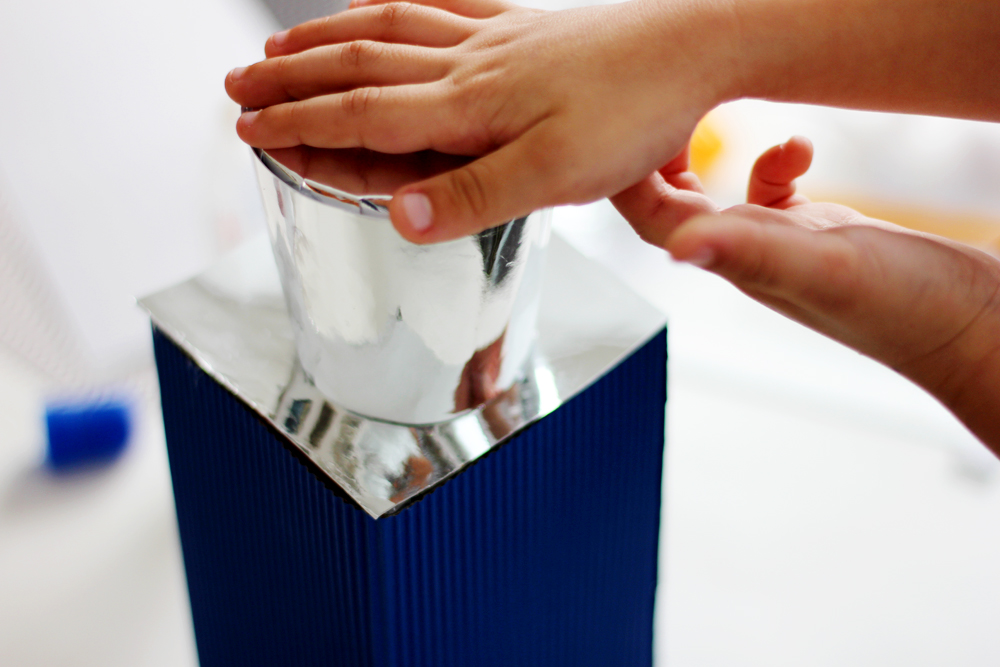
6.) Mark and cut out the bottom part of your cup, this will be your robots' head. We used a glass to help us measure and mark a straight cut all the way around our cup.
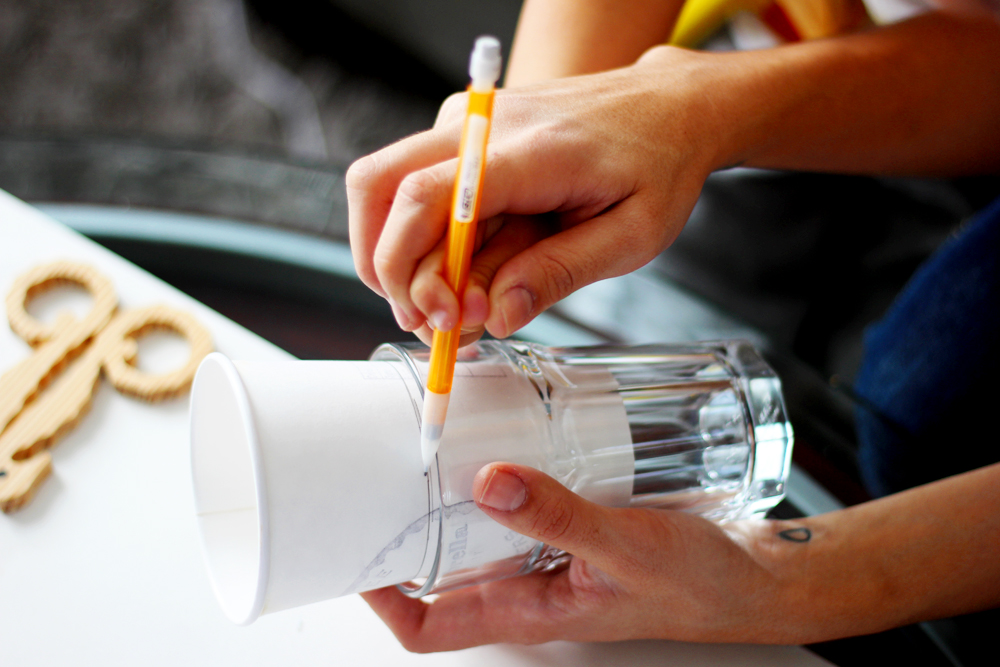

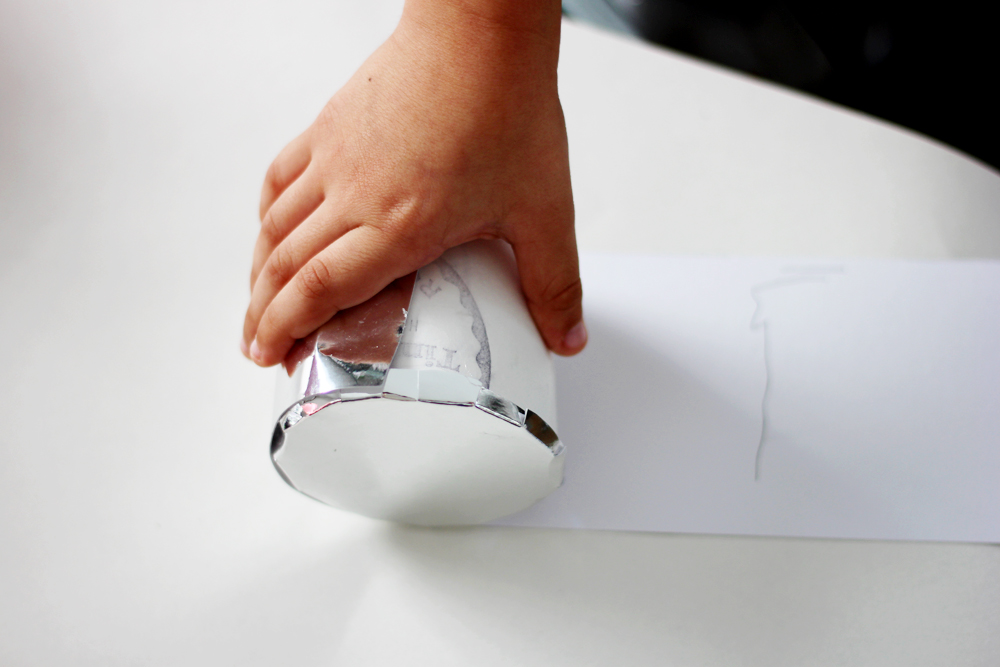
7.) Trace a circle around the top side of your newly cut cup onto the back side of your mirror card stock, then cut a circle 1 cm wider than this circle so that it's easier to attach the card stock to your cup (the top of your robots' head). I cut little tabs all around my circle and folded them in which made it easier to glue down to the top of the cup.


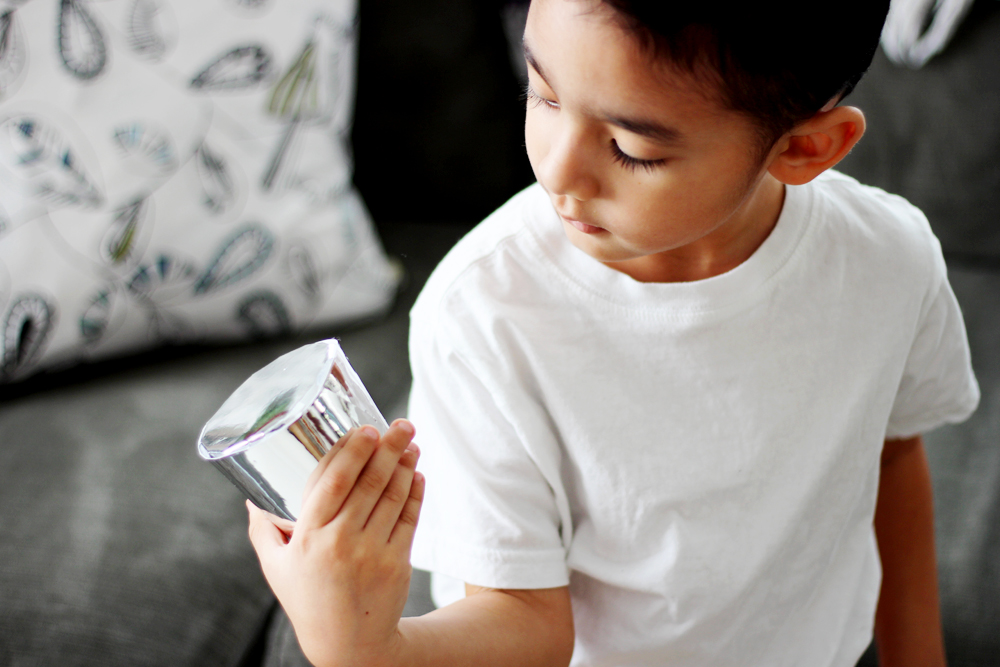
8.) After you glue down the top of your robot's head; measure, cut and wrap a piece of the mirror card stock all around the width of the cup (gluing it down as you go). Then you can glue this to the carton top (this will be your robots head and body).
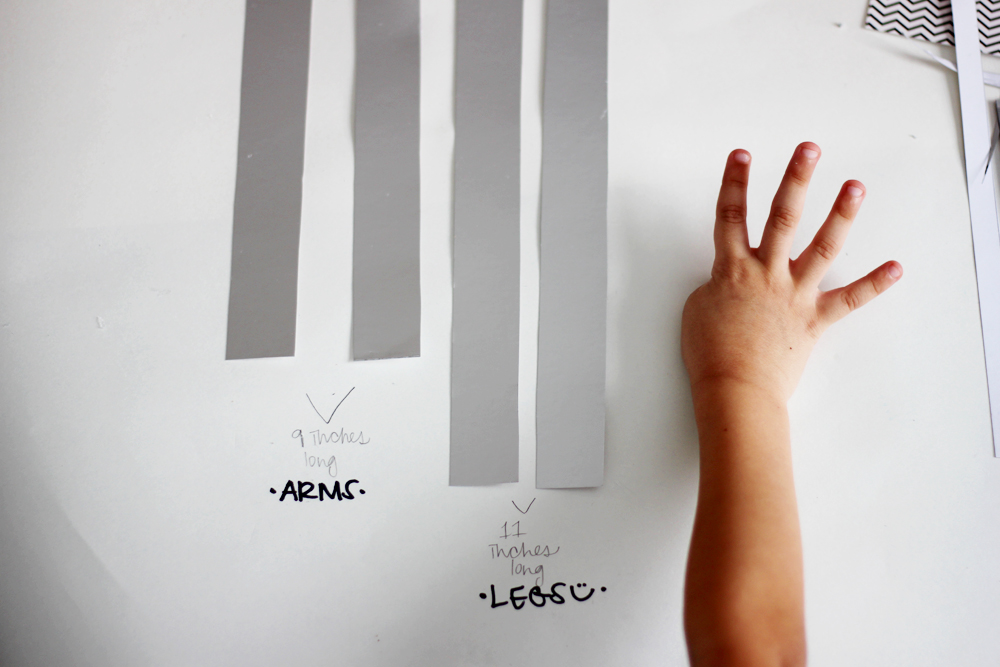
9.) Cut 4 pieces of mirror card stock 1 inch wide, making 2 pieces 9 inches long and 2 pieces 11 inches long (these will be the arms and legs). Glue to the robots' body.

// We folded our legs accordion style, then cut + glued pieces of New Years' noise maker ribbon into each fold to make them more fun. The metallic blue went perfectly with our robot and once more: reuse / reduce :)


10.) Create a face out of sticky foam sheet and attach. I drew it and then cut it out. I had my little man attach it. I also added white puffy paint dots to give the eyes a little of dimension.

11.) Glue as many decorative tacks as you would like to the top and sides of the head. I also created a little tube with a piece of mirror card stock to lift the top pin, this is optional. You and your little one(s) can decorate your robot as much or as little as you'd like.

// Add little pieces of love :)

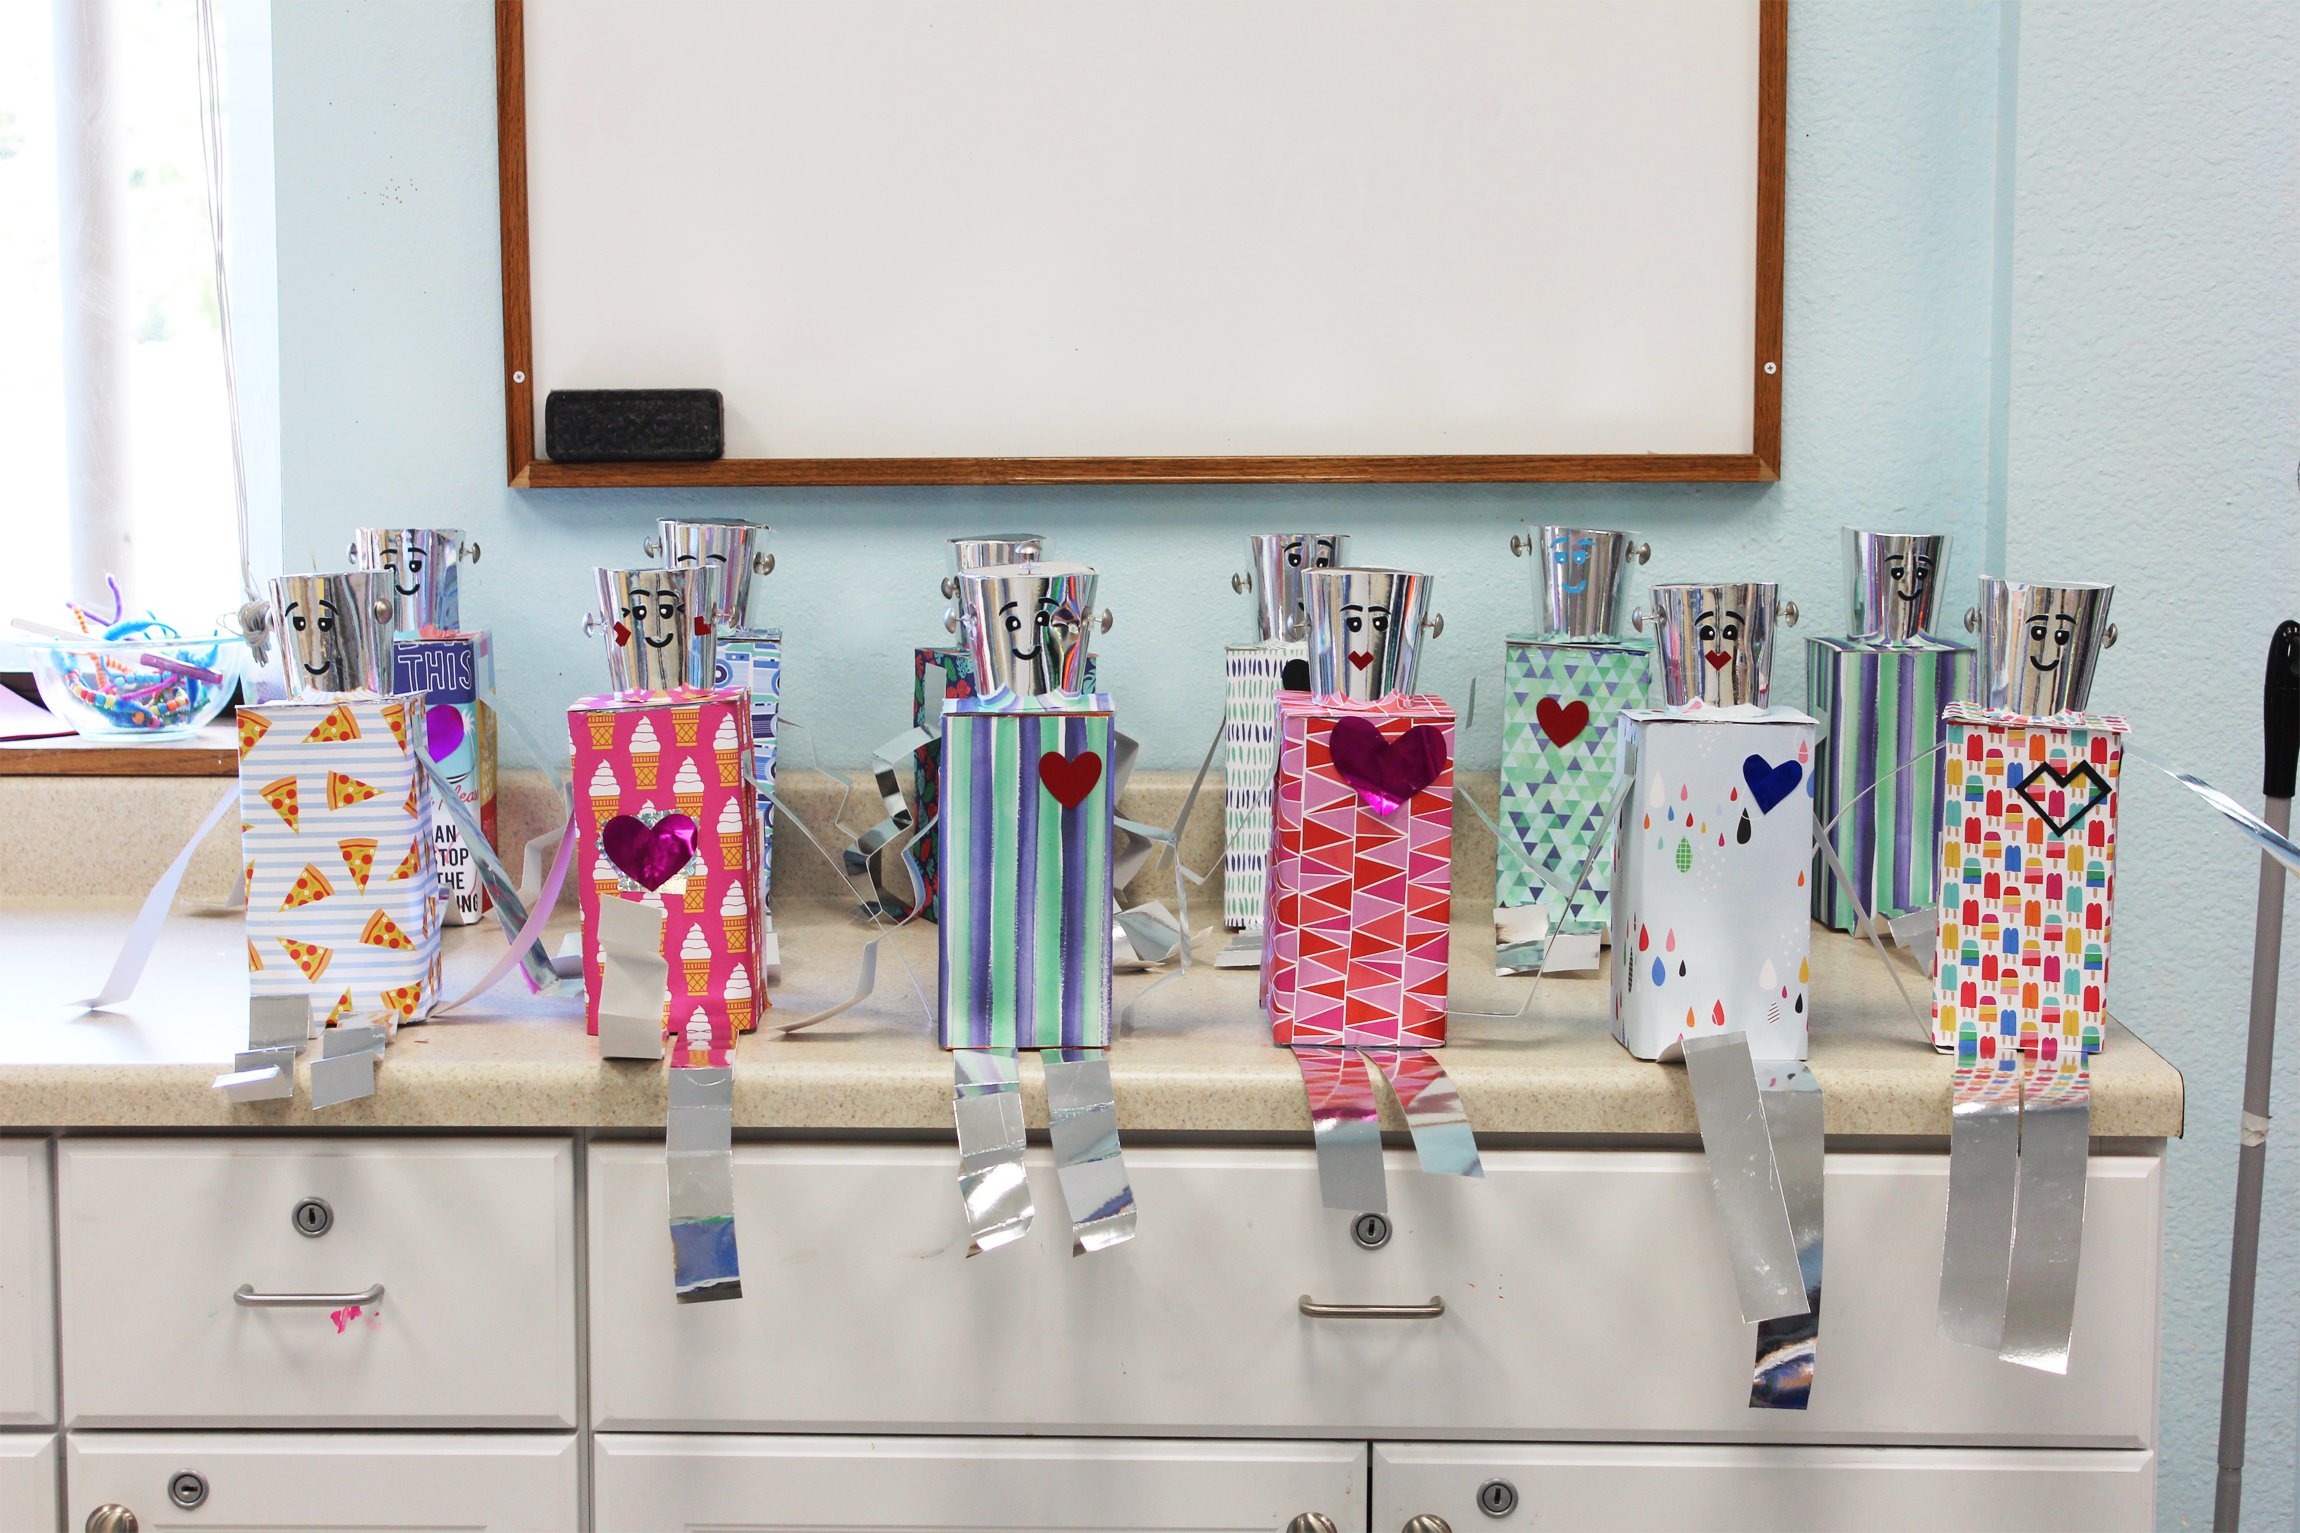
// Cuddle with your Valentine's Day Robots + sit them on your favorite shelf, don't forget to revisit the Valentine's inside reminding you how amazingly loved you are. Have fun making these and tag @allkidsaregifted so that we can see how yours turned out! Can't wait to see!!


TAUGHT IN CLASS
Here is a peek at when I taught the Valentine's Day Robot Mailbox DIY in my son’s Kindergarten class:


PAPER PLATE PIZZA GARLAND 🍕
I was cutting a paper plate for my 5 year old for another car project he requested me to help him with, when I thought "these would make cute pizza slices (insert lightbulb emoji here 💡 )". I started visualizing what these would look like and that's how these came to be…
Read MoreMINI PINEAPPLE PIñATAS! 🍍
Ello! Making these mini pineapple piñatas was actually a very fun project! The idea came to me when I was trying to come up with a fun party favor for my sons 4th birthday party (last year) and then it clicked! I had purchased a cute mini donkey piñata at Target a few weeks before, but I wanted to add my own little creative twist to go with his summery tropical theme. Plus I've been really into pineapples lately so there you go!

MESSY LEVEL: 3
The paper maché process can get pretty messy with the glue and water mix. Also, there is a lot of tissue + paper cutting and gluing.
SUPPLIES:
Balloons
Tissue paper
Scissors
Water
Elmer's glue (I used the largest gallon I could find)
Hole punch
String for handle
Dish to mix glue + water
Newspaper / magazine paper
Paper for small message (optional)
Card stock to seal bottom of shape
Acrylic / tempera paint
Paint brushes
Card stock for stems / leaves
1. First of all you want to blow up your balloon(s) to the size desired. After that, you want to mold them (by squeezing the balloons) into the shape you're wanting the body of the piñata to have. Then you're ready to start paper maché-ing. I mixed 3/4 parts glue to 1/4 parts water so that it was a thicker consistency, just soak each piece of newspaper or magazine and stick it right onto the balloon. I found that 2 -3 layers of paper maché is best for this project. I also left a top and bottom opening on each balloon so that once the paper maché dried I could determine which side I liked best to be the bottom and top of the pineapple. I tied some yarn (any type of string will work) to the end of each balloon to hang while drying so that the soon to be piñatas would dry evenly, this also made it easier to add the extra layers of paper maché.


2. Once your paper maché is dry and you're left with a solid shape, you pop all of the balloons and take them out of each piñata along with the yarn used to hang dry them. Then you're ready to see which side would be best as the bottom side. When you pick that, it's time to seal it off by creating a cardstock circle (make sure it's a good amount larger than the opening). Cut half inch tabs all the way around your circle, then you dip each cardstock circle into the glue and water paper maché mixture.
We did this by: Turning each piñata shape upside down and laying the circle flat on the opening that we wanted to seal off. We then smoothed the edges out all around and glued them to the sides bending and gluing them down into the rest of the shape. Two layers of glue mixture is best for a good solid base. Let this part dry well. If it's too soft once dry, add another layer and don't be afraid to use too much glue, the more glue the better for a solid base that isn't easily breakable.


3. Now that the bottom of your pineapple is dry, you have a standing piñata! These top openings will be where you attach the stem / leaves of the fruit. You can add the candy (if you're putting candy in it) here or you could do what I did and put the candy in a separate little bag so that the leaves aren't ruined. Also feel free to cut the openings wider to form a nice circle , it makes it easier to insert the leaves and will leave a nicer overall result.


4. I then painted each piñata with a tempera paint so that the newspaper didn't show through the thin tissue outer layer. You can also use the paper maché method and add a yellow (or whichever color) paper all over. I tried this with one of the piñatas and found it more time consuming, so then I went with the paint which was a lot faster for me.

5. After that I added two layers of small tissue paper squares I cut to seal the bottom of the piñata for a nice finish, since I knew I wanted to add a message to each. You can do this by just gluing down each tissue square, and then sealing it with a coat of glue as well. Once the glue is dry you're left with a nice, durable, and shiny finish. This is optional and if you're happy with what the bottom of your piñatas look like once you're done painting them, you can totally skip this step


6. Then you're going cut 1 inch wide x 2 inch long strips of tissue paper. You can either cut small vertical lines all the way across (like the traditional piñatas normally use) or you can create a chevron pattern. These will be the strips you layer all around your piñatas. I used both kinds of strips to have a variety of the piñatas for the kiddos.

7. Once you have enough strips cut (about 20) you can start layering and gluing them all around your piñata, row after row from bottom to top. I just used a paint brush and painted elmer's glue along the top of each strip to seal it down and kept doing this until I reached the opening of the piñata.

8. When this is dry, you can make two holes with your hole punch on opposite sides of the top of the piñata so that you can attach your sting that will be the handle. I used a plastic craft string but any durable yarn, string or plastic would work.

9. Now you're ready to add your leaves. I cut pieces of green card stock into different shapes and sizes of pineapple leaves. Then I added some glue to the side that would be attached to the inside of the piñata, and put each of them in pressing firmly for about a minute to make sure they attached well. I did this all the way around the inside of the piñata folding the leaves in different places as I went, creating a pineapple leaf look. Then I did this again in a second layer attaching leaves to the leaf pieces that were already glued to the piñata. This formed the center leaves which you can also fold out or just leave standing.


10. When your glue is all dry you can focus on the finishing details. I typed out little messages for each guest, cut them into little squares, and glued each of them to the bottom of the piñatas. As I mentioned before, this step is completely optional.

Then TAAA DAAA! You're all finished and ready to add your creations to your party favor or cake table! Aren't they the cutest?! They make adorable little decorations as well for the party and for the guest to use in their home! Also watching each tiny birthday guest walk away with their little piñata party favor in hand was ADORABLE. I will definitely be making more varieties of these in the future! I hope you enjoy making them and we would love to see your creations! Also, you can add any Holiday / celebration twist to them! Check out some of the Holidays we've used them for below! Don't forget to comment and tag us in your photos: @allkidsaregifted on Instagram (@allkidsrgifted on Pinterest) and use hashtag #allkidsdiy as well! Have fun!!


HAPPY DECEMBER! It looks like so many have been getting ready for Christmas earlier this year—putting up Christmas trees, decor, etc. and I ABSOLUTELY LOOOVE this!