HAPPY DECEMBER! It looks like so many have been getting ready for Christmas earlier this year—putting up Christmas trees, decor, etc. and I ABSOLUTELY LOOOVE this! For our home, although we had talked about getting our Christmas tree earlier than we traditionally do each year: we actually didn’t get to it. So, Saturday after Thanksgiving it was!
Talking about Christmas trees and decor—I’ve been looking for the perfect advent calendar for years, no joke. Ever since our oldest son was born (10 years ago) I had this idea of a magical, whimsical, gorgeous, perfect advent calendar that my kids would be super excited to take out every year. I also hoped that they’d be equally as excited to see what each day brings on the countdown to Christmas Day. I have looked in so many stores, online and although I’ve come very close (many times) to purchasing the *almost* perfect one—it never is the one I really really wanted.
Finally I decided, yep you guessed it: “I’m going to make my own!” So here she goes—I have created an advent calendar that has two ways to be hung + styled and finished. Read on to see what I mean:

***There’s a good amount of supplies that go into this advent calendar. Since my hope going into this DIY is for it to be an heirloom in our family—it’s really special. Also being a maker, I had a lot of the tools on hand already and just had to grab what I didn’t have from the hardware store. I hope this is the case for you too! If not, it’s TOTALLY worth it to collect these AND you can use them for more creating fun year round!***
SUPPLIES:
(10) 1/2 x 48 inch wood dowels
(24) small gold cup hooks (or any color preferred)
(1) balsa wood strip 1/2 inches wide x 22 inches long
(35) 7 cm thin nails
Wood glue
Level
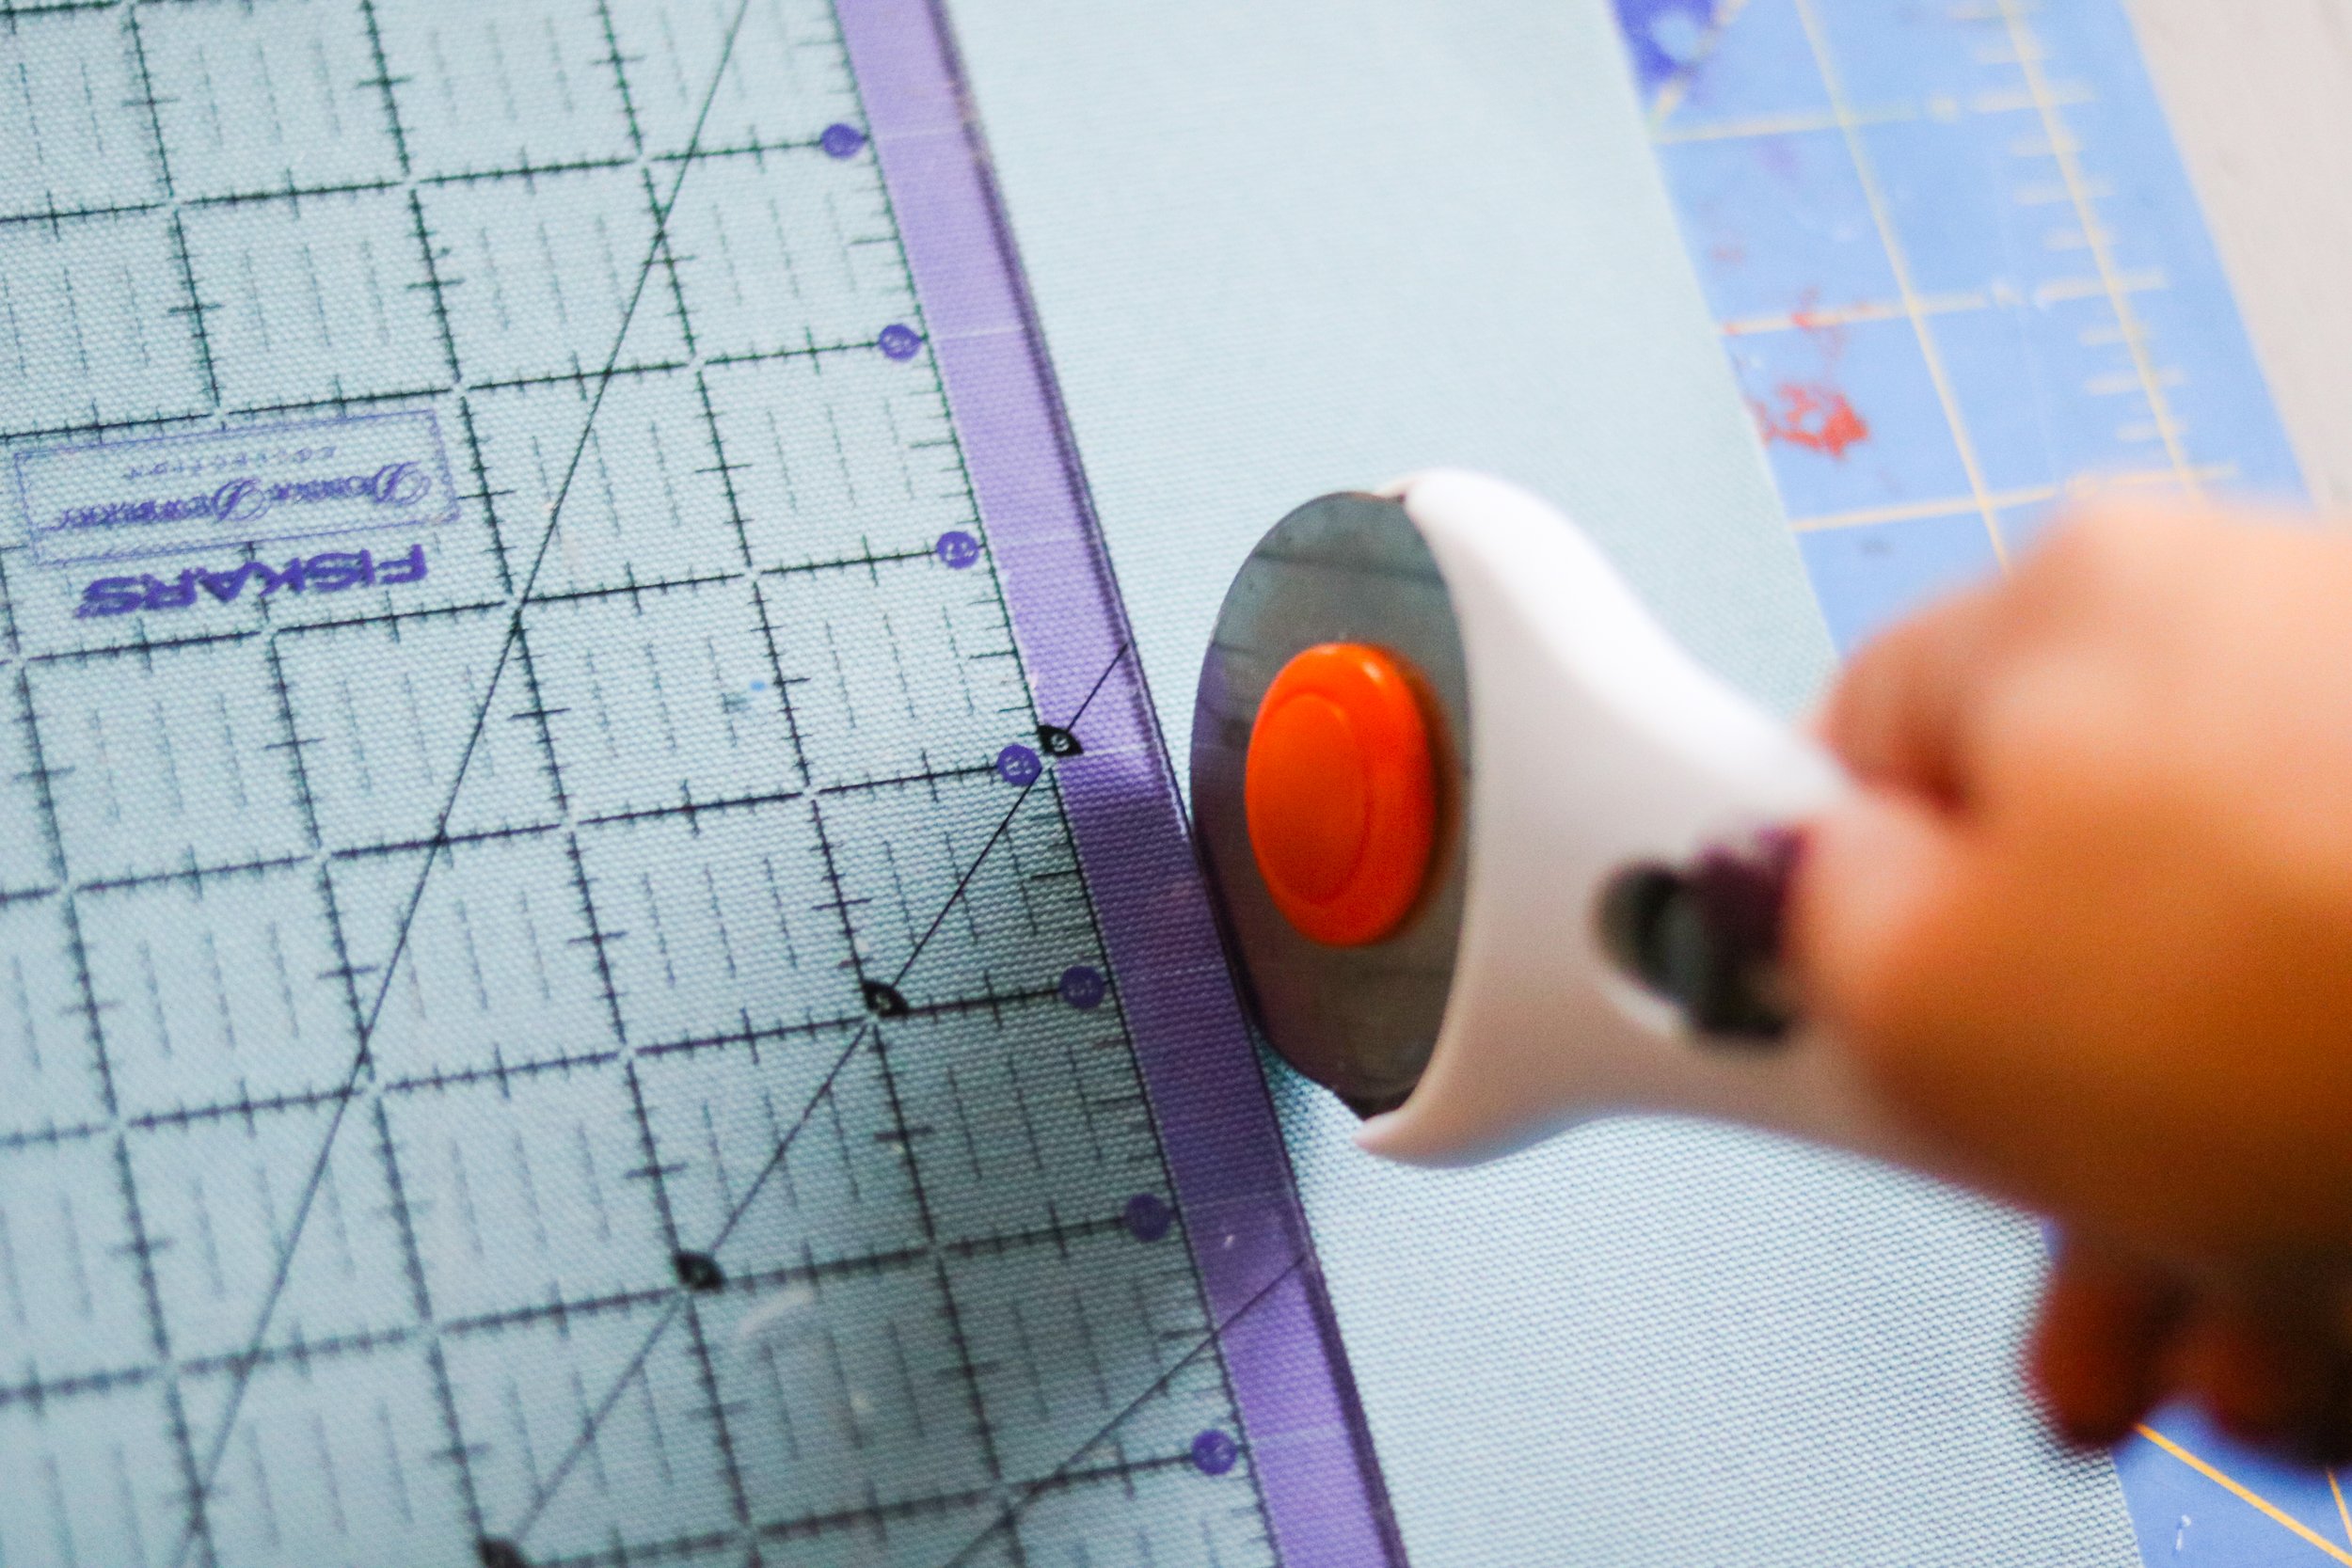
Acrylic quilters ruler/ruler
Hammer
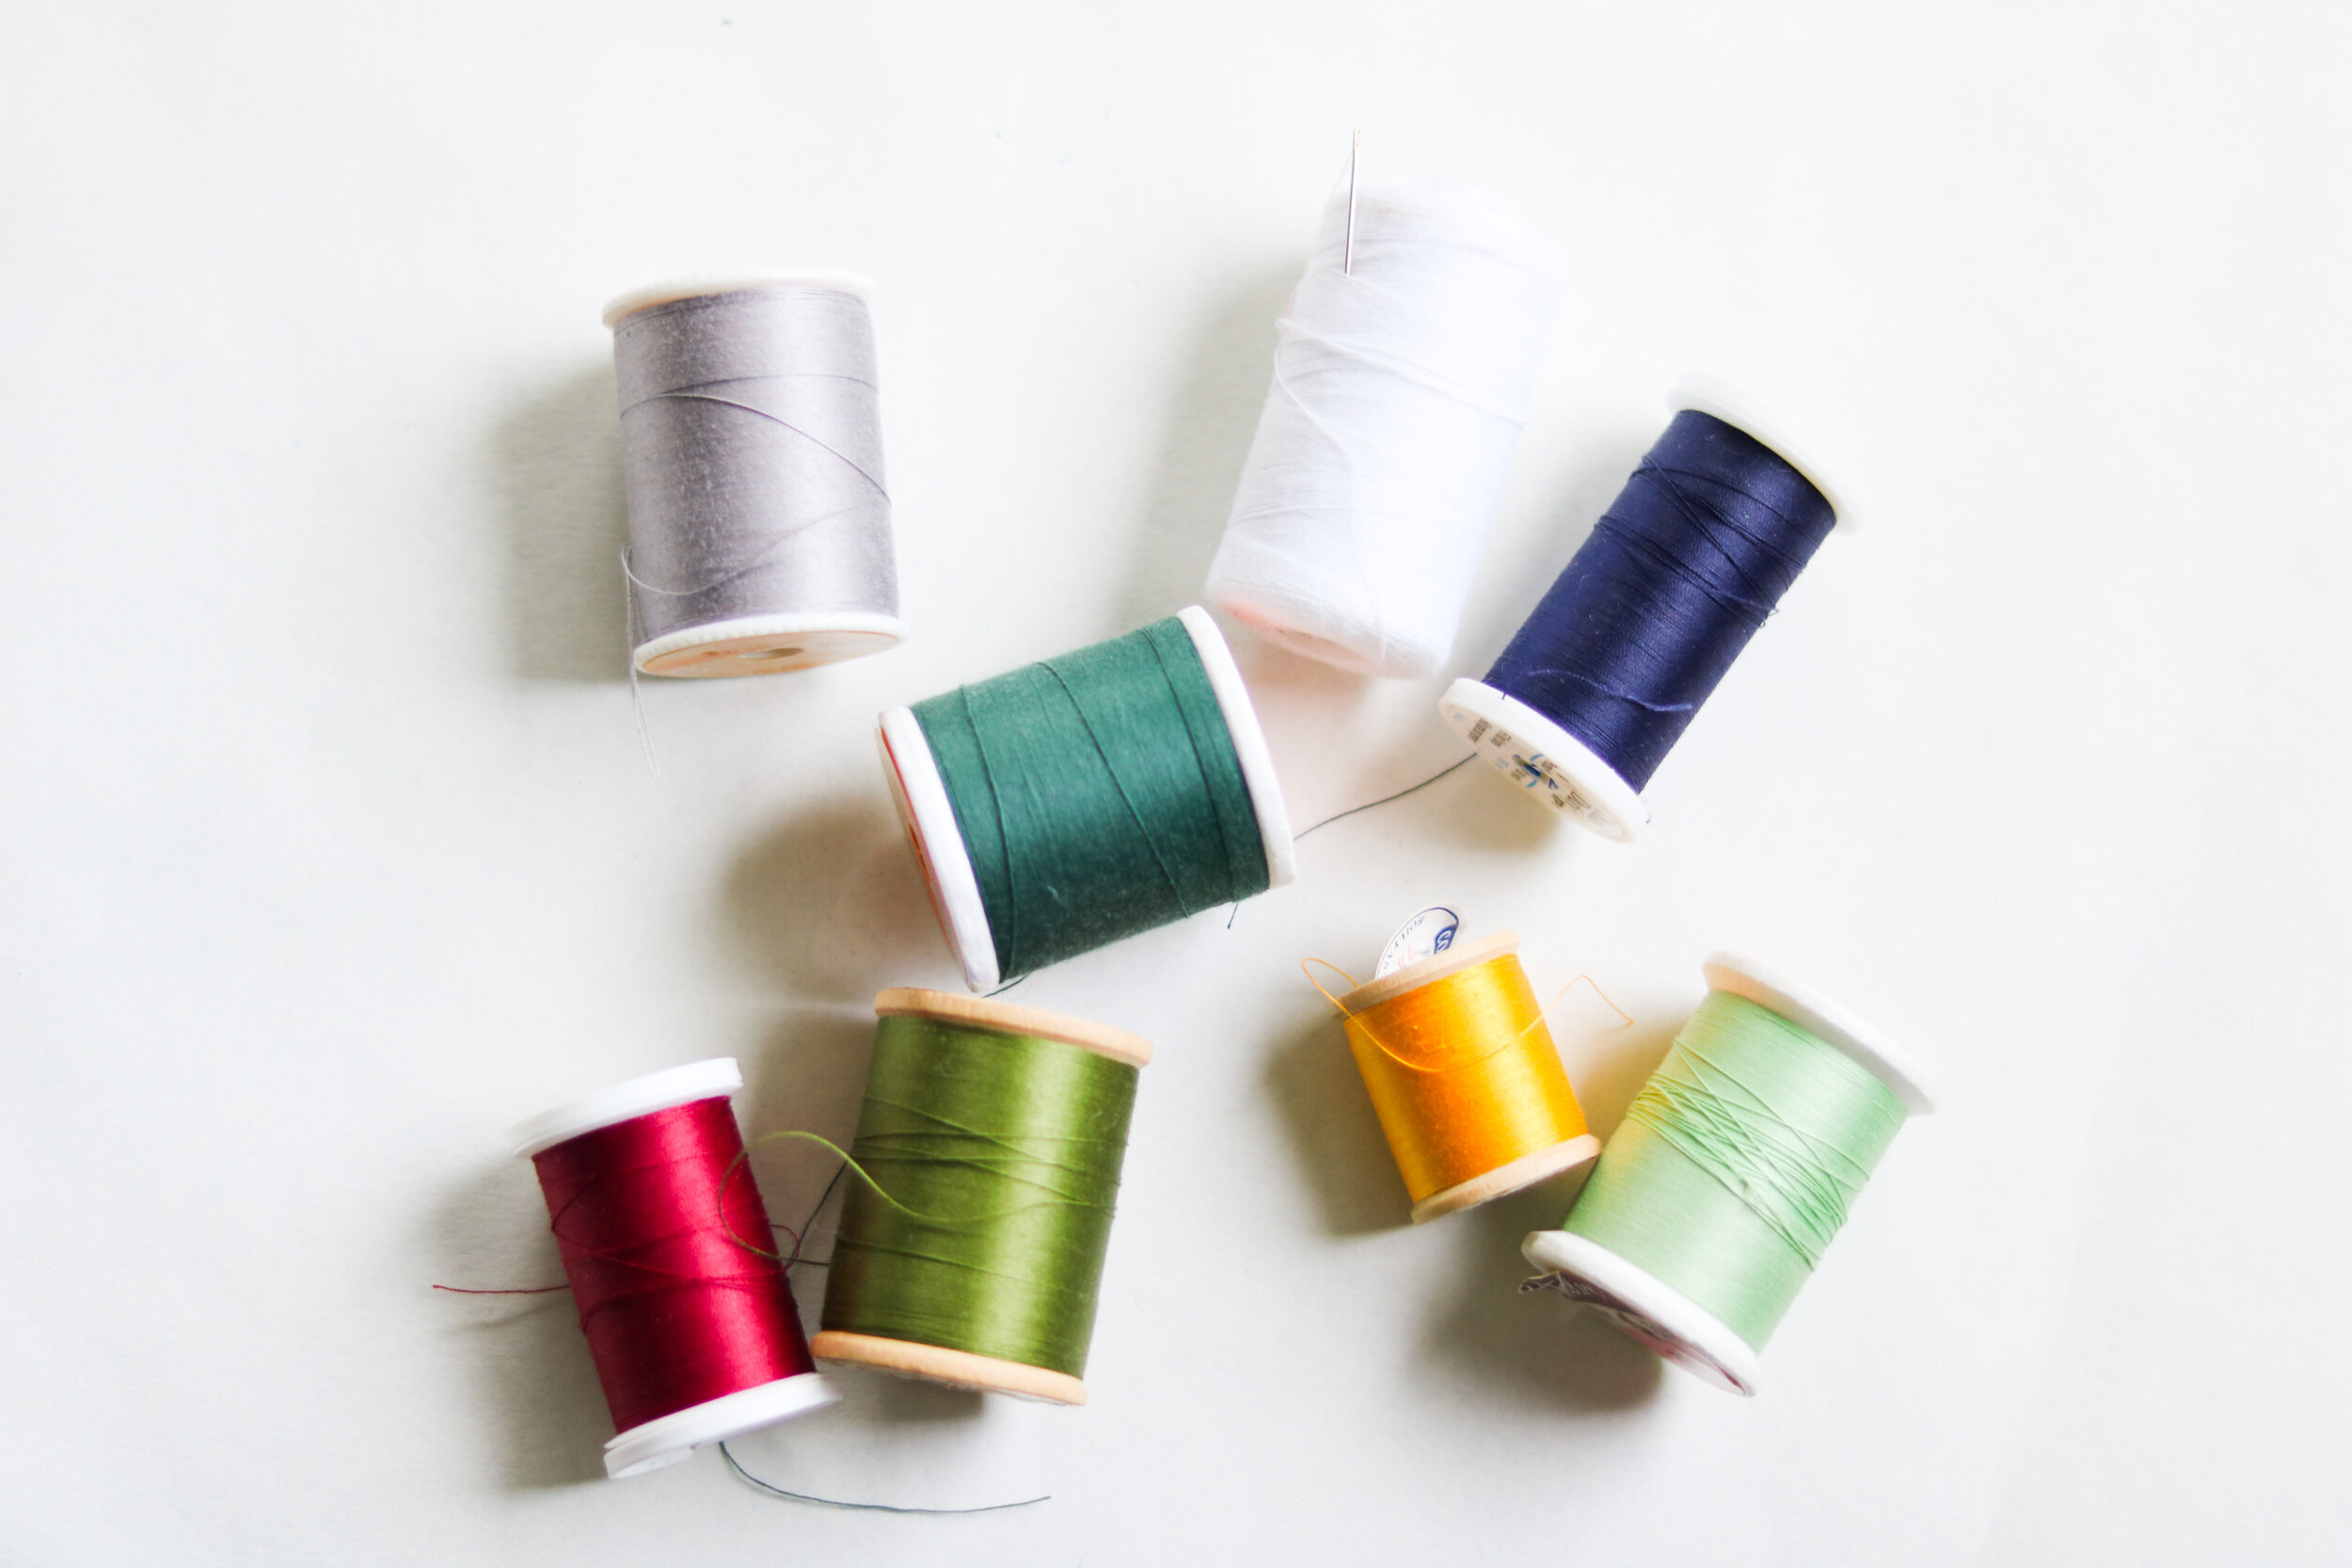
Felt in all the colors preferred
Embroidery floss + needle
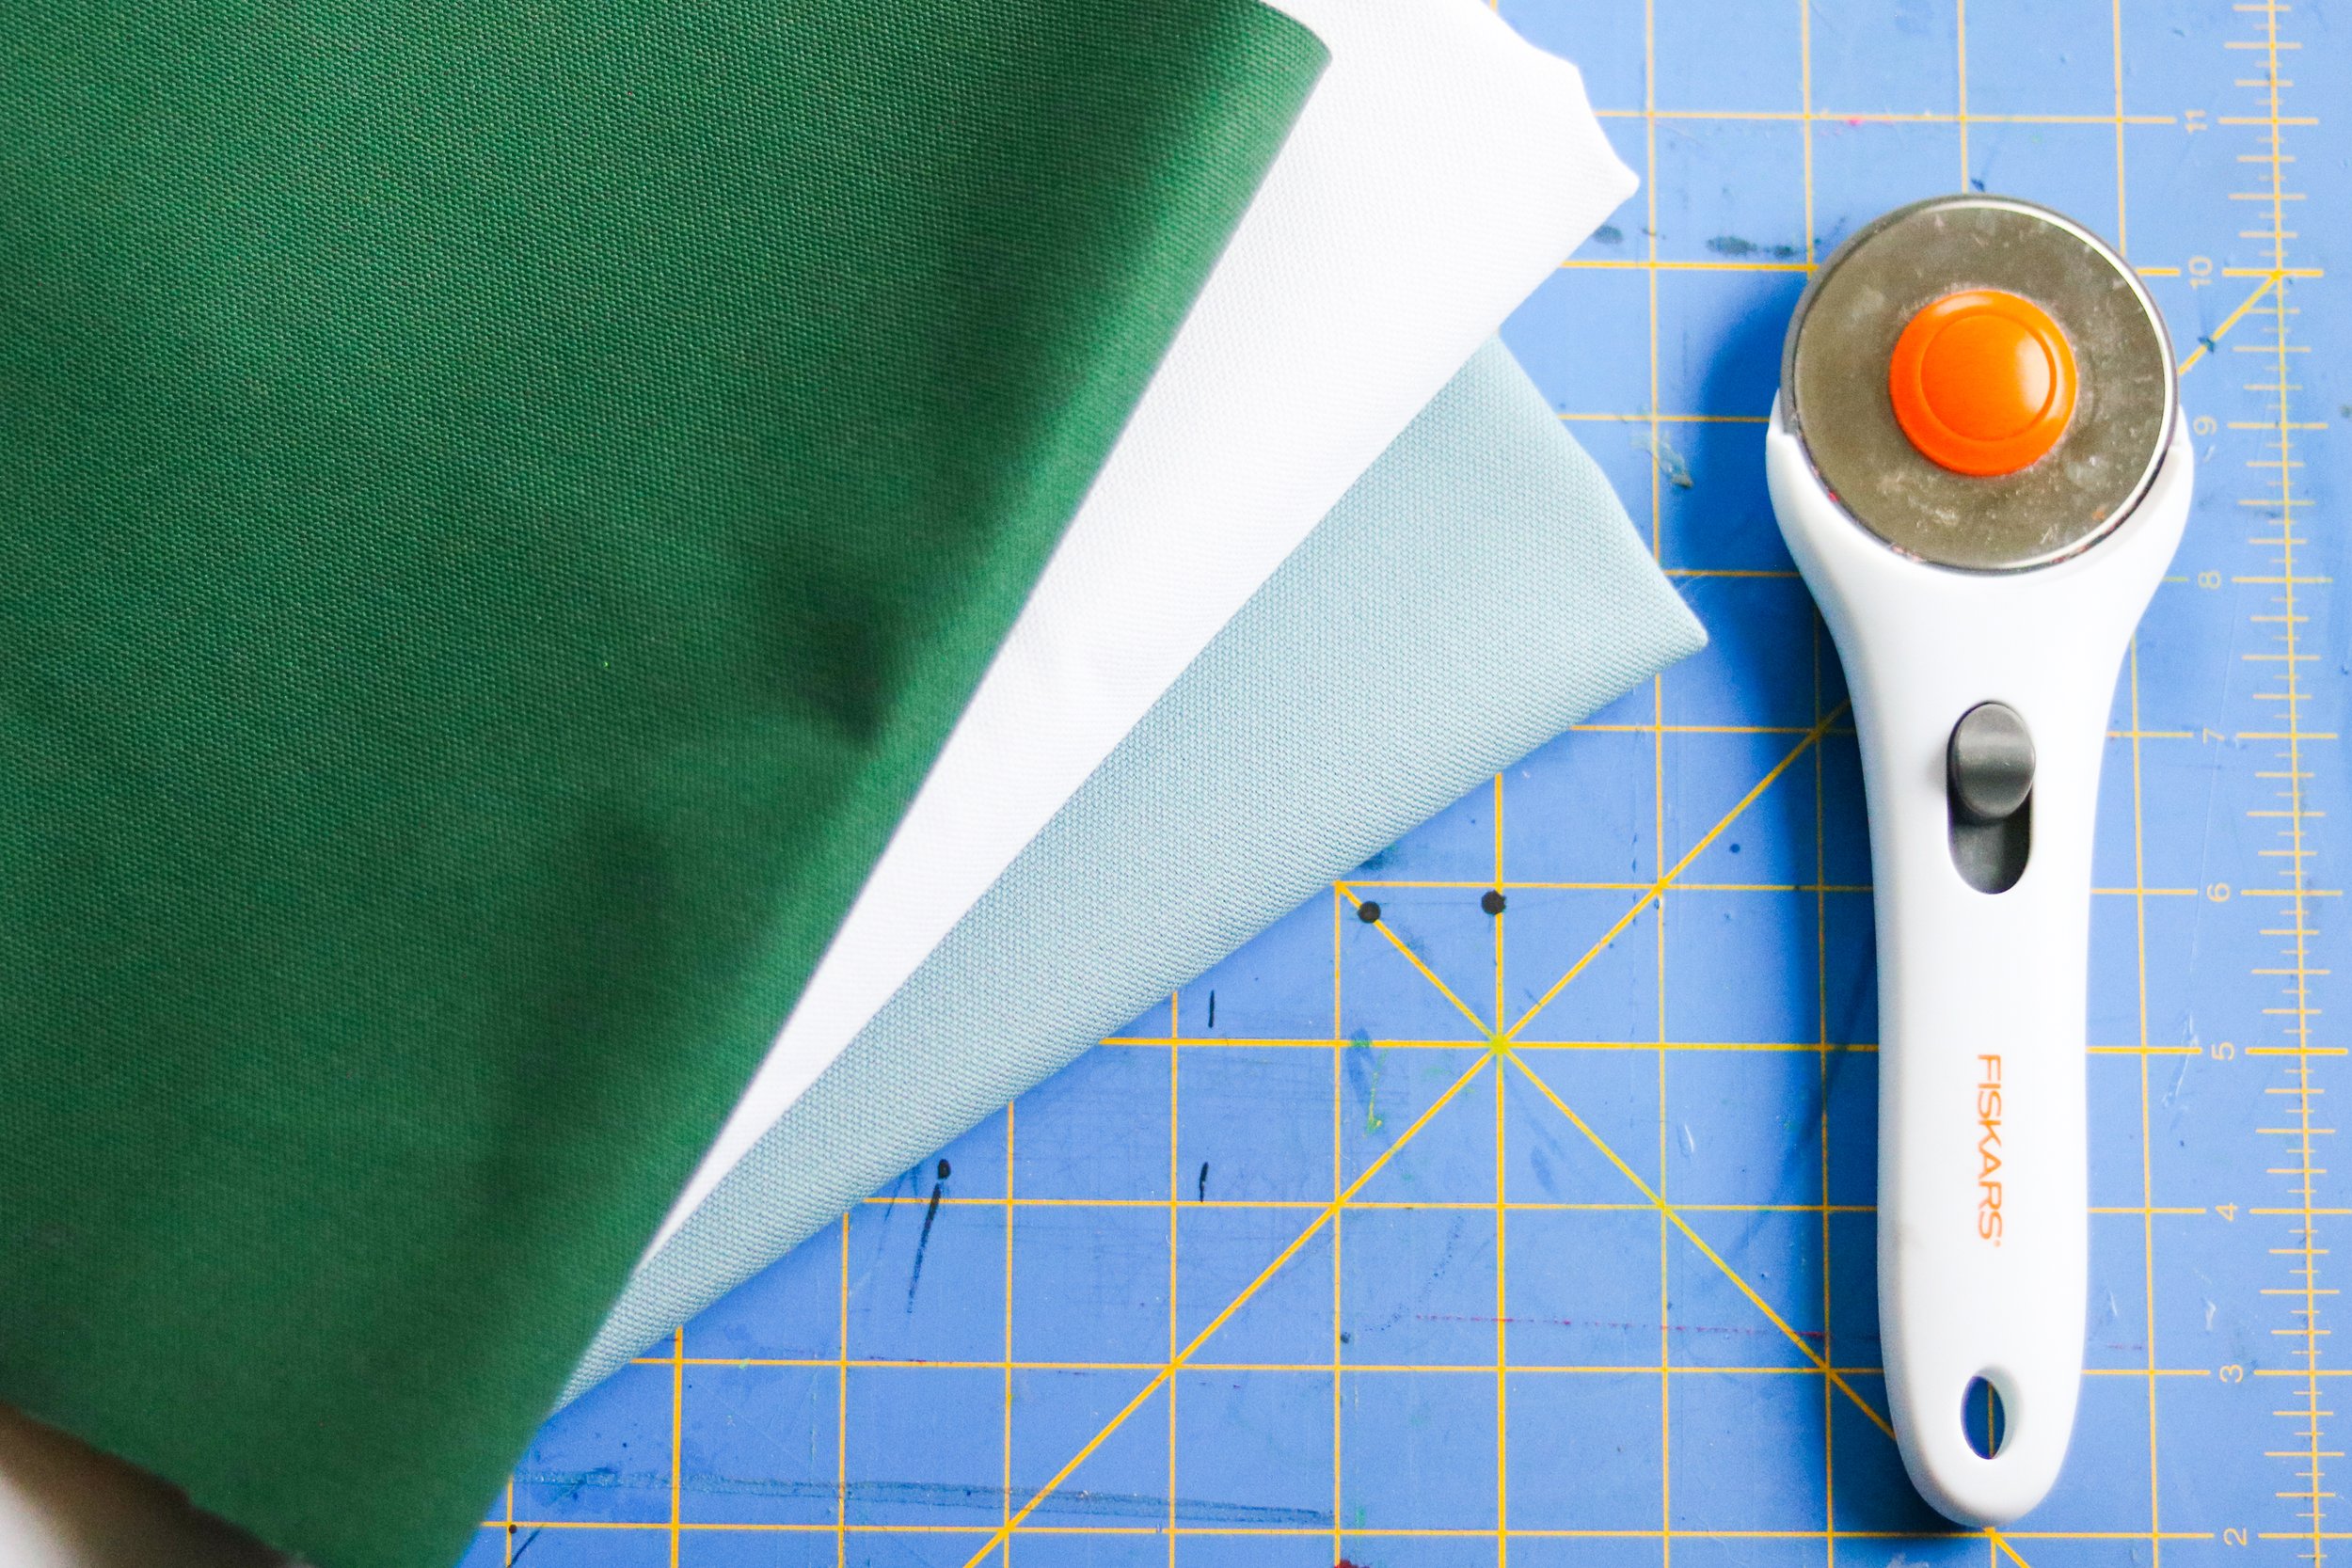
Duck canvas fabric in color scheme desired
Gold tinsel cord
Thick string/rope for hanging (optional)
Hot glue gun + glue sticks
Scissors
Permanent stamp ink pad + number stamp(s)
Sewing machine (you can also hand sew)
Feathers, glitter, beads, accents to add festive touches to your advent.
Fabric cutting mat (optional)
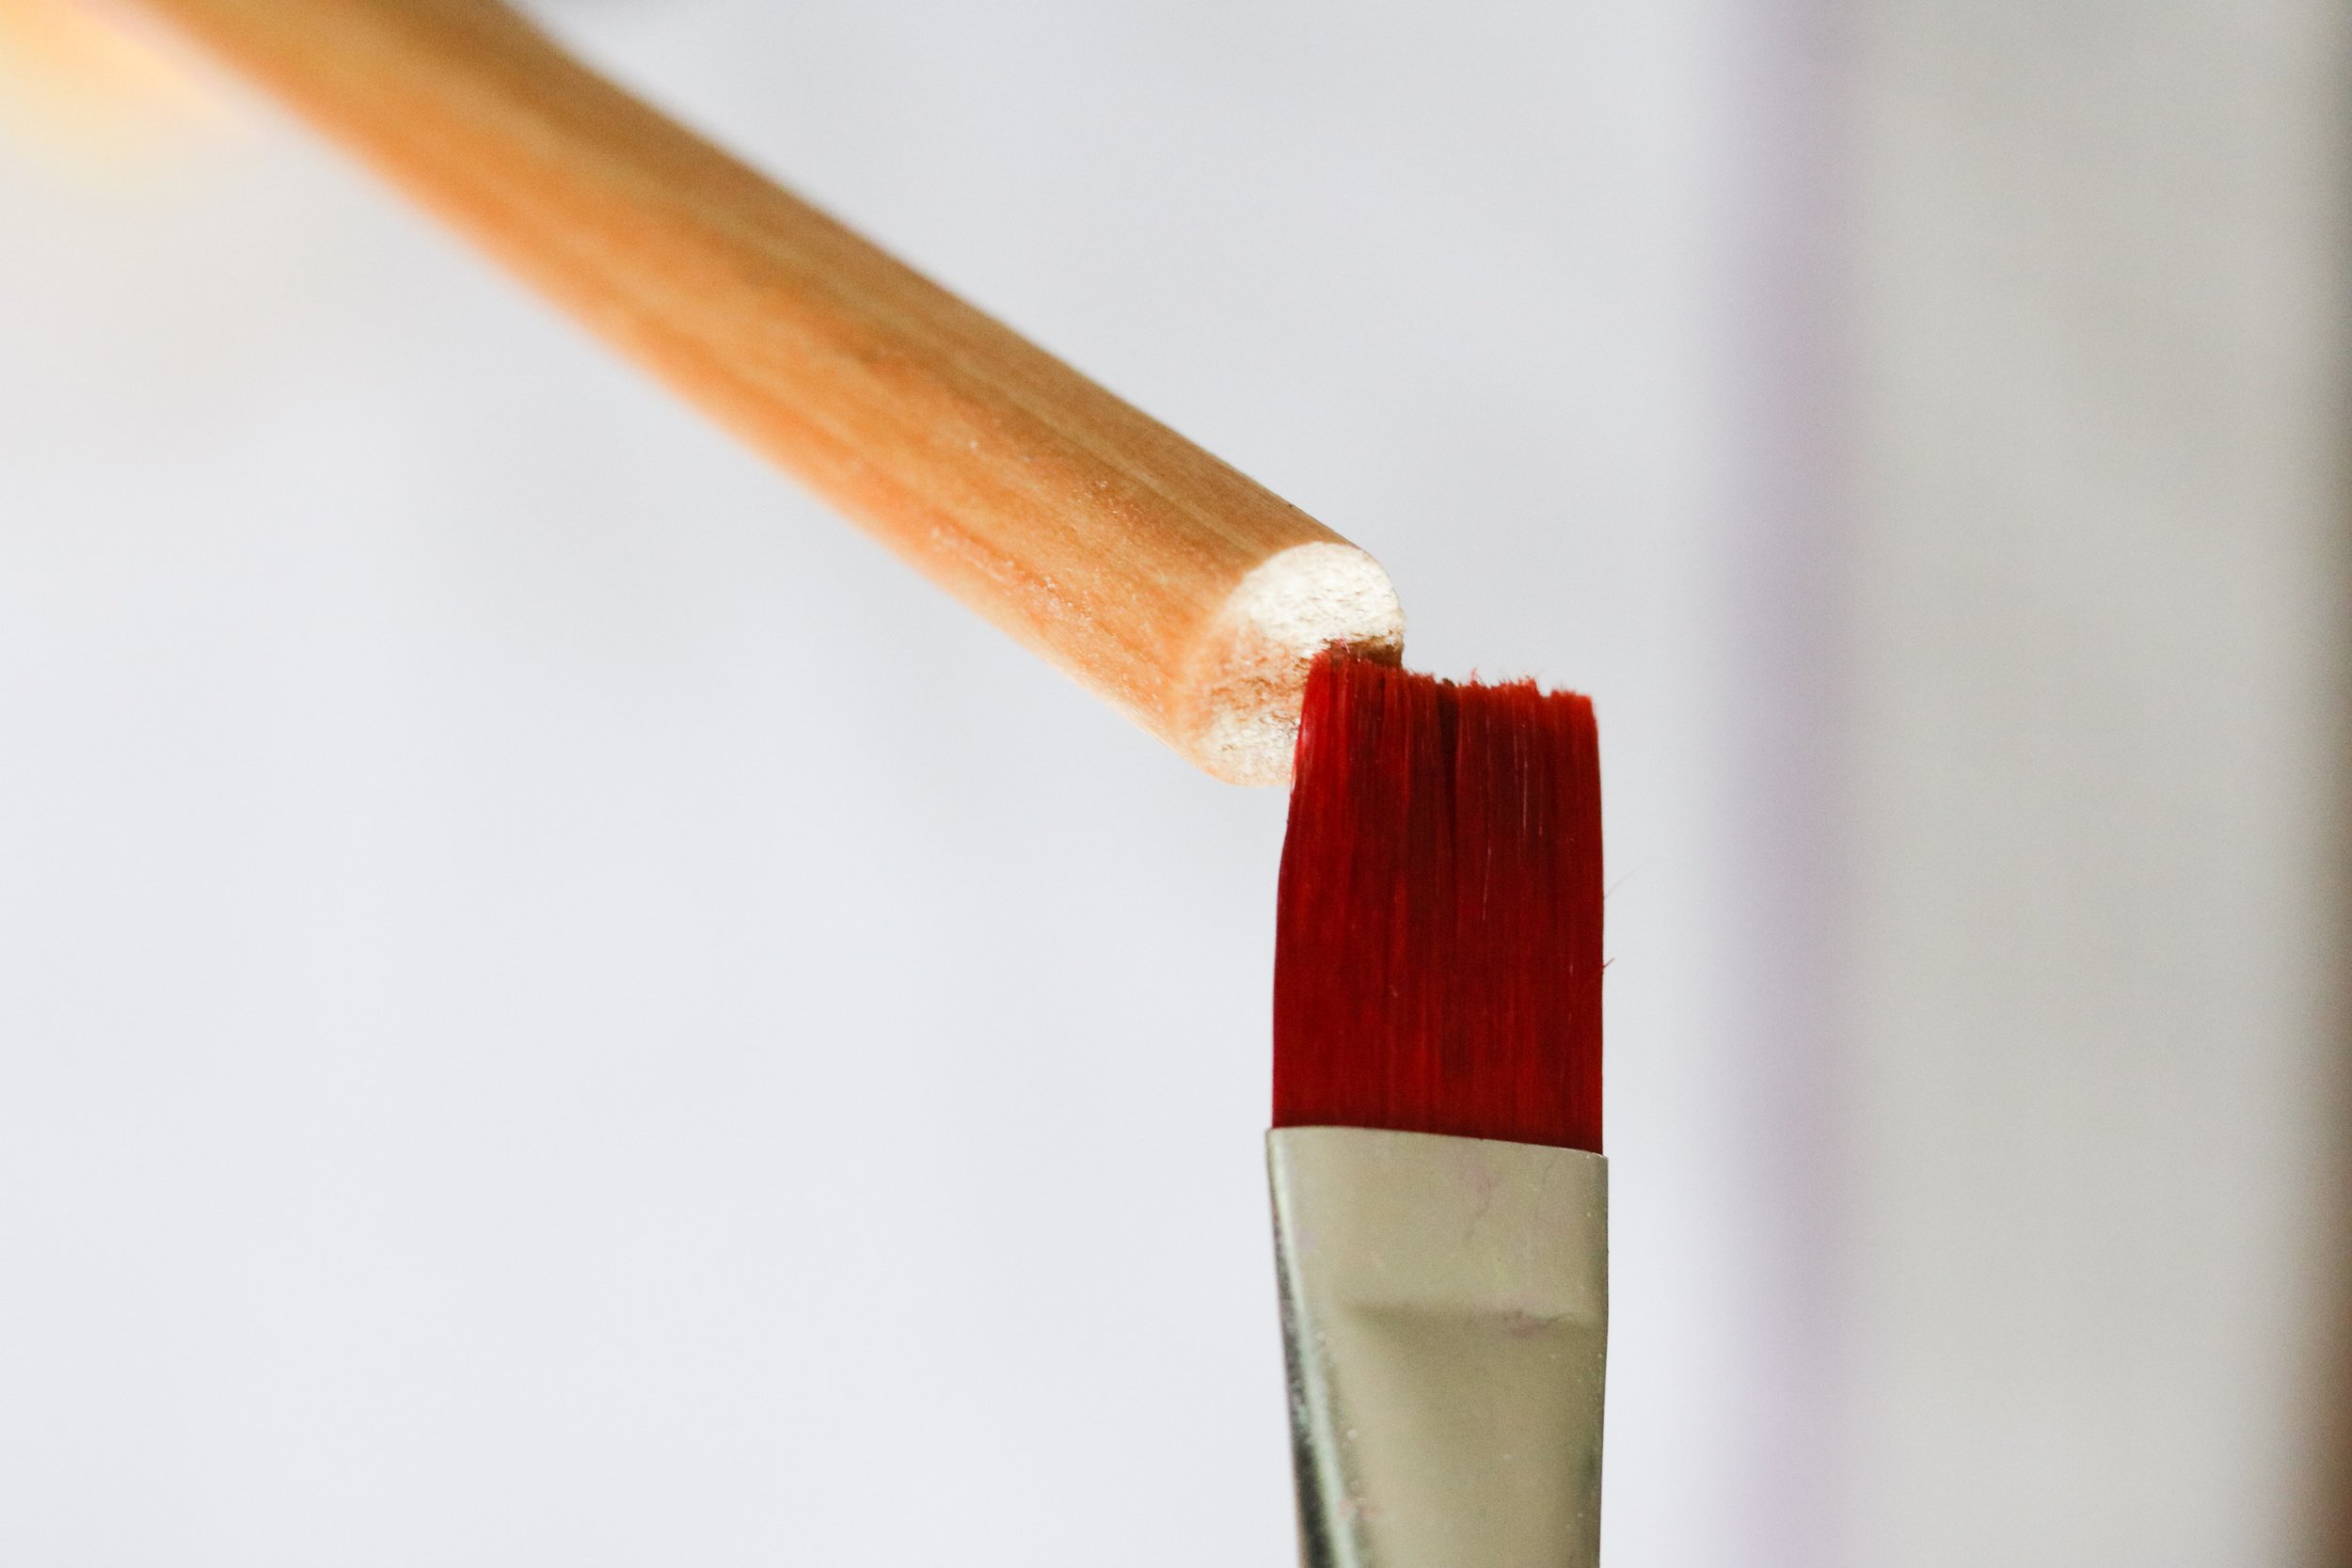
Small can of wood stain (optional) I used Golden Pecan 245 stain by Minwax Wood Finish.
Lots of cups of coffee/tea/hot chocolate/matcha (optional 😊)
STEP 1: Stain all of your wood dowels + let dry. I had the idea to use wood dowels and create a sort of pattern with them. I envisioned using gold hooks to hang pockets from—these pockets would be adorned with felt scenes of the things we love and traditionally do for Christmas every year.


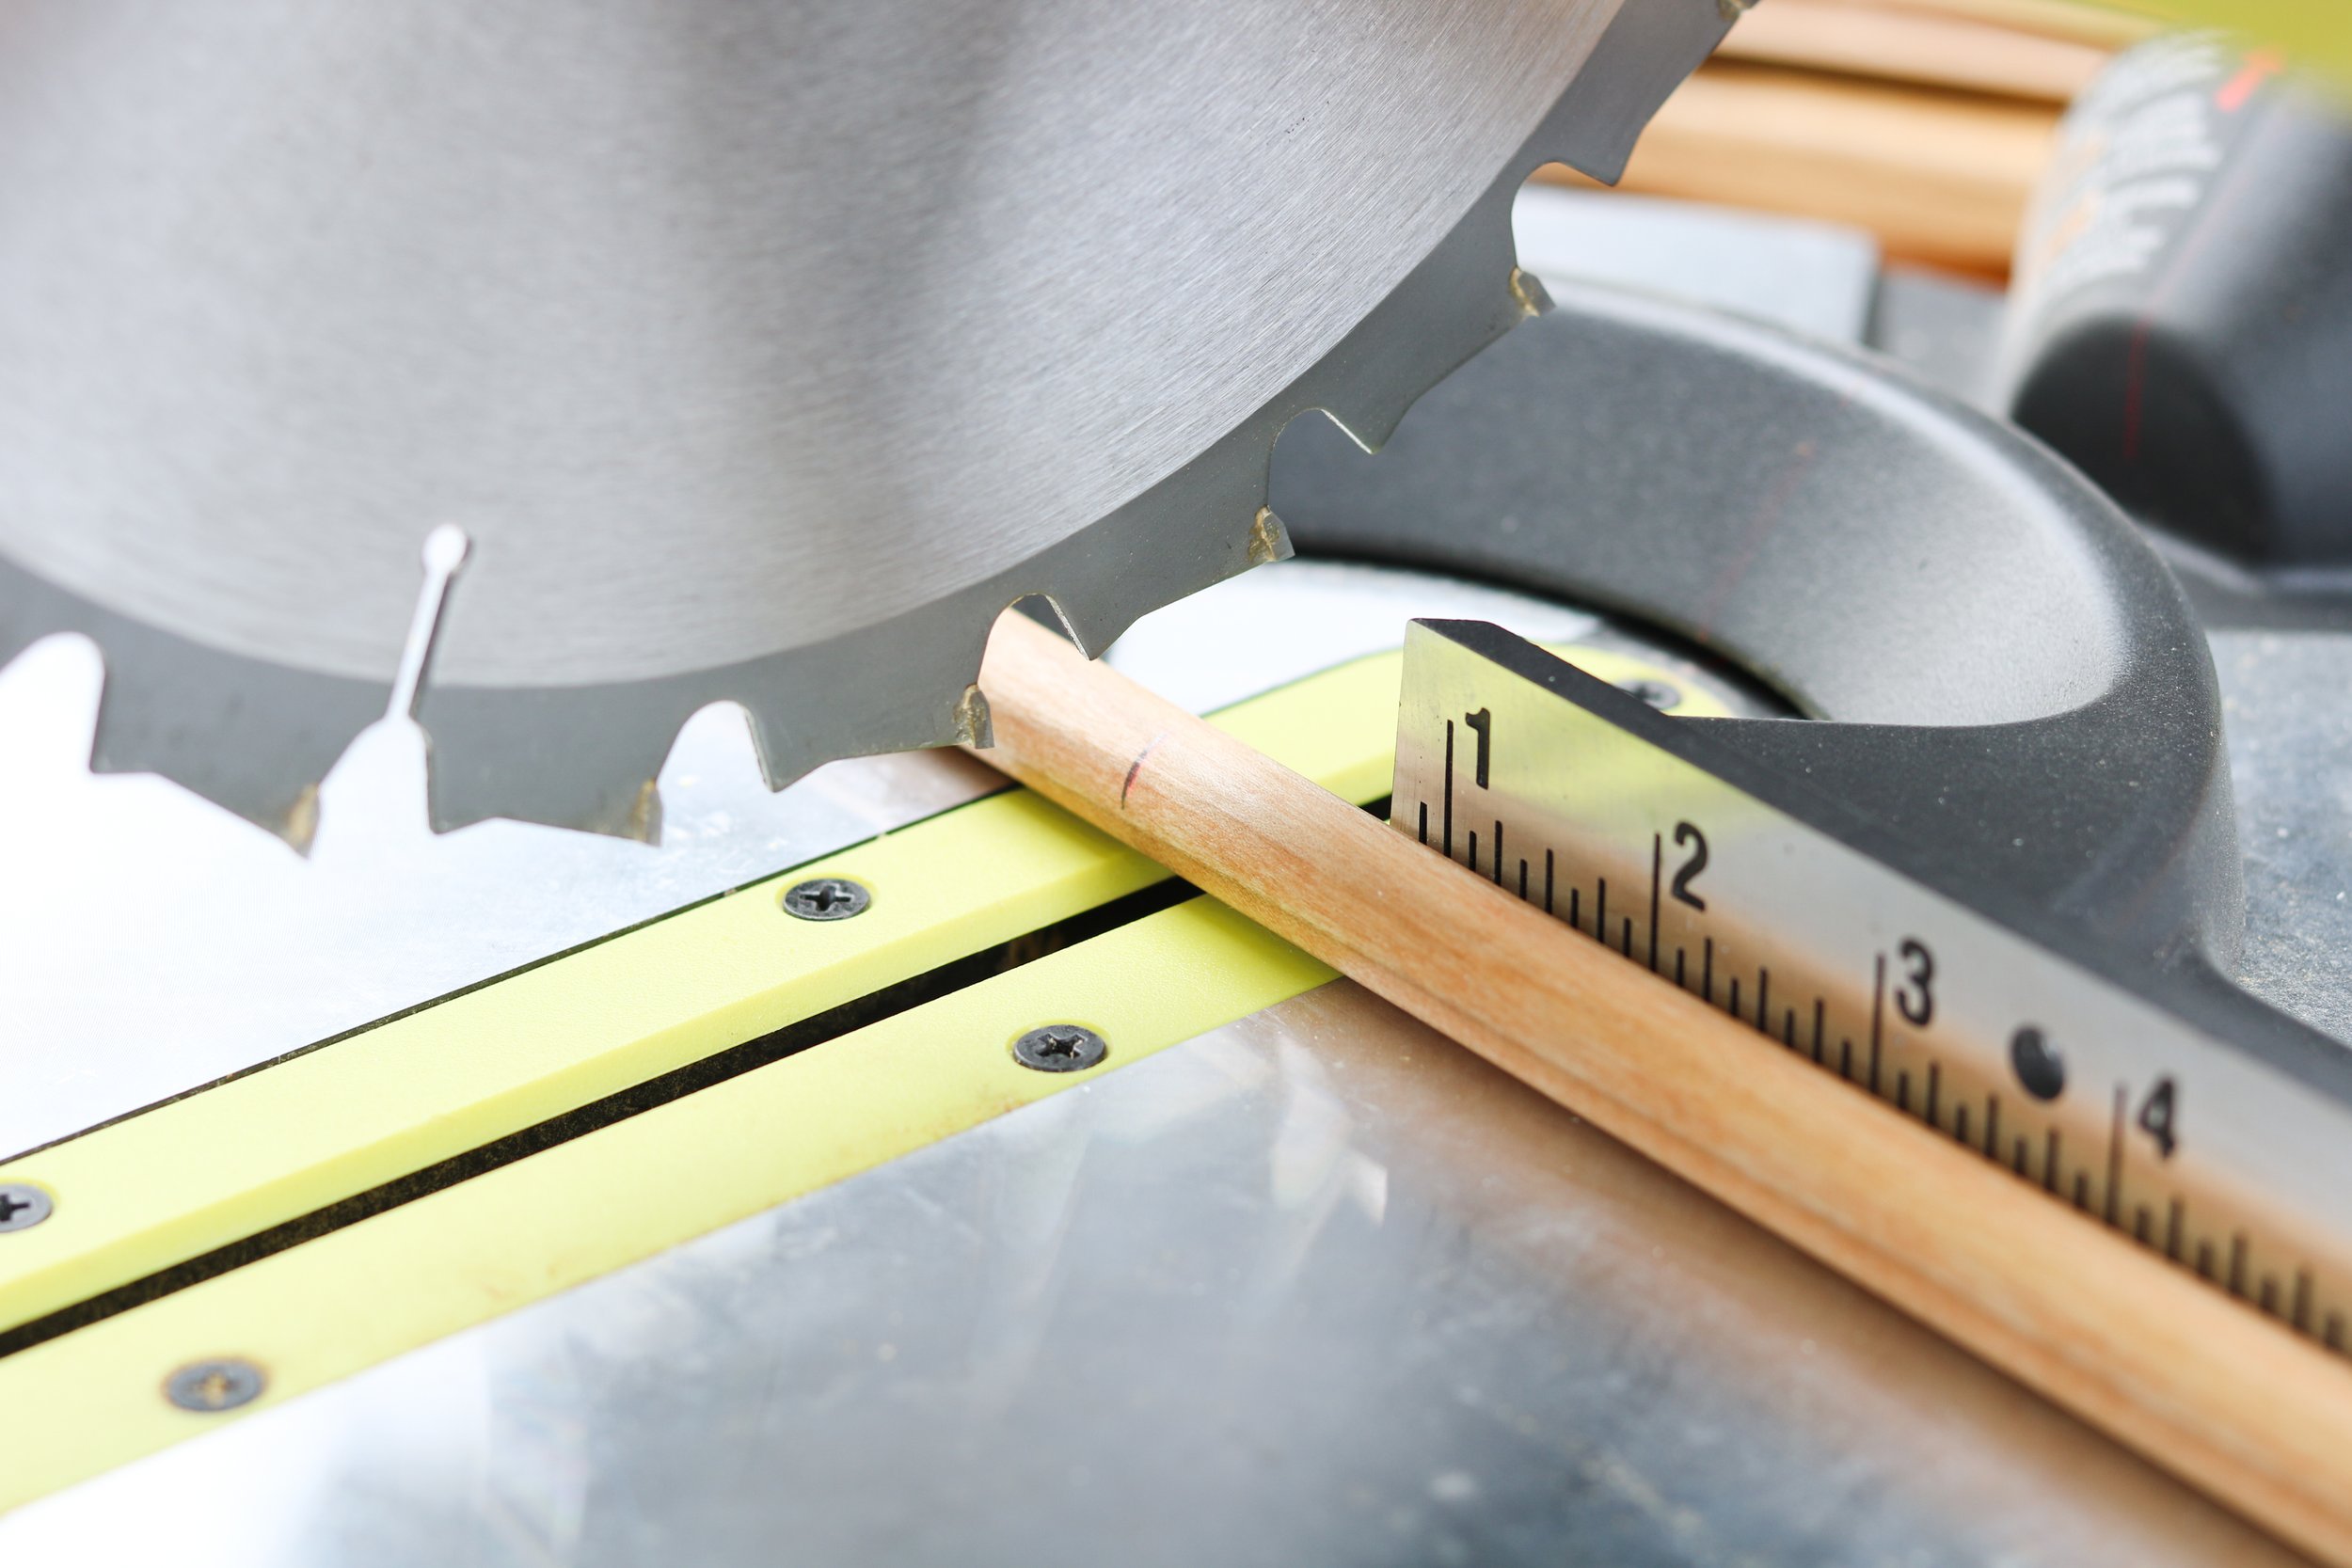
STEP 2: Cut your dowels to size desired, then sand and stain the ends of your cut dowels. This is how we cut ours:
(5) Pieces 27 inches long, these will be the vertical pieces
(6) Pieces 17.5 inches long, these will be the horizontal pieces
(1) Piece 21 inches long, this will be the top piece of your advent calendar


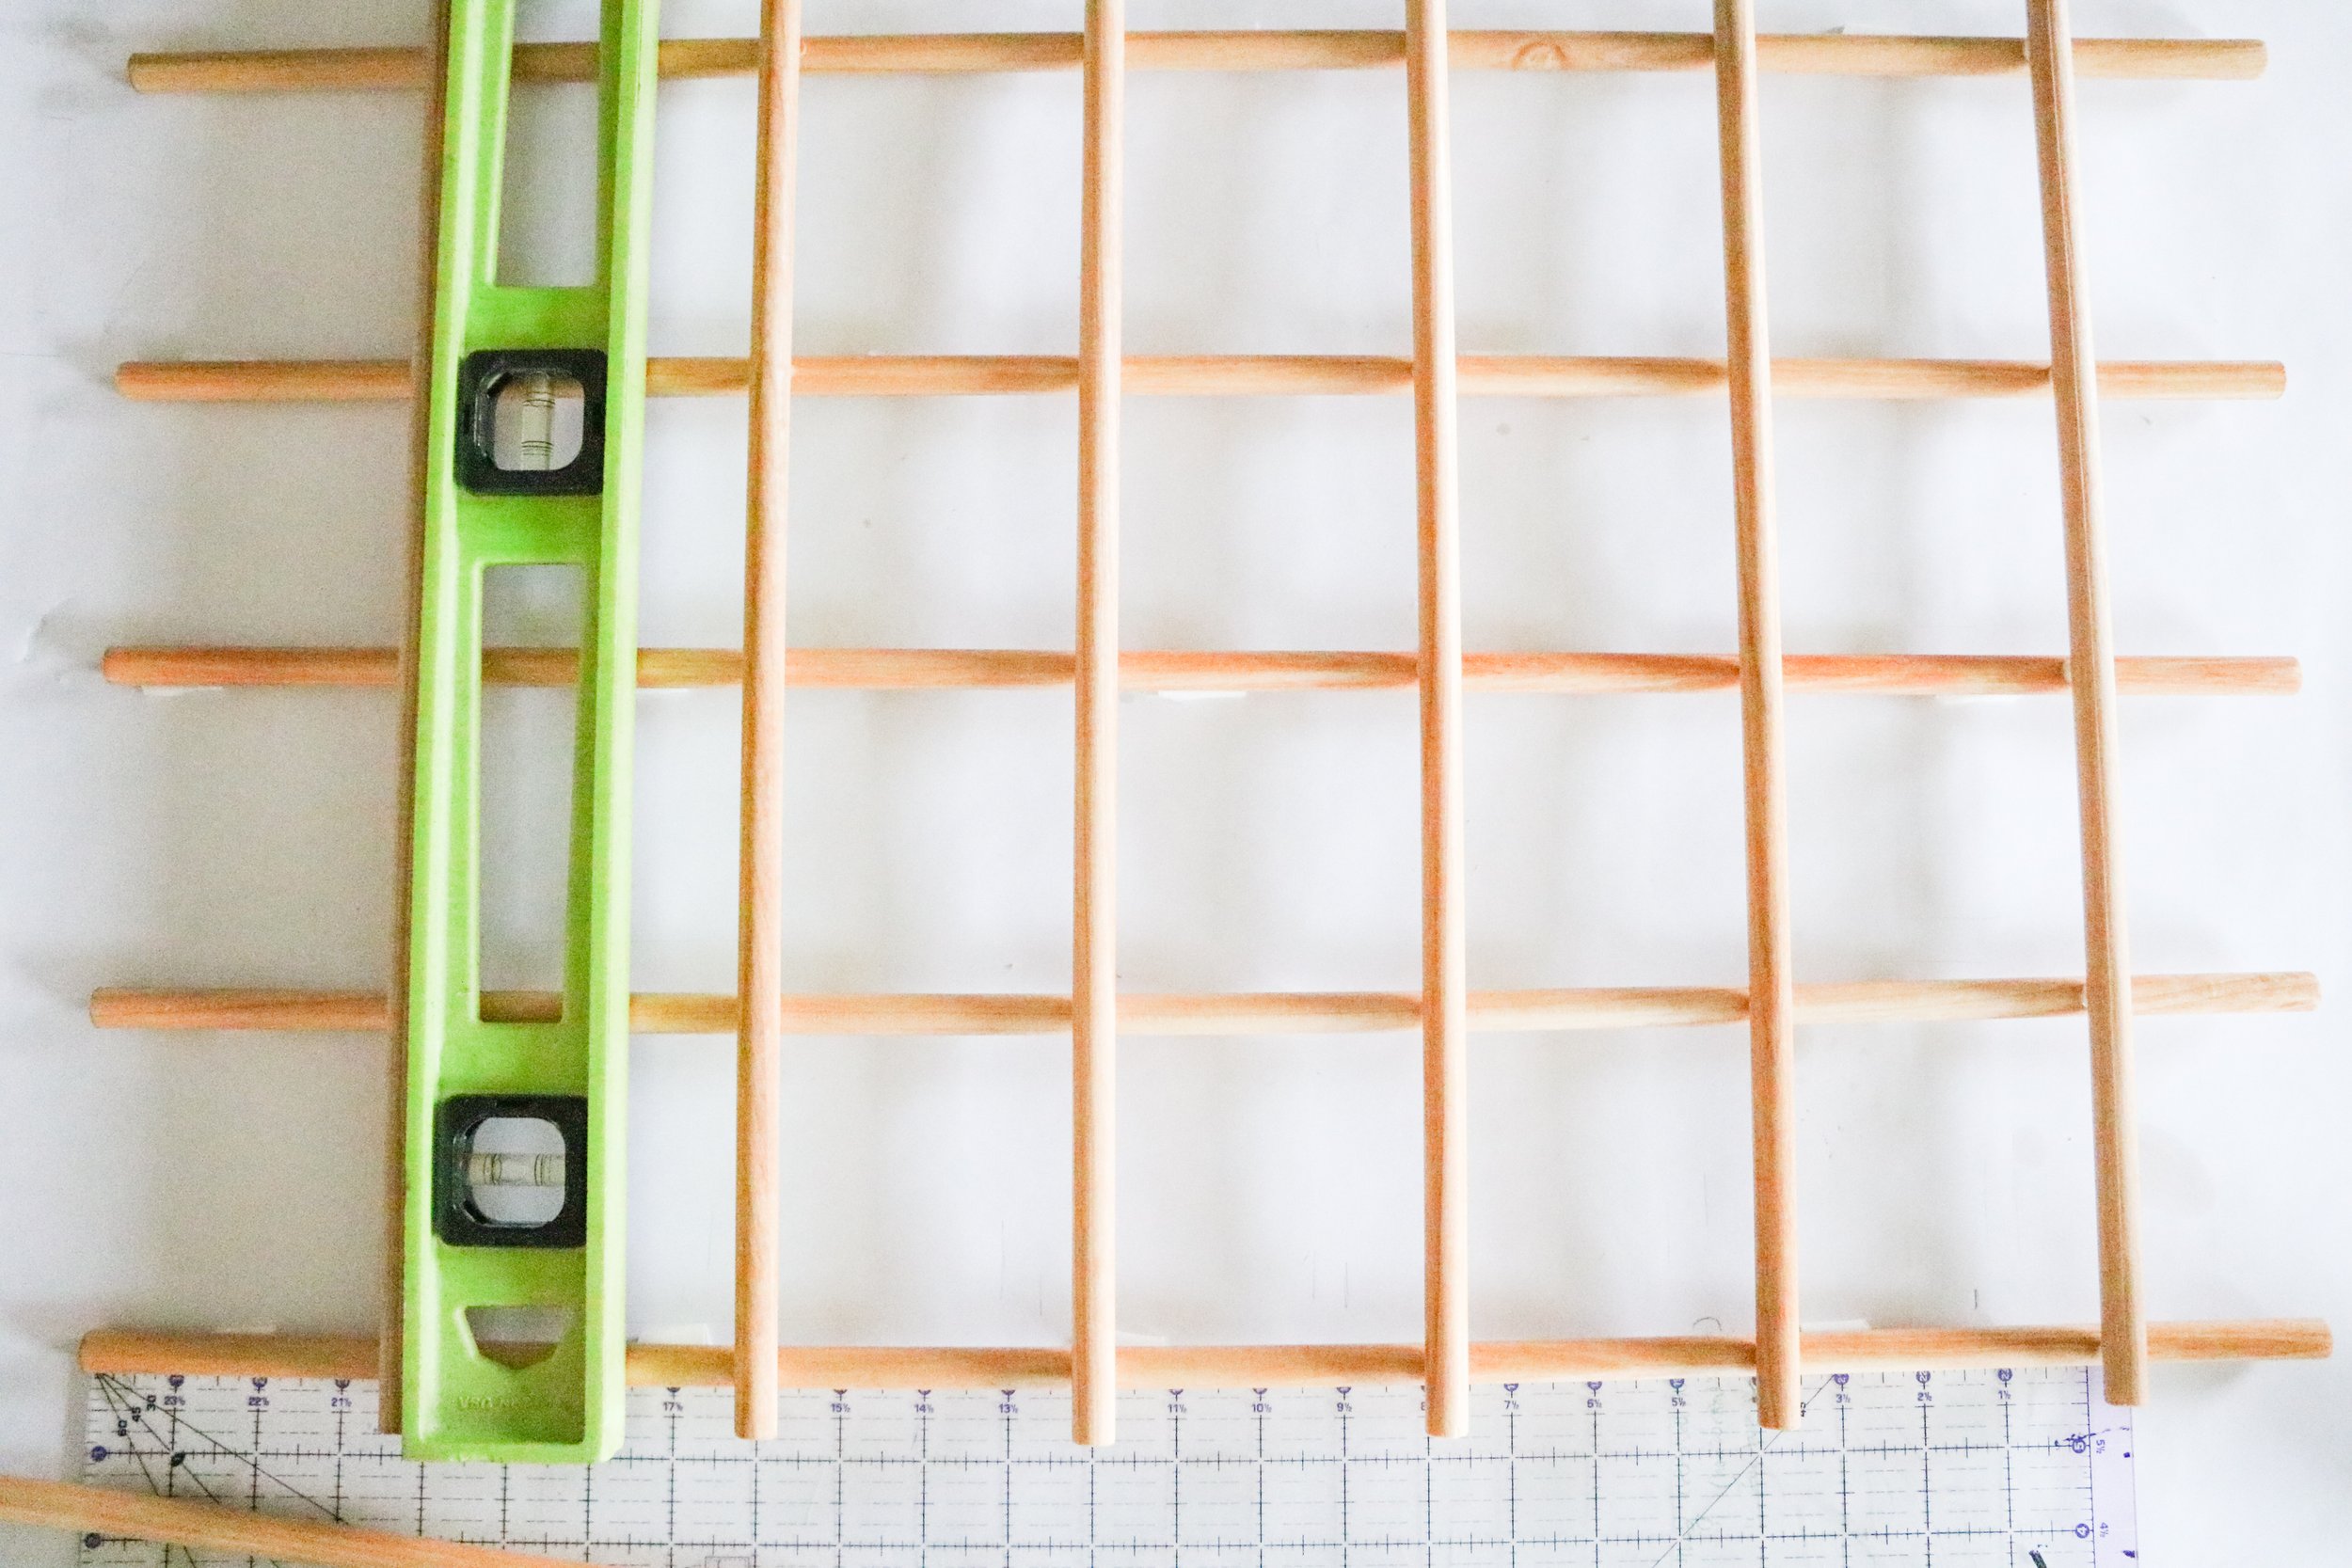
STEP 3: Lay your cut wood dowels out and using your level + ruler: measure so that your 5 vertical pieces are 4 inches apart.
*Tip* we used duct tape to hold them in place on our working surface (you can use a fold out table, studio table, etc).

STEP 4: Then using your level, take your 6 horizontal pieces, start to glue down using wood glue and laying each piece carefully on top of your vertical pieces. Measure to 4 inches apart as well. Let dry.
*Tip* give this step plenty of time to dry in a space where it will not be touched or moved (wood glue suggested curing time is 24 hours). You can move on to steps 5 + 6 while you wait for your glue to dry.

STEP 5: Grab your canvas fabric in the colors you picked out. We went with hunter green, white and a denim blue. Fold the fabric in half so that when you cut your squares for the pockets, you will have 2 pieces for each pocket. We created a total of 48 squares measuring 3 x 3 inches which will equal to 24 pockets.
*Tip* We pinned our sets of squares together making easier for sewing.

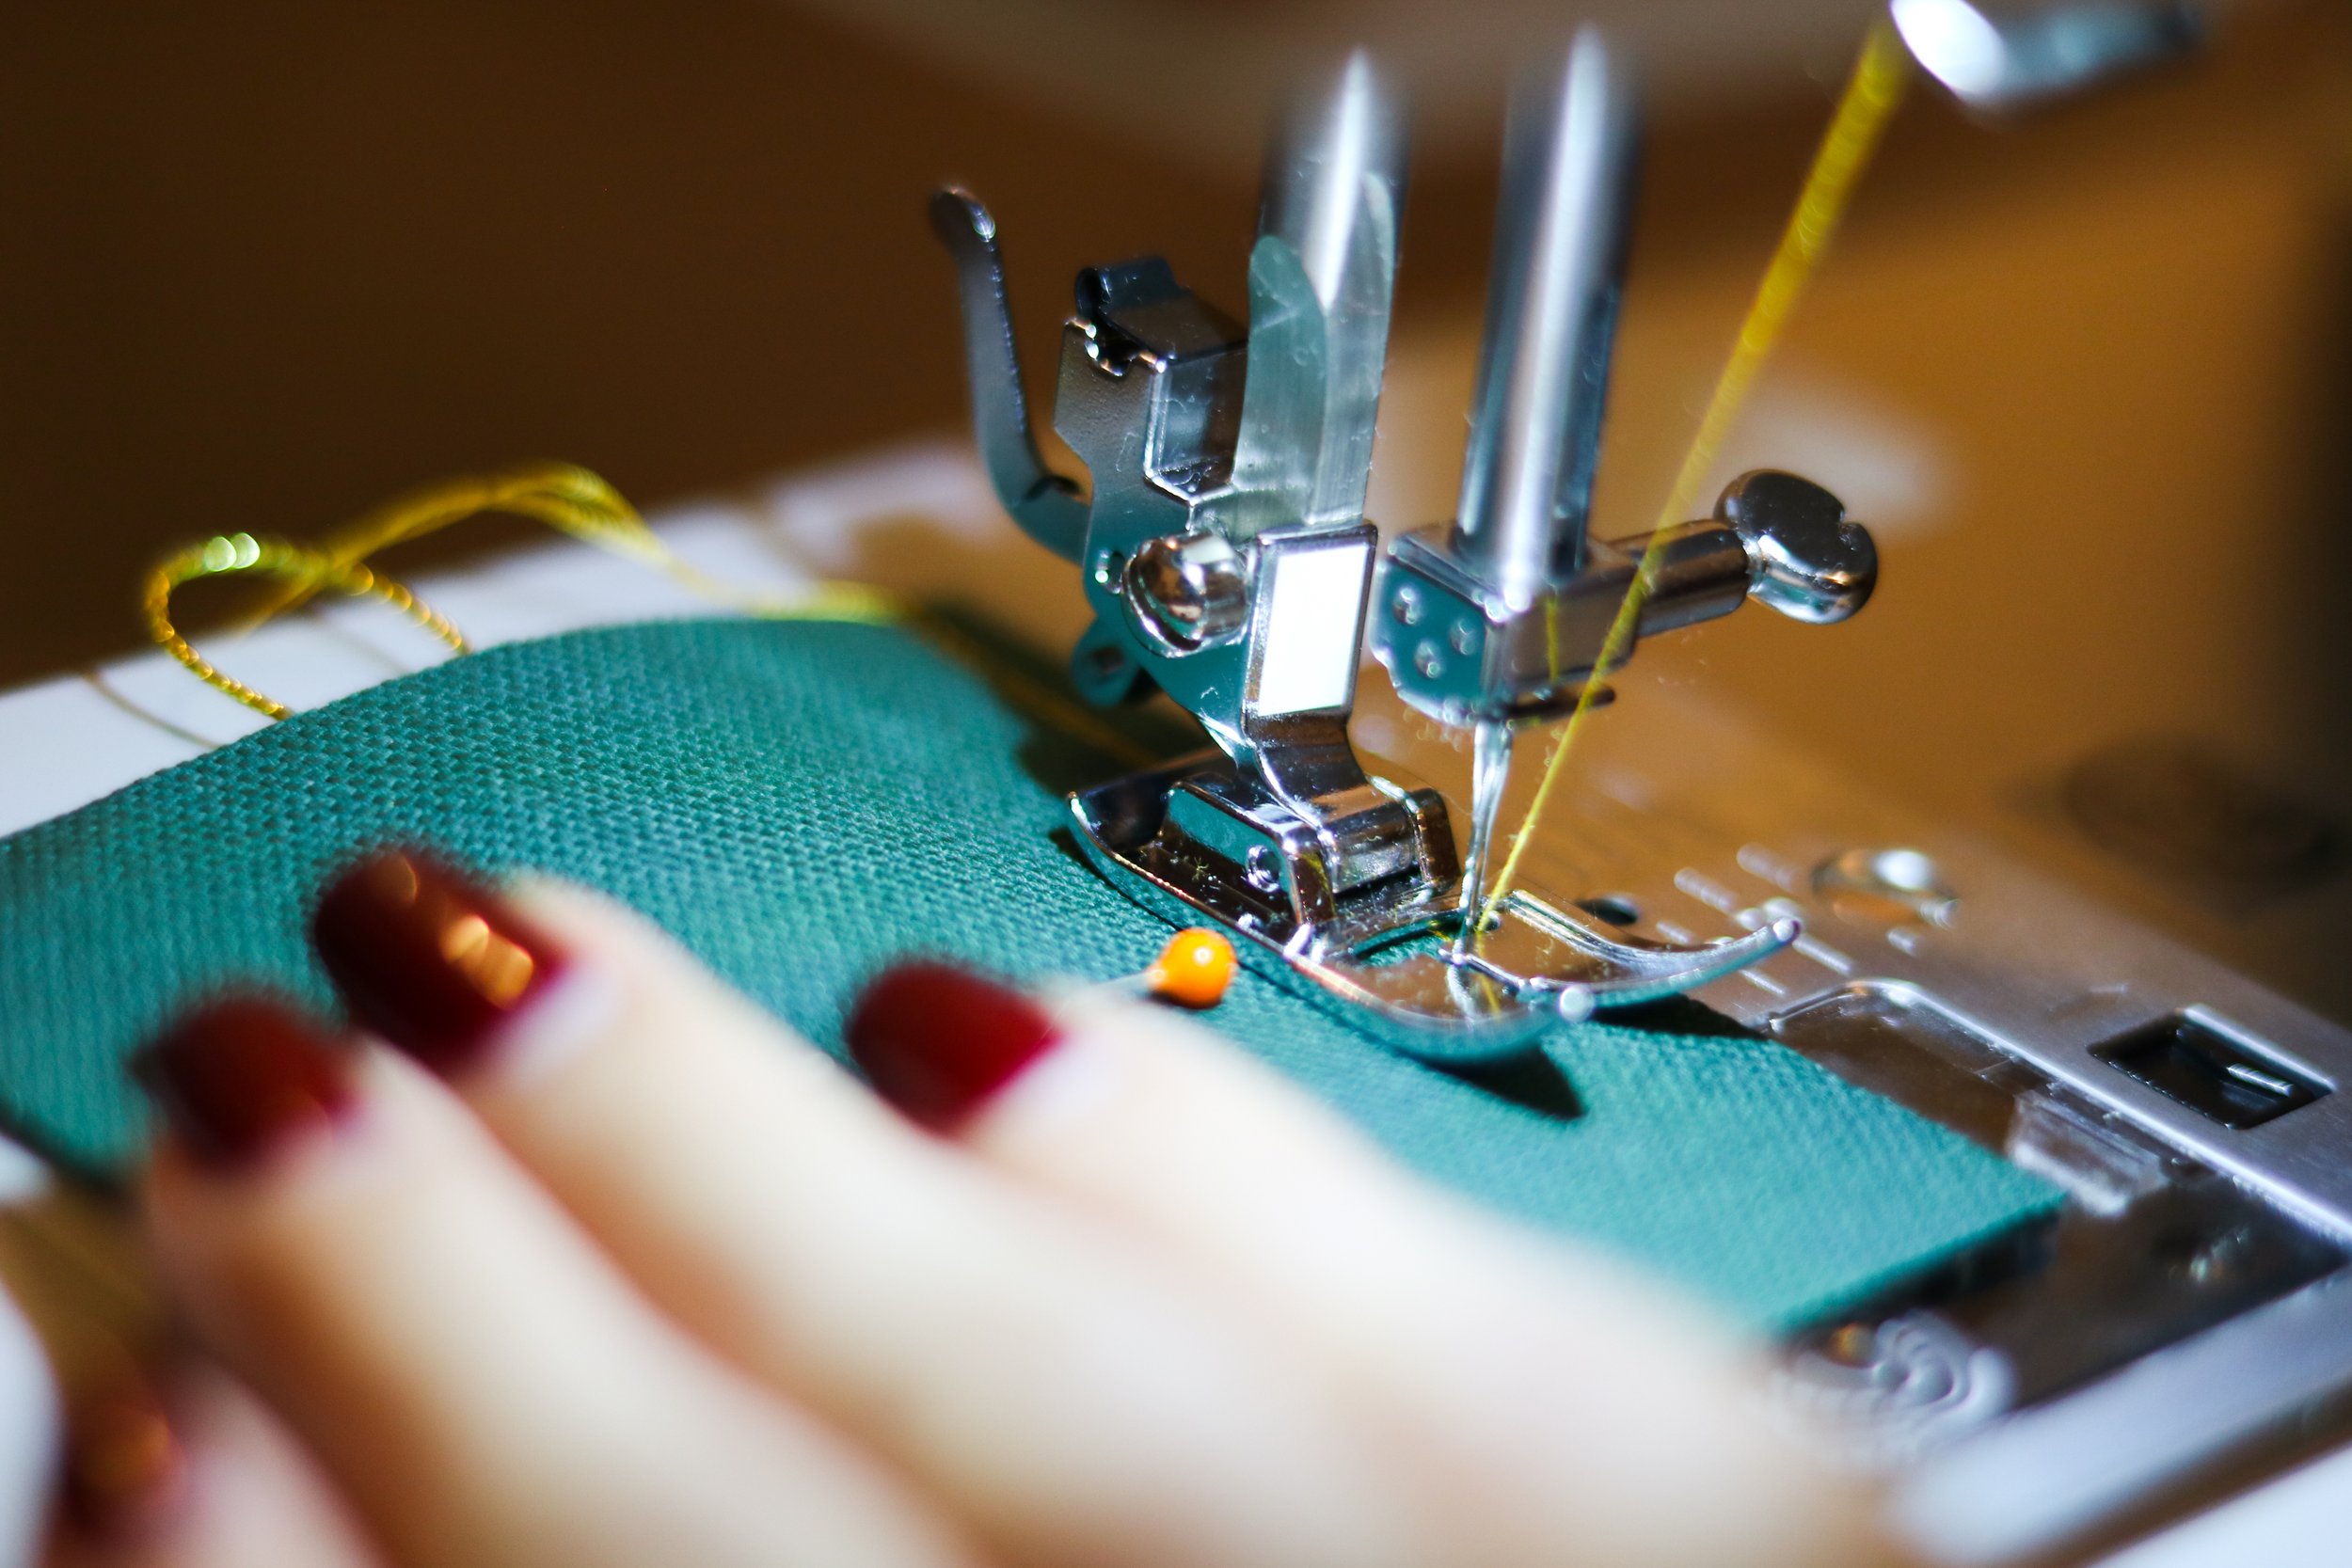
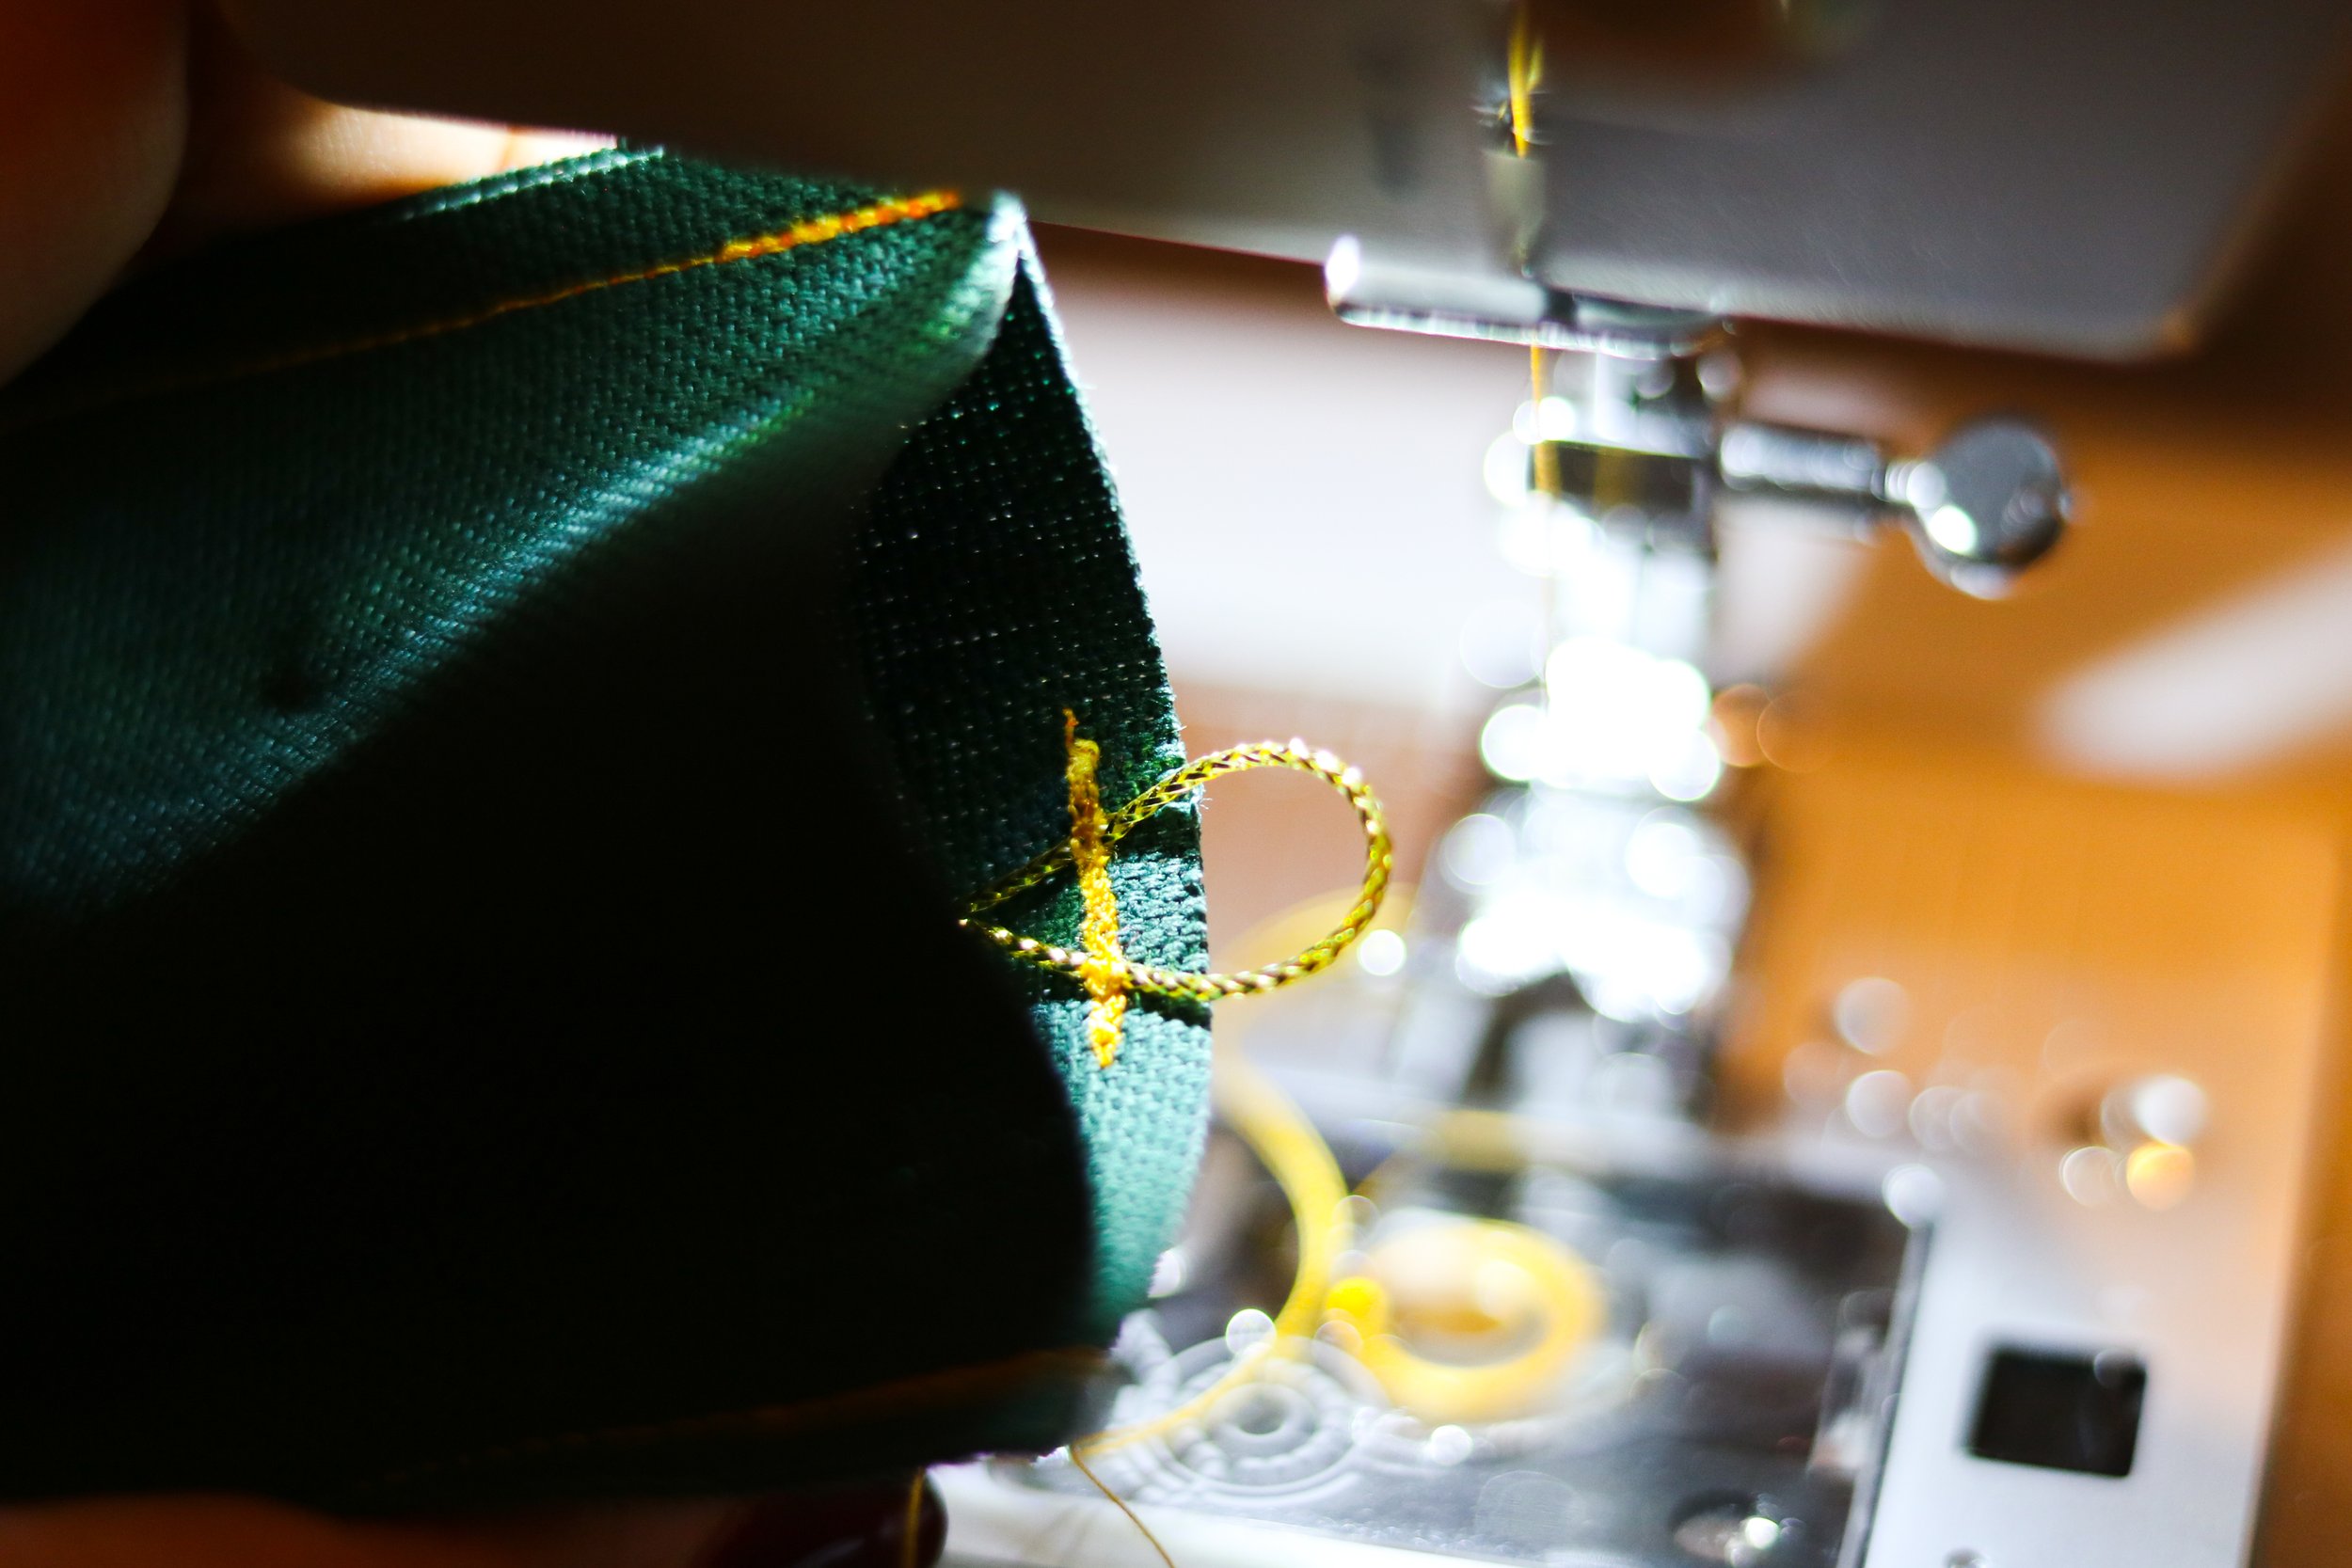
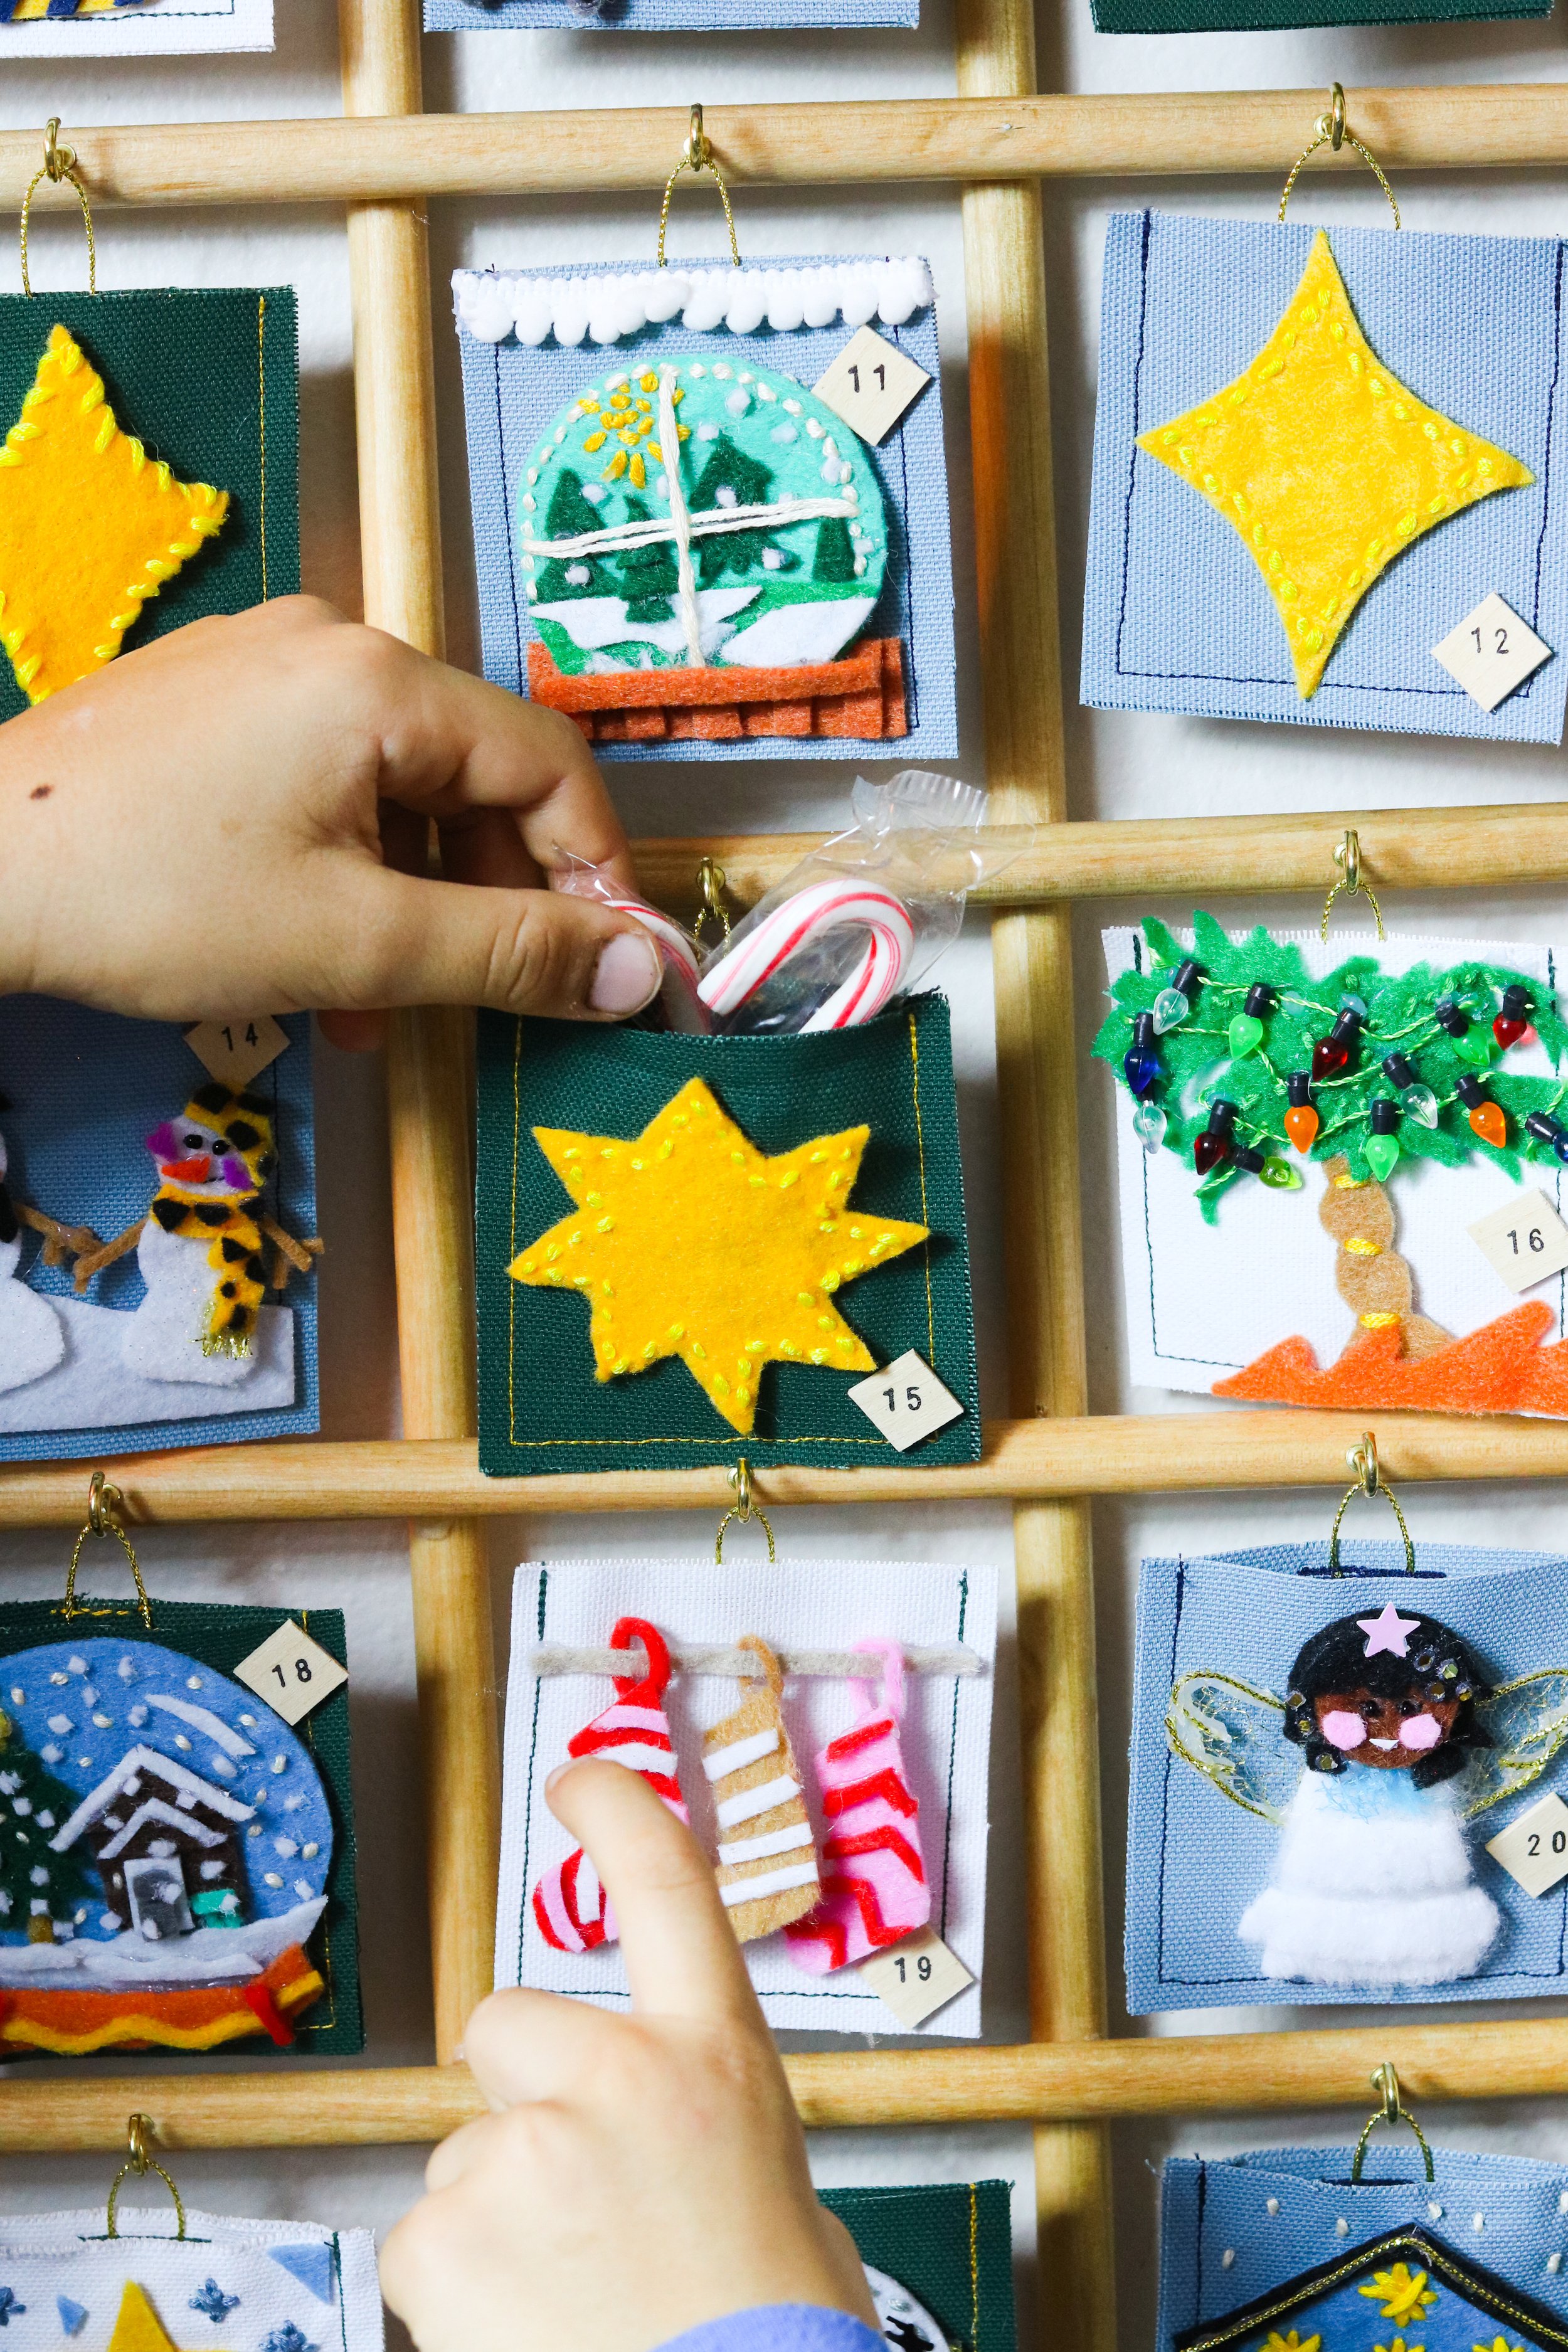
STEP 6: Sew 3 sides of each of your square sets leaving 1 side open—creating a pocket. Then sew/glue a small piece of string into a loop shape on the inner back of your pockets. You can also sew the loop on the side you are going to choose to be the open side—THEN sew the other 3 sides. Whatever works best for you. This will allow you to hang them. TA•DAAA! You now have adorable pockets.

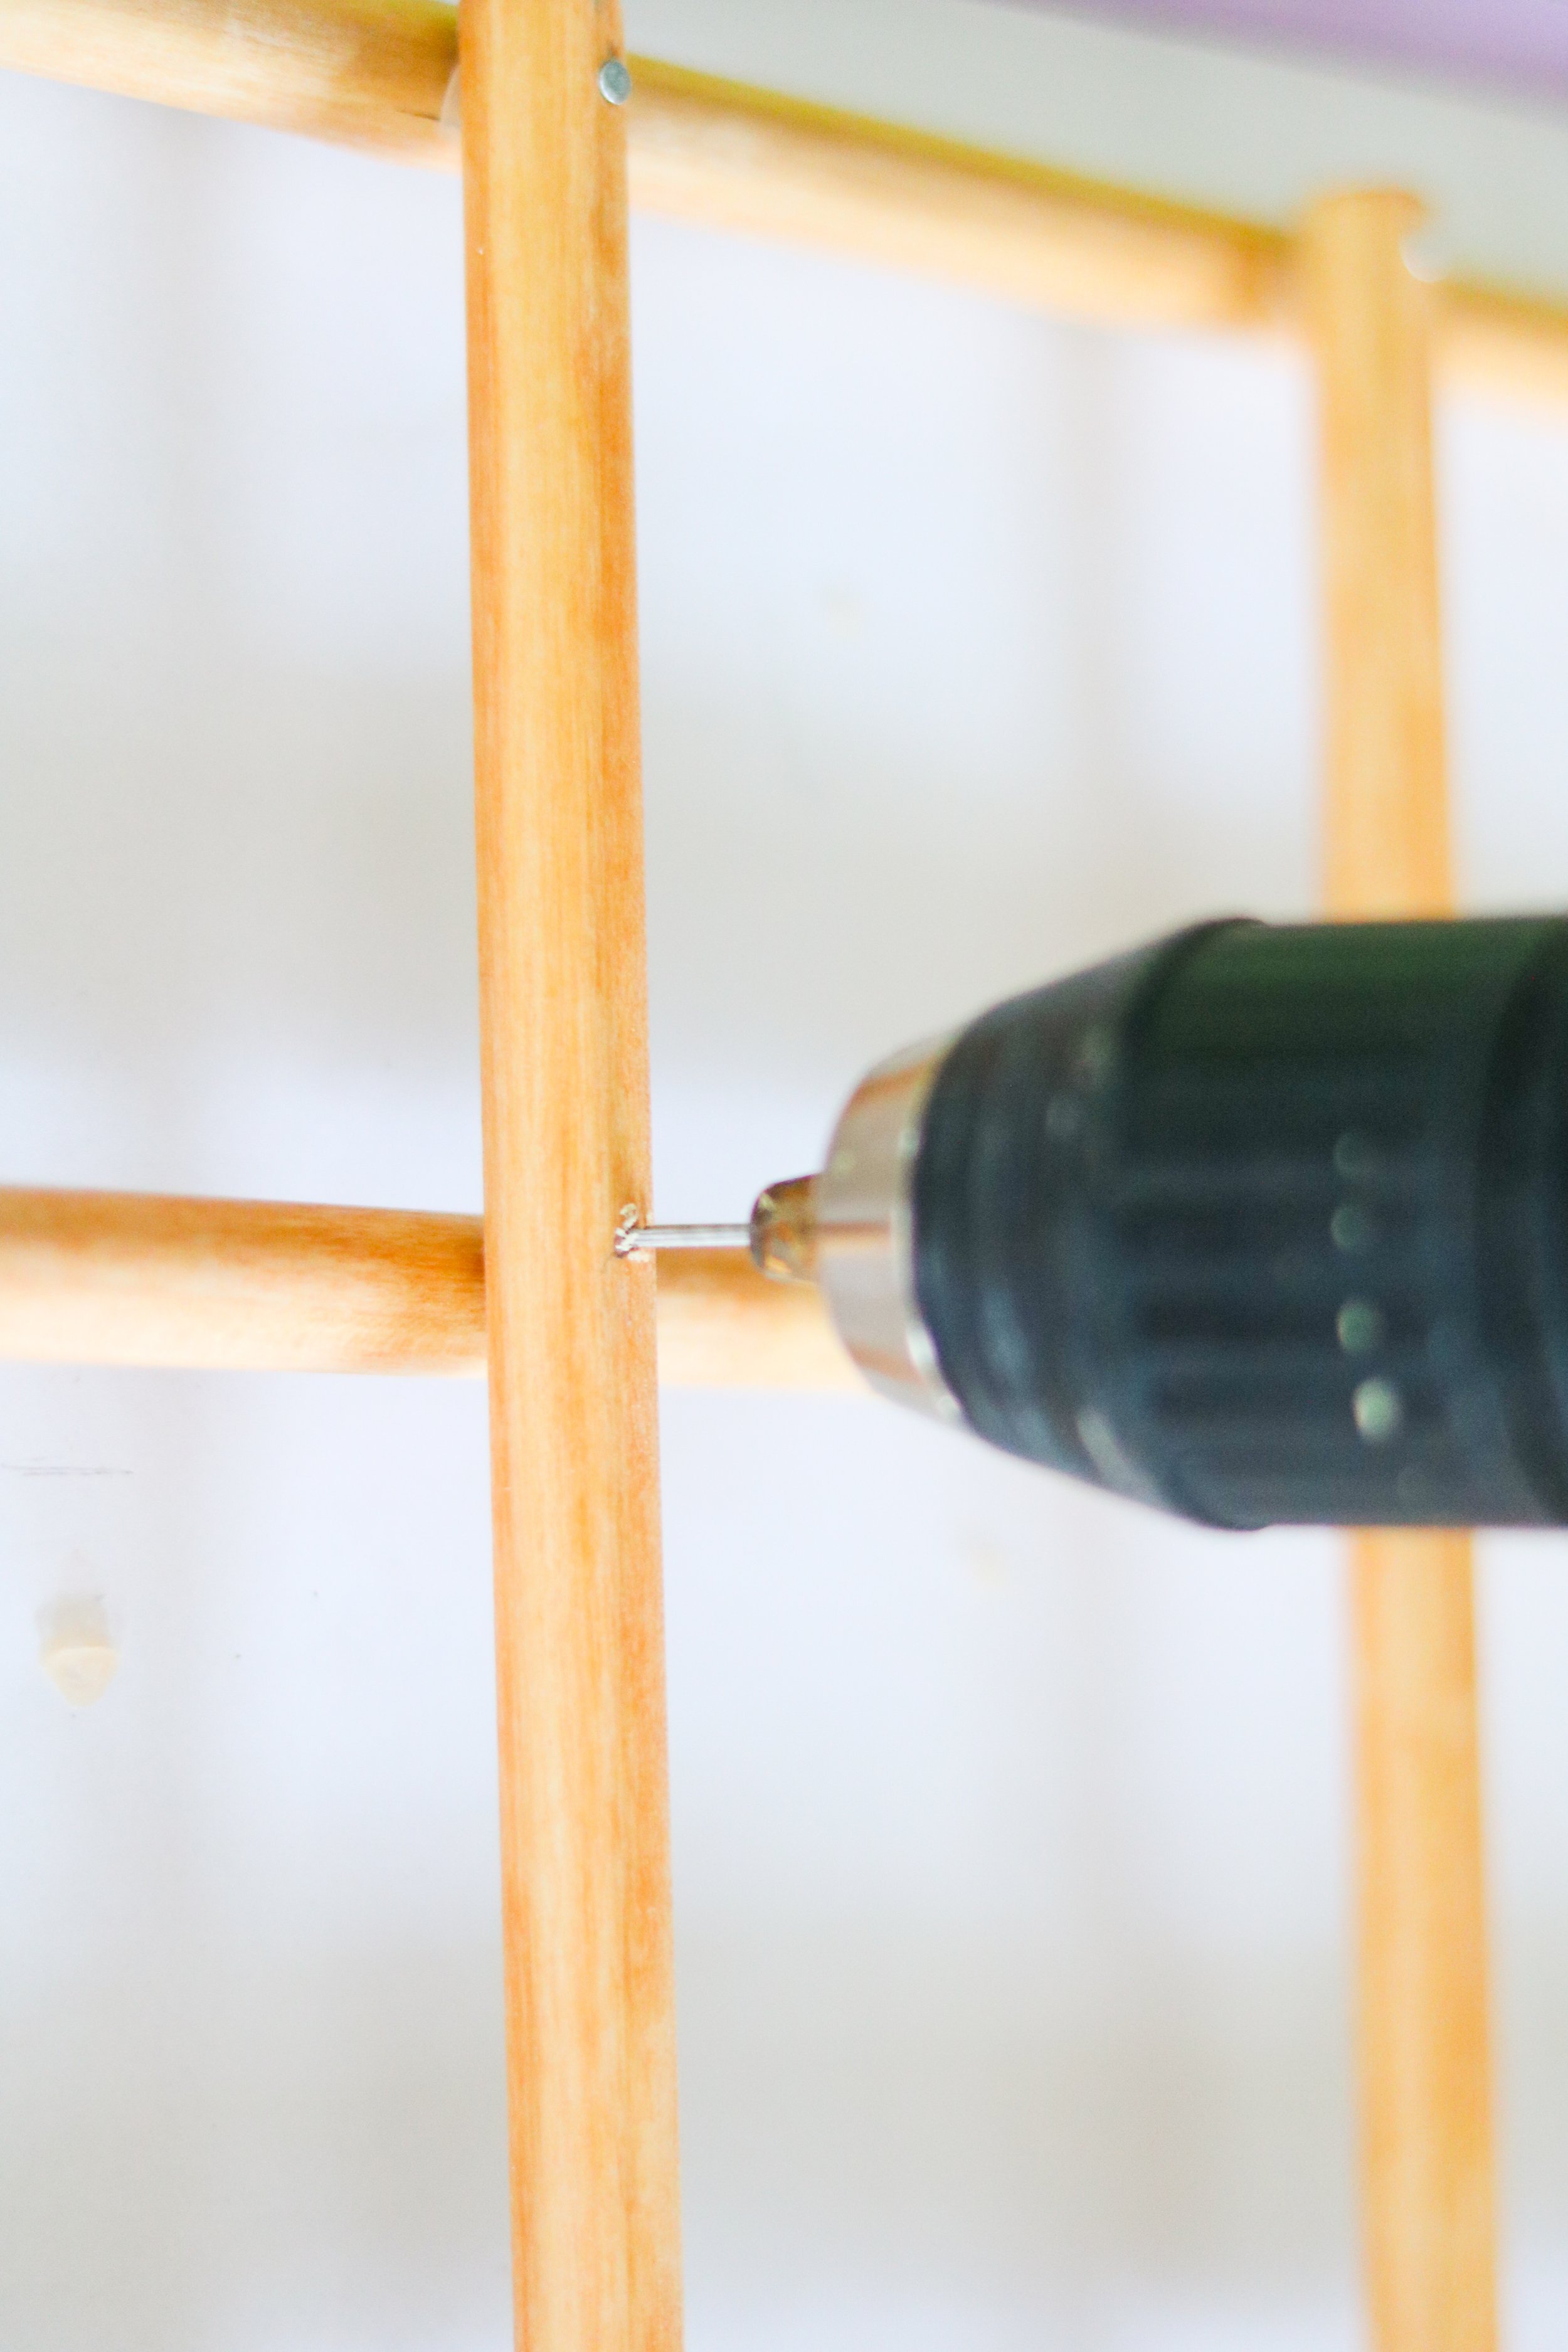
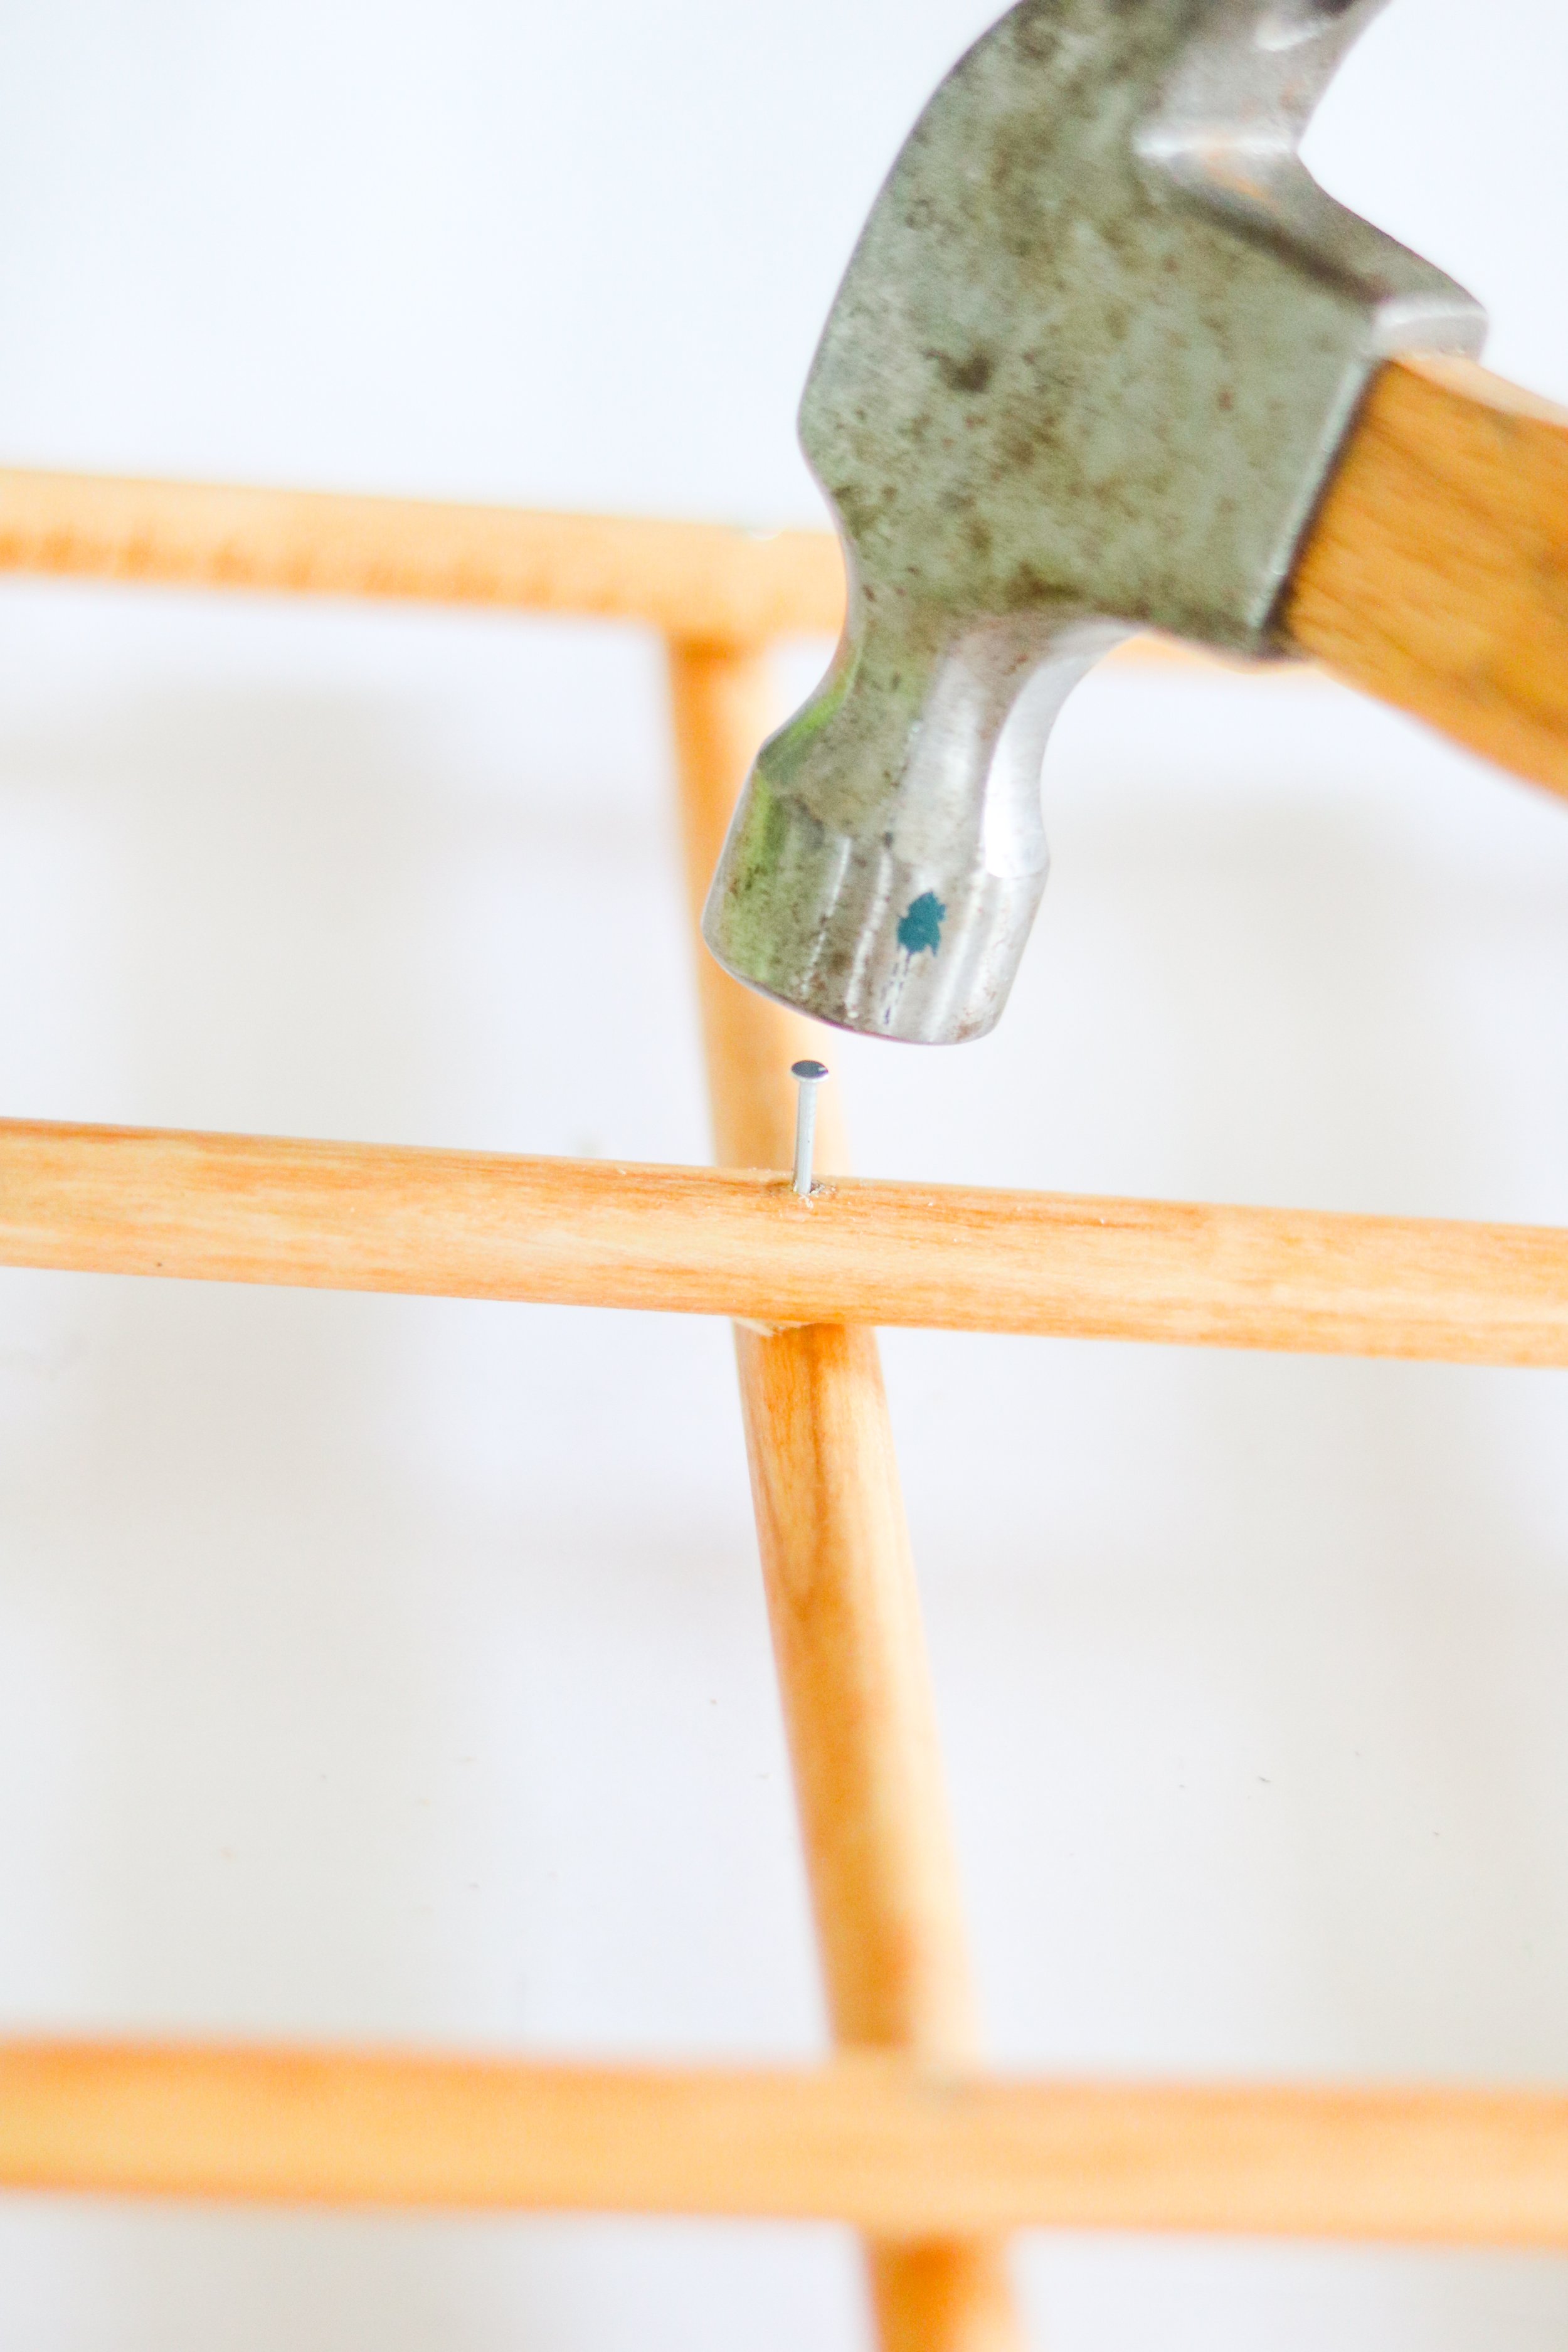
STEP 7: Once the glue on your wood frame is dry you are going to, flip it around to the backside and nail a 7 cm nail into the center of each place your dowels cross. I measured and drew dots for this step too. You will end up with 35 nails in your frame to reinforce the structure. We want this advent to be sturdy and last a long time. 🤗
*Tip* To make hammering easier, pre drill tiny holes before inserting each nail. Also, hammer gently so that the nail doesn’t accidentally break through the wood.


STEP 8: Flipping your wood frame back to work on the front: start marking where your mini hooks are going to go. Using a pencil and my quilters ruler —I drew a dot on the dowel, in the top center of each wood “square”. This will total to 24 dots. (Click images below to see a close up for reference)


STEP 9: Now, you are going to screw your 24 mini hooks into each pencil draw dot. Once you’re finished screwing in each hook, you can hang your 24 pockets in the color order that makes your heart happy. Isn’t this so cool?!
*Tip* I used a hammer and gently hammered each hook into the dots to start them off, so that it made screwing them in easier.


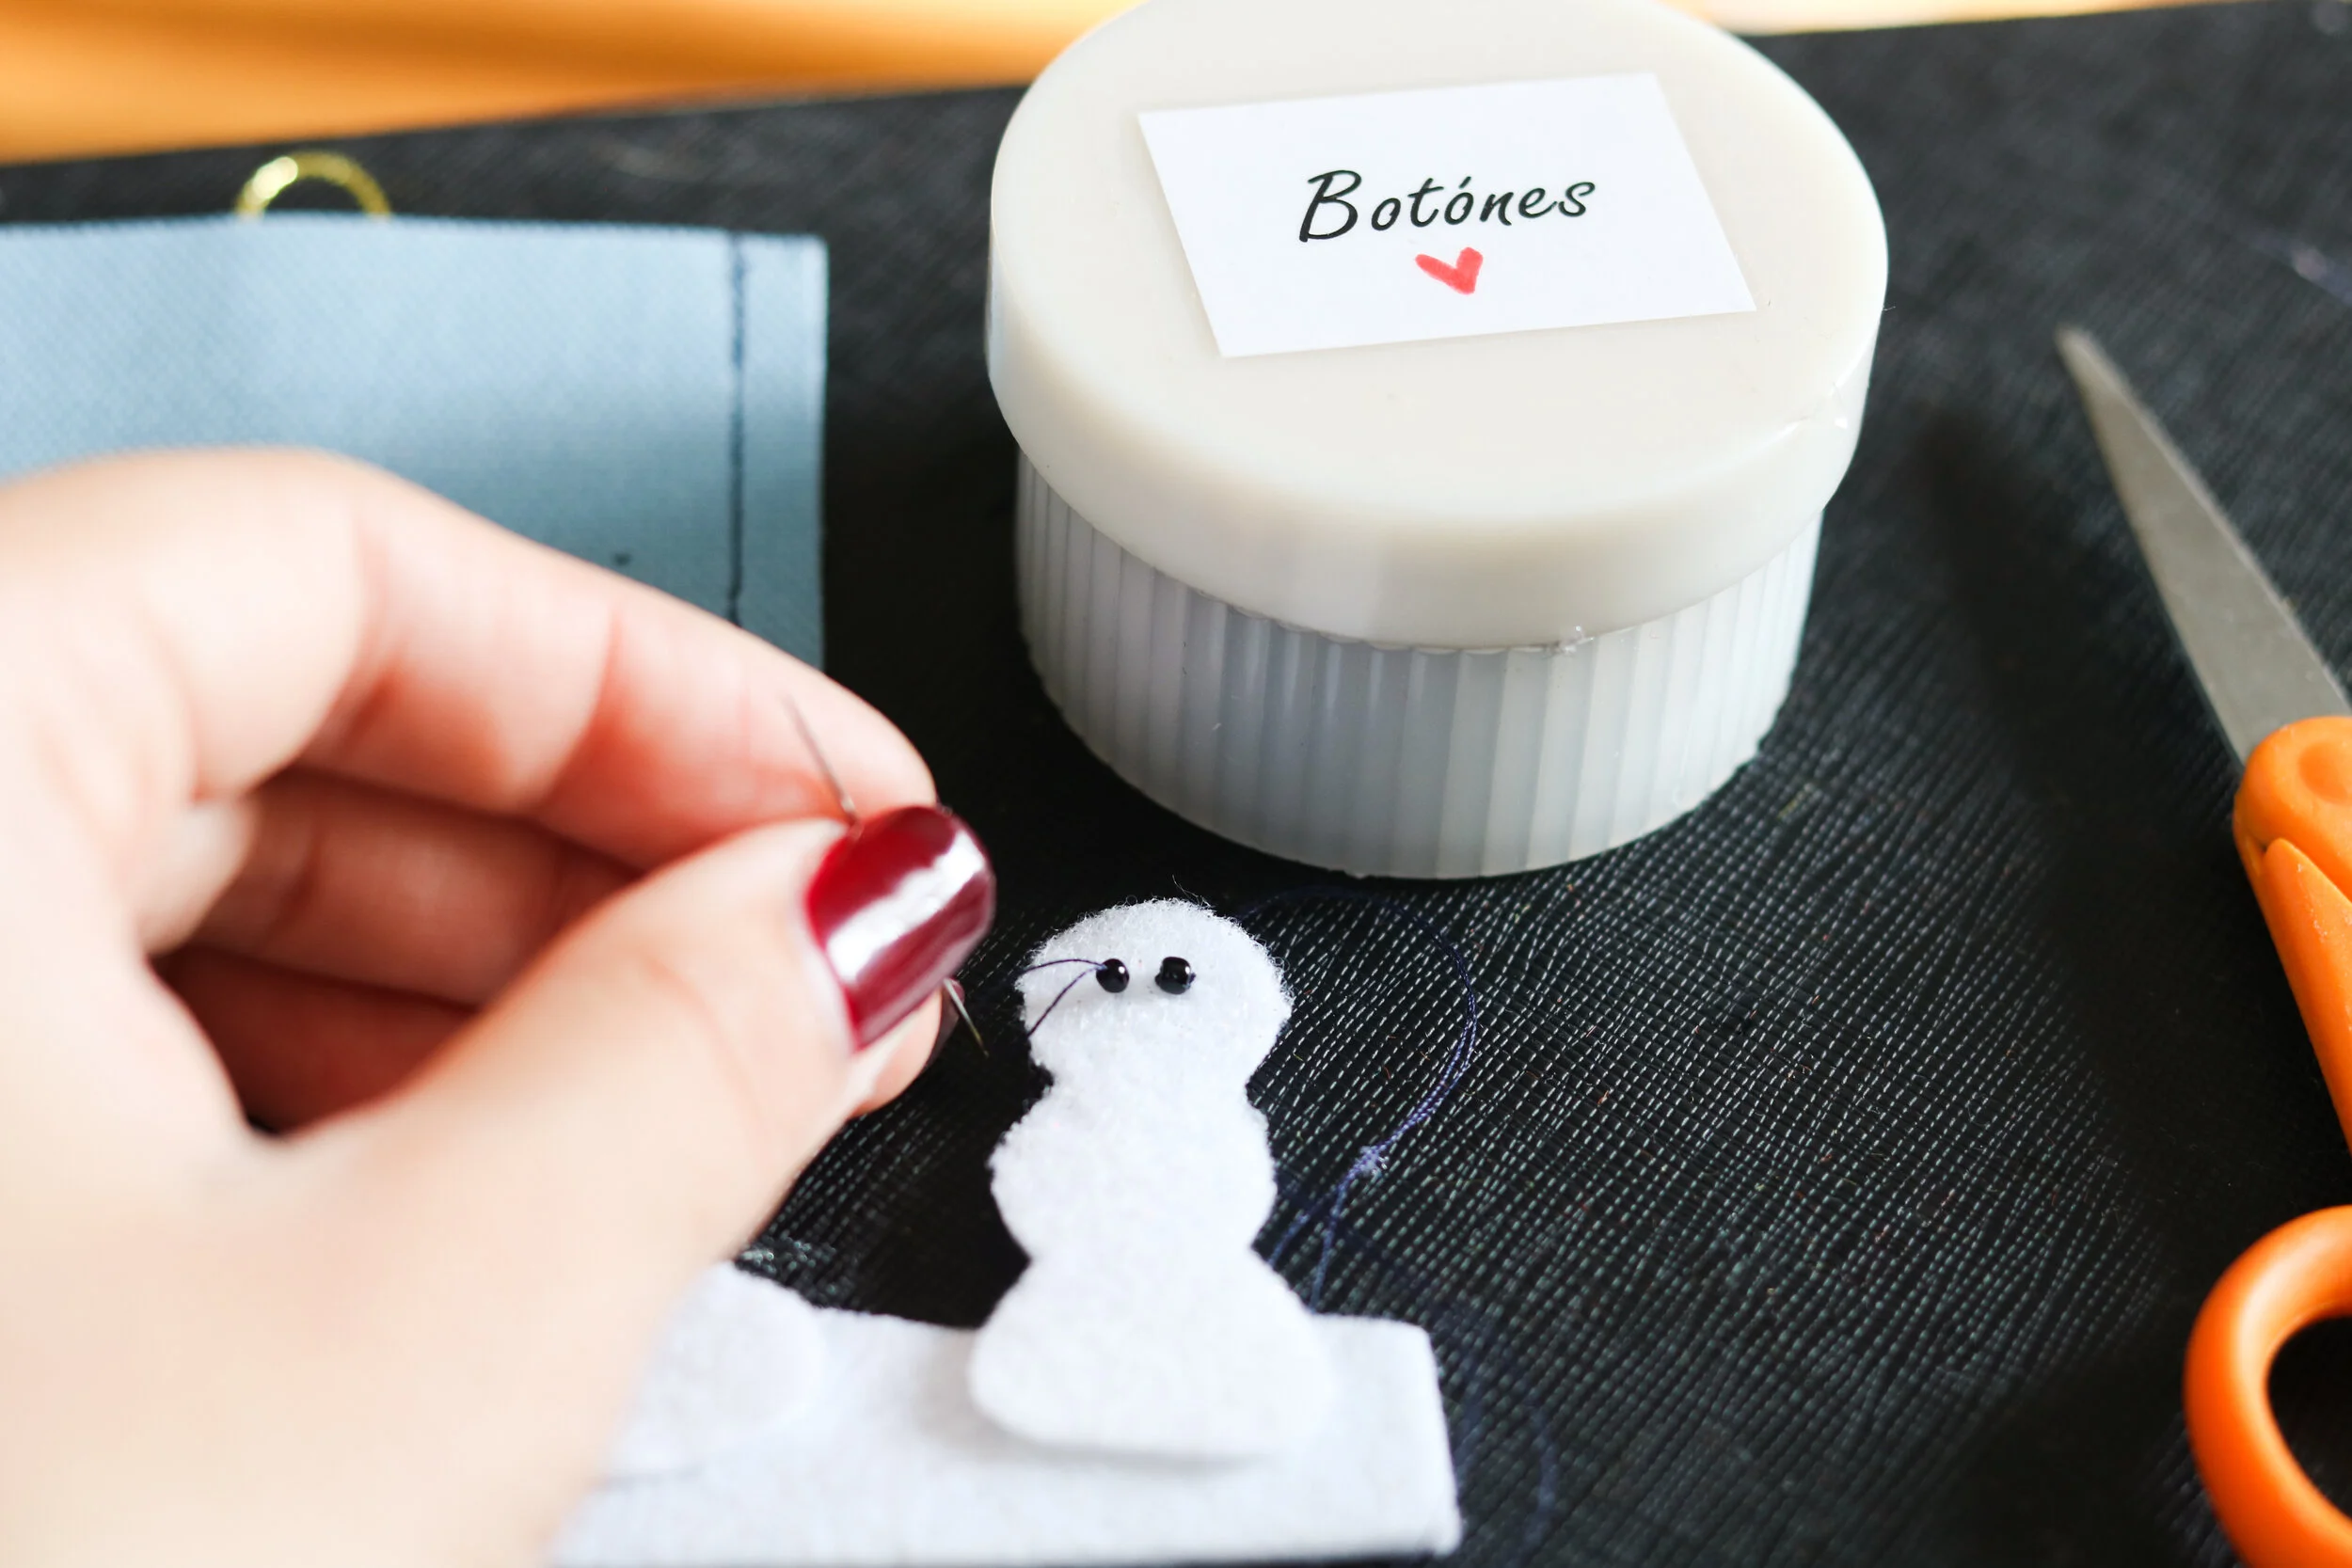
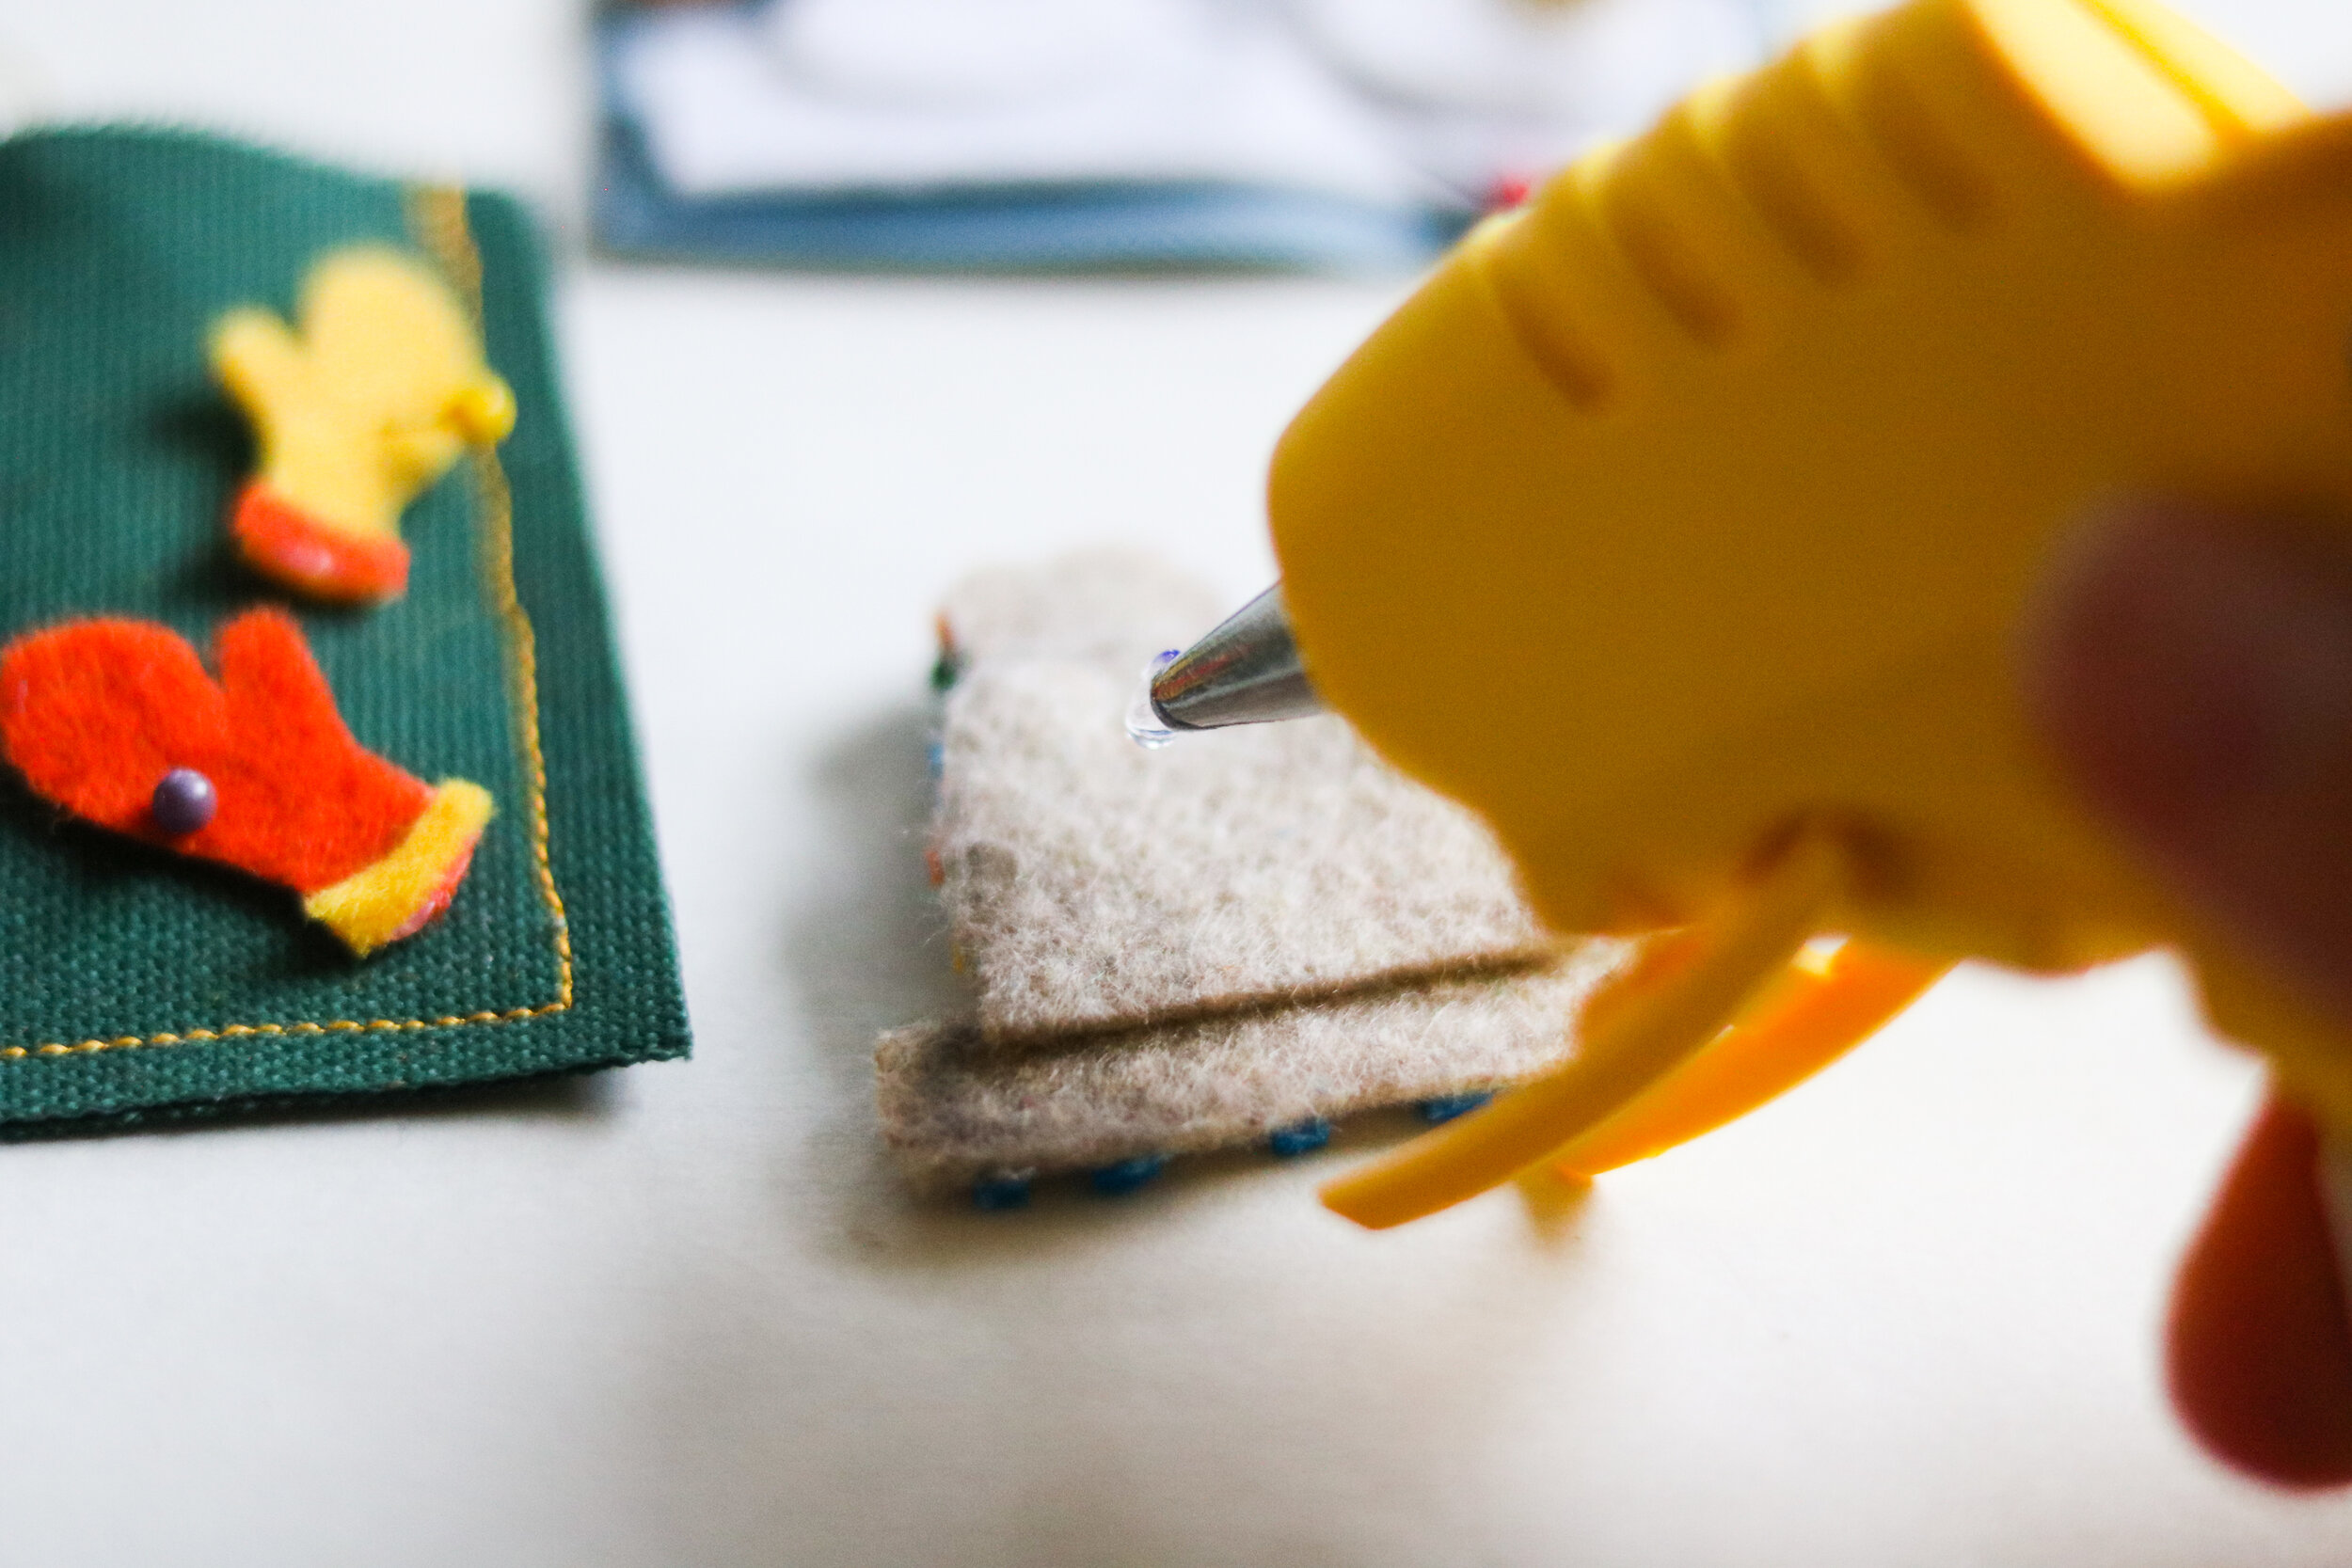
STEP 10: It’s time to get out your felt fabrics + anything you want to use to embellish. Start designing each scene that you want to go onto your advent pockets. Then, start creating them! Have FUN!!
*Tip* I used my ipad to sketch out the advent + what would go onto each pocket. I highly recommend sketching out your designs with whatever art medium you prefer. It helped me to envision, color coordinate, and it’s great for reference too! Don’t forget your bebida of choice ☕️.


STEP 11: As you cut out your creations and add buttons, feathers, string, sequins, etc.—start to pin + glue them onto your pockets. I LOVE this step so much and felt so giddy as my pockets came to life with magical winter scenes adorning them.
*Tip* Again, pinning before glueing is so helpful to color coordinate and organize your scenes.


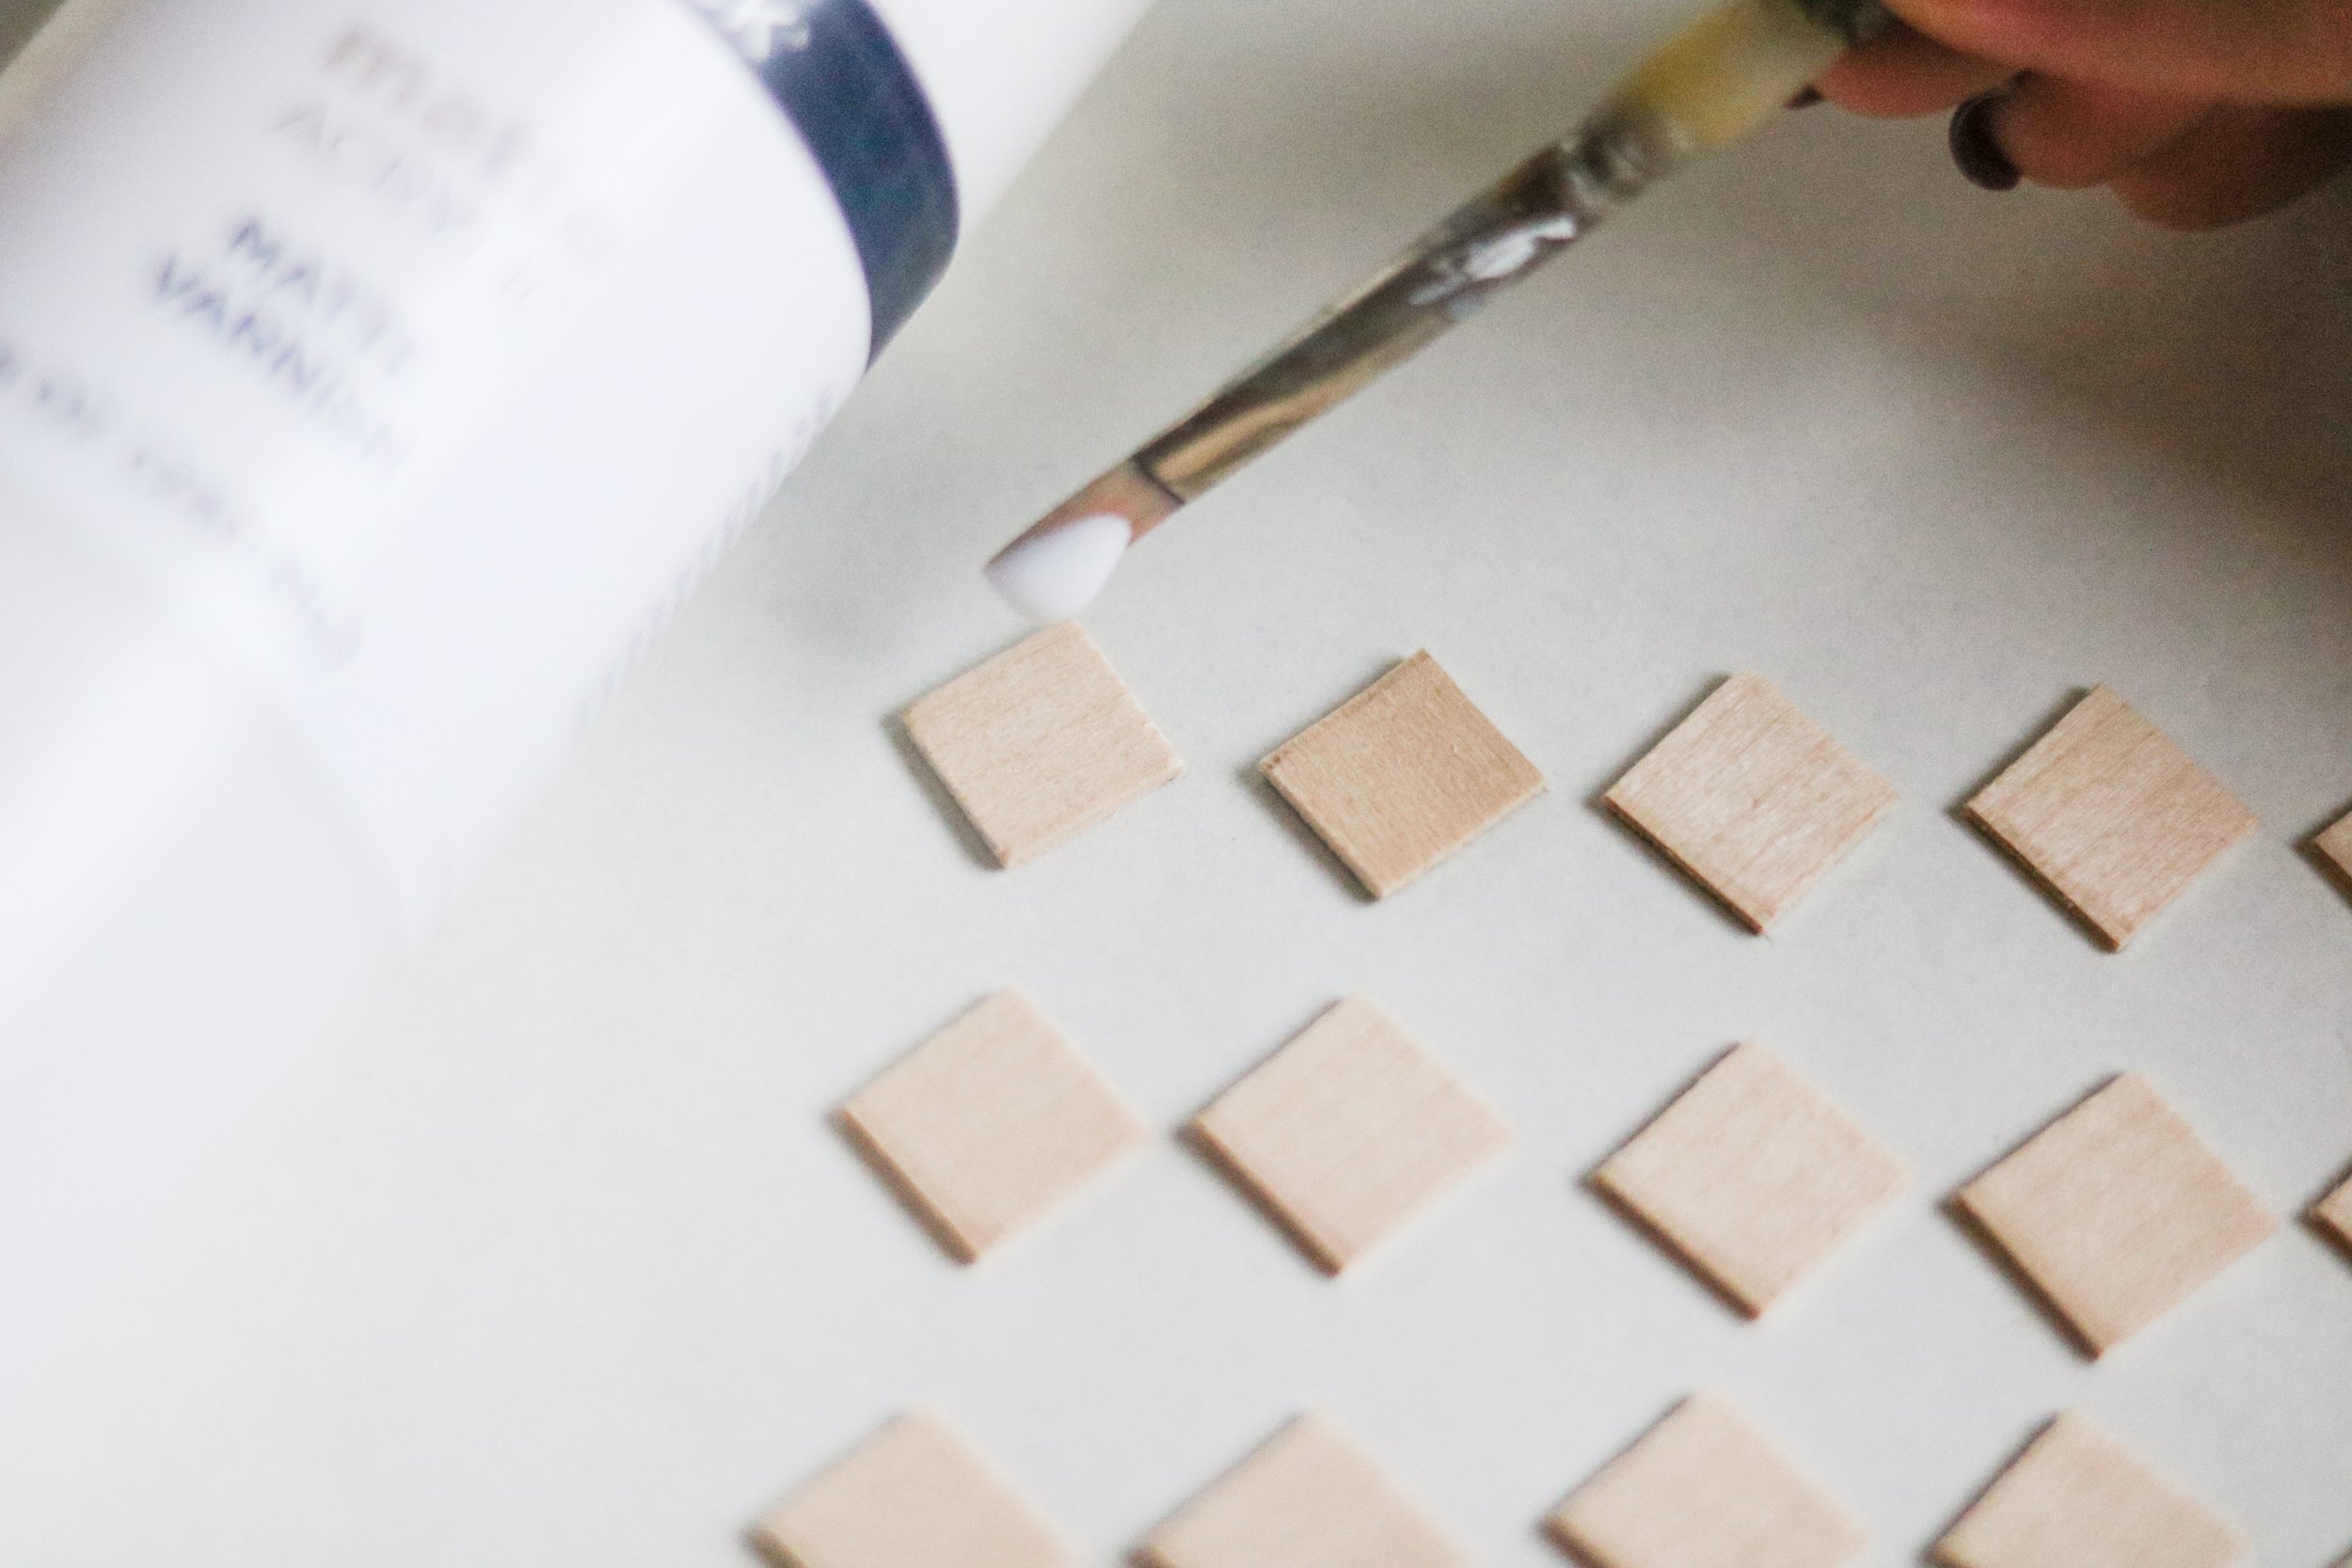
STEP 12: The next thing you’re going to do is: create your advent countdown numbers. I used the balsa wood strip cut into 0.5 x 0.5 inch squares. First, I sealed each square with a matte varnish. Once dry, I used a permanent ink pad + a number stamp I had on hand to stamp each square (turned to diamond shape) with #’s 1-24. Then, hot glue onto your pockets and hang your pockets onto your wood frame.


STEP 13: If you will be using string/rope to hang your advent, you can tie it to each side of your wood frame now. I cut a 39 inch rope for this step. You can adjust the sizing however you would like. If you prefer to mount the advent directly onto the wall —you can skip this step.
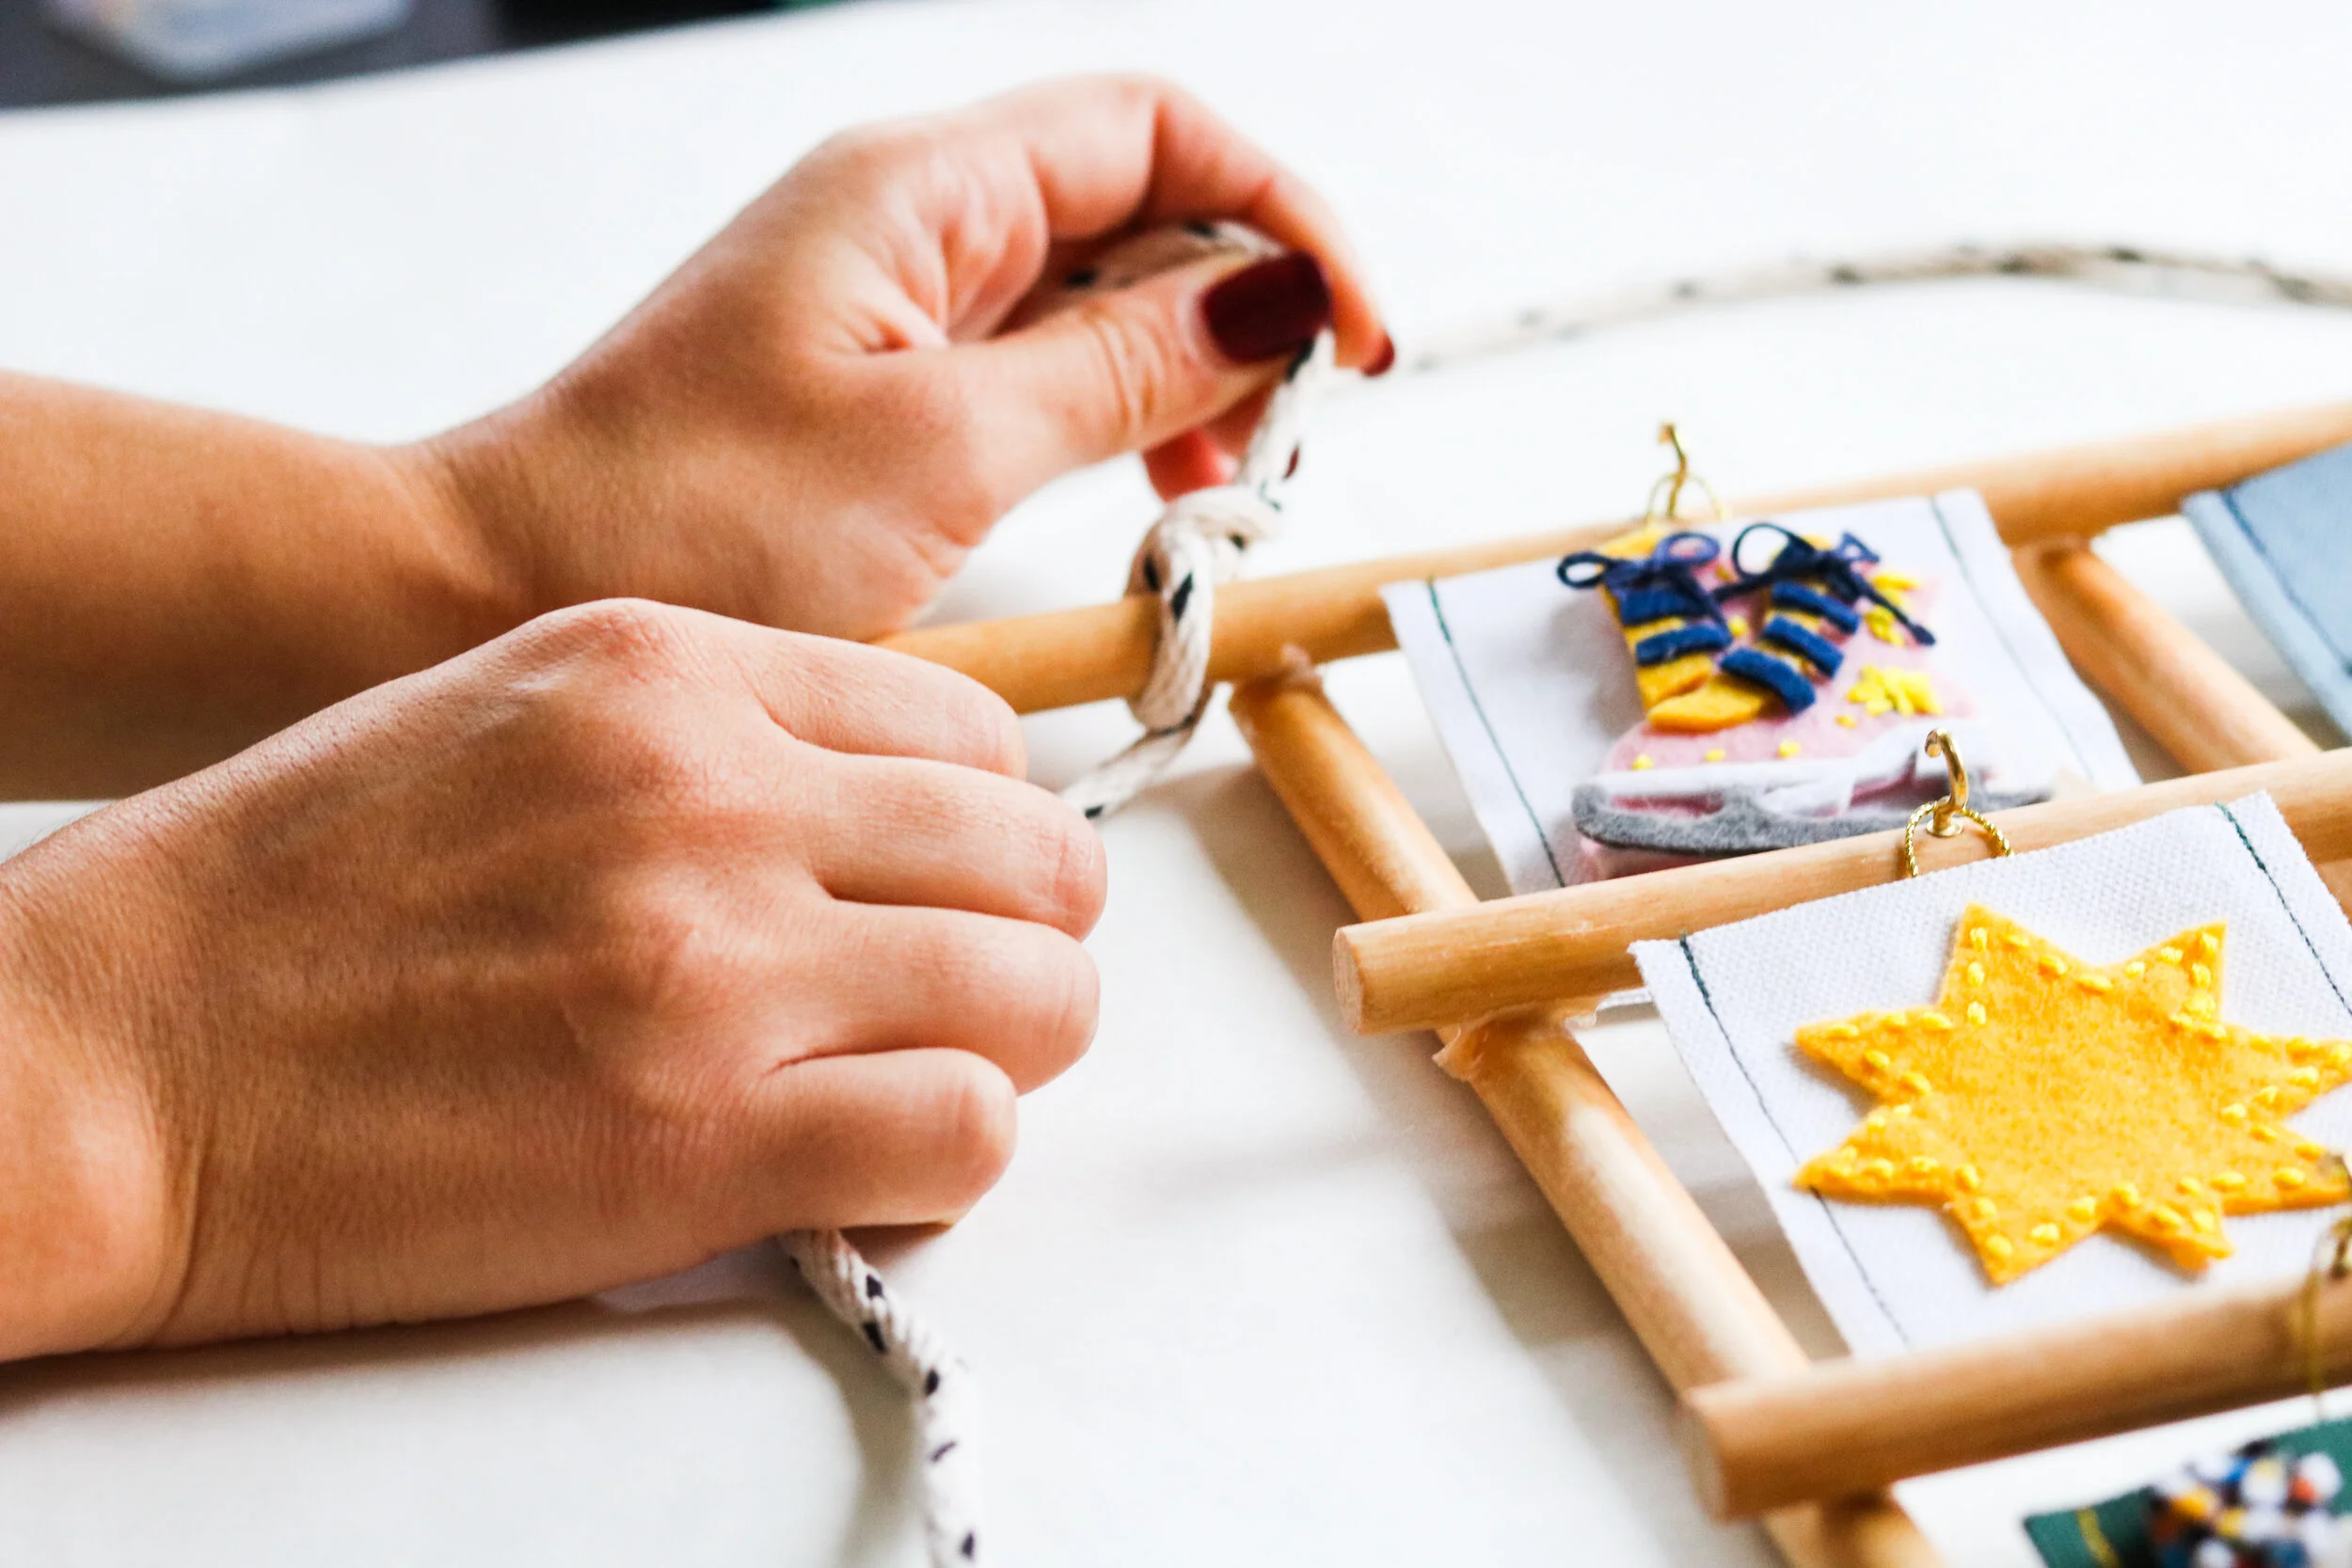
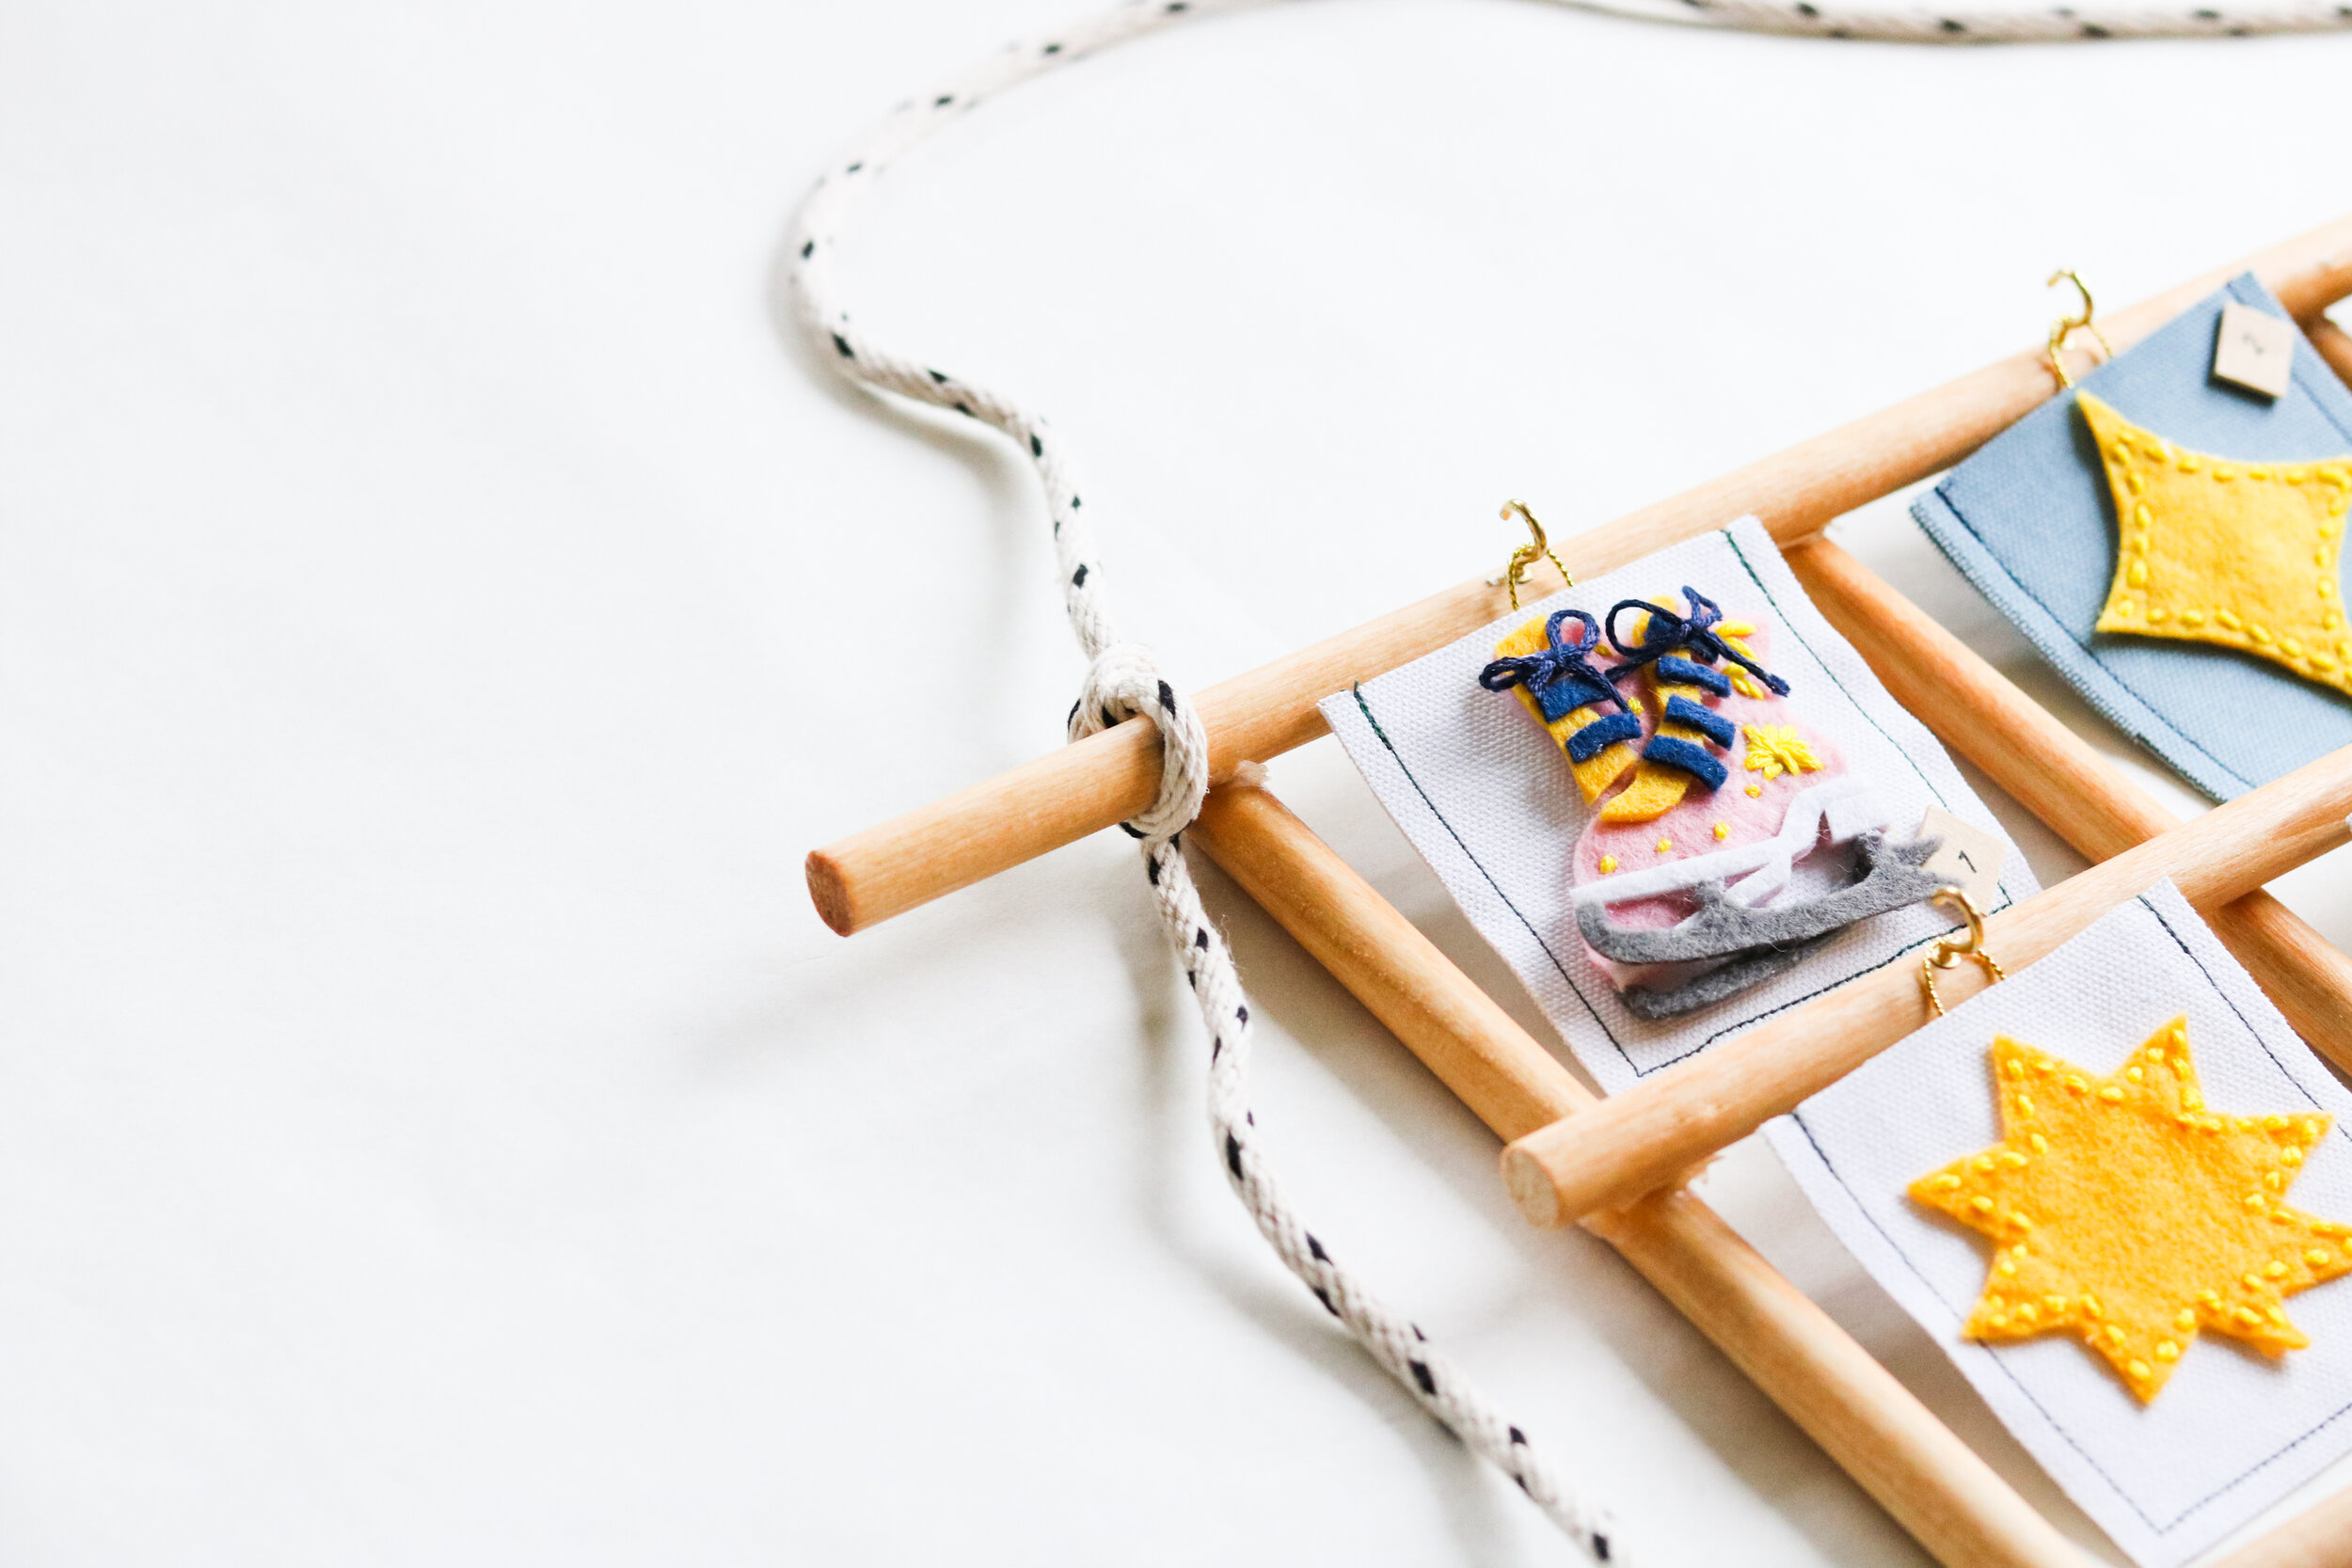
…And after that BEAUTIFUL labor of love (worth it), you are finished with your gorgeous heirloom advent calendar. The dream for our family is that it will be just that: something that can be passed down. It makes me emotional just to think of tiny, precious grand baby hands holding these very pockets that I have held.
SCROLL DOWN to see the advent styled in different ways + hung with the rope or just mounted directly onto the wall for inspo. We ended up mounting it directly to the wall and I stained + added a wood rainbow silhouette that I had purchased at Target but never used. You can shop a similar silhouette HERE.


When your littles go to bed (or you can do this together), fill that baby up with mini candy canes and all sorts of day to day treats, activities and our very favorite: acts of kindness + generosity for each other at home, neighbors, shelters, and/or just someone that needs a meal/a coat/a bouquet of flowers etc. After all, advent is all about counting down to Christmas Day in honor + celebration of our Savior being born—the greatest gift to all humanity. ✨


If you made it this far, thank you for taking the time to read up on this super special DIY. We hope you’ve enjoyed the visuals and are feeling inspired + motivated to create your own. We just hung ours up yesterday, December 1st to start counting down. It brought me such joy to watch our oldest boys carefully place each pocket onto each tiny hook. They were so happy. I can’t wait as we carry out the activities together! If you DO create your own take on this advent, please tag us at #allkidsdiy, or comment here…we would LOVE to see. Have tons of fun decking your halls and making memories. 🧚🏽♀️✨
💛 Melissa