
I wanted to throw an idea out there that I came up with starting from my husband and I's very first Valentine's Day together. Before my husband and I had our boys I would set up a little mailbox for each of us where we would write fourteen things that we loved about each other, fourteen things for the fourteen days in February before Valentine's Day. It became a fun little thing to open on Valentine's Day either before our date or after, I myself was excited to see what what he would come up with on those little notes.
Read MoreVALENTINE'S DAY ROBOT MAILBOX DIY ❤️
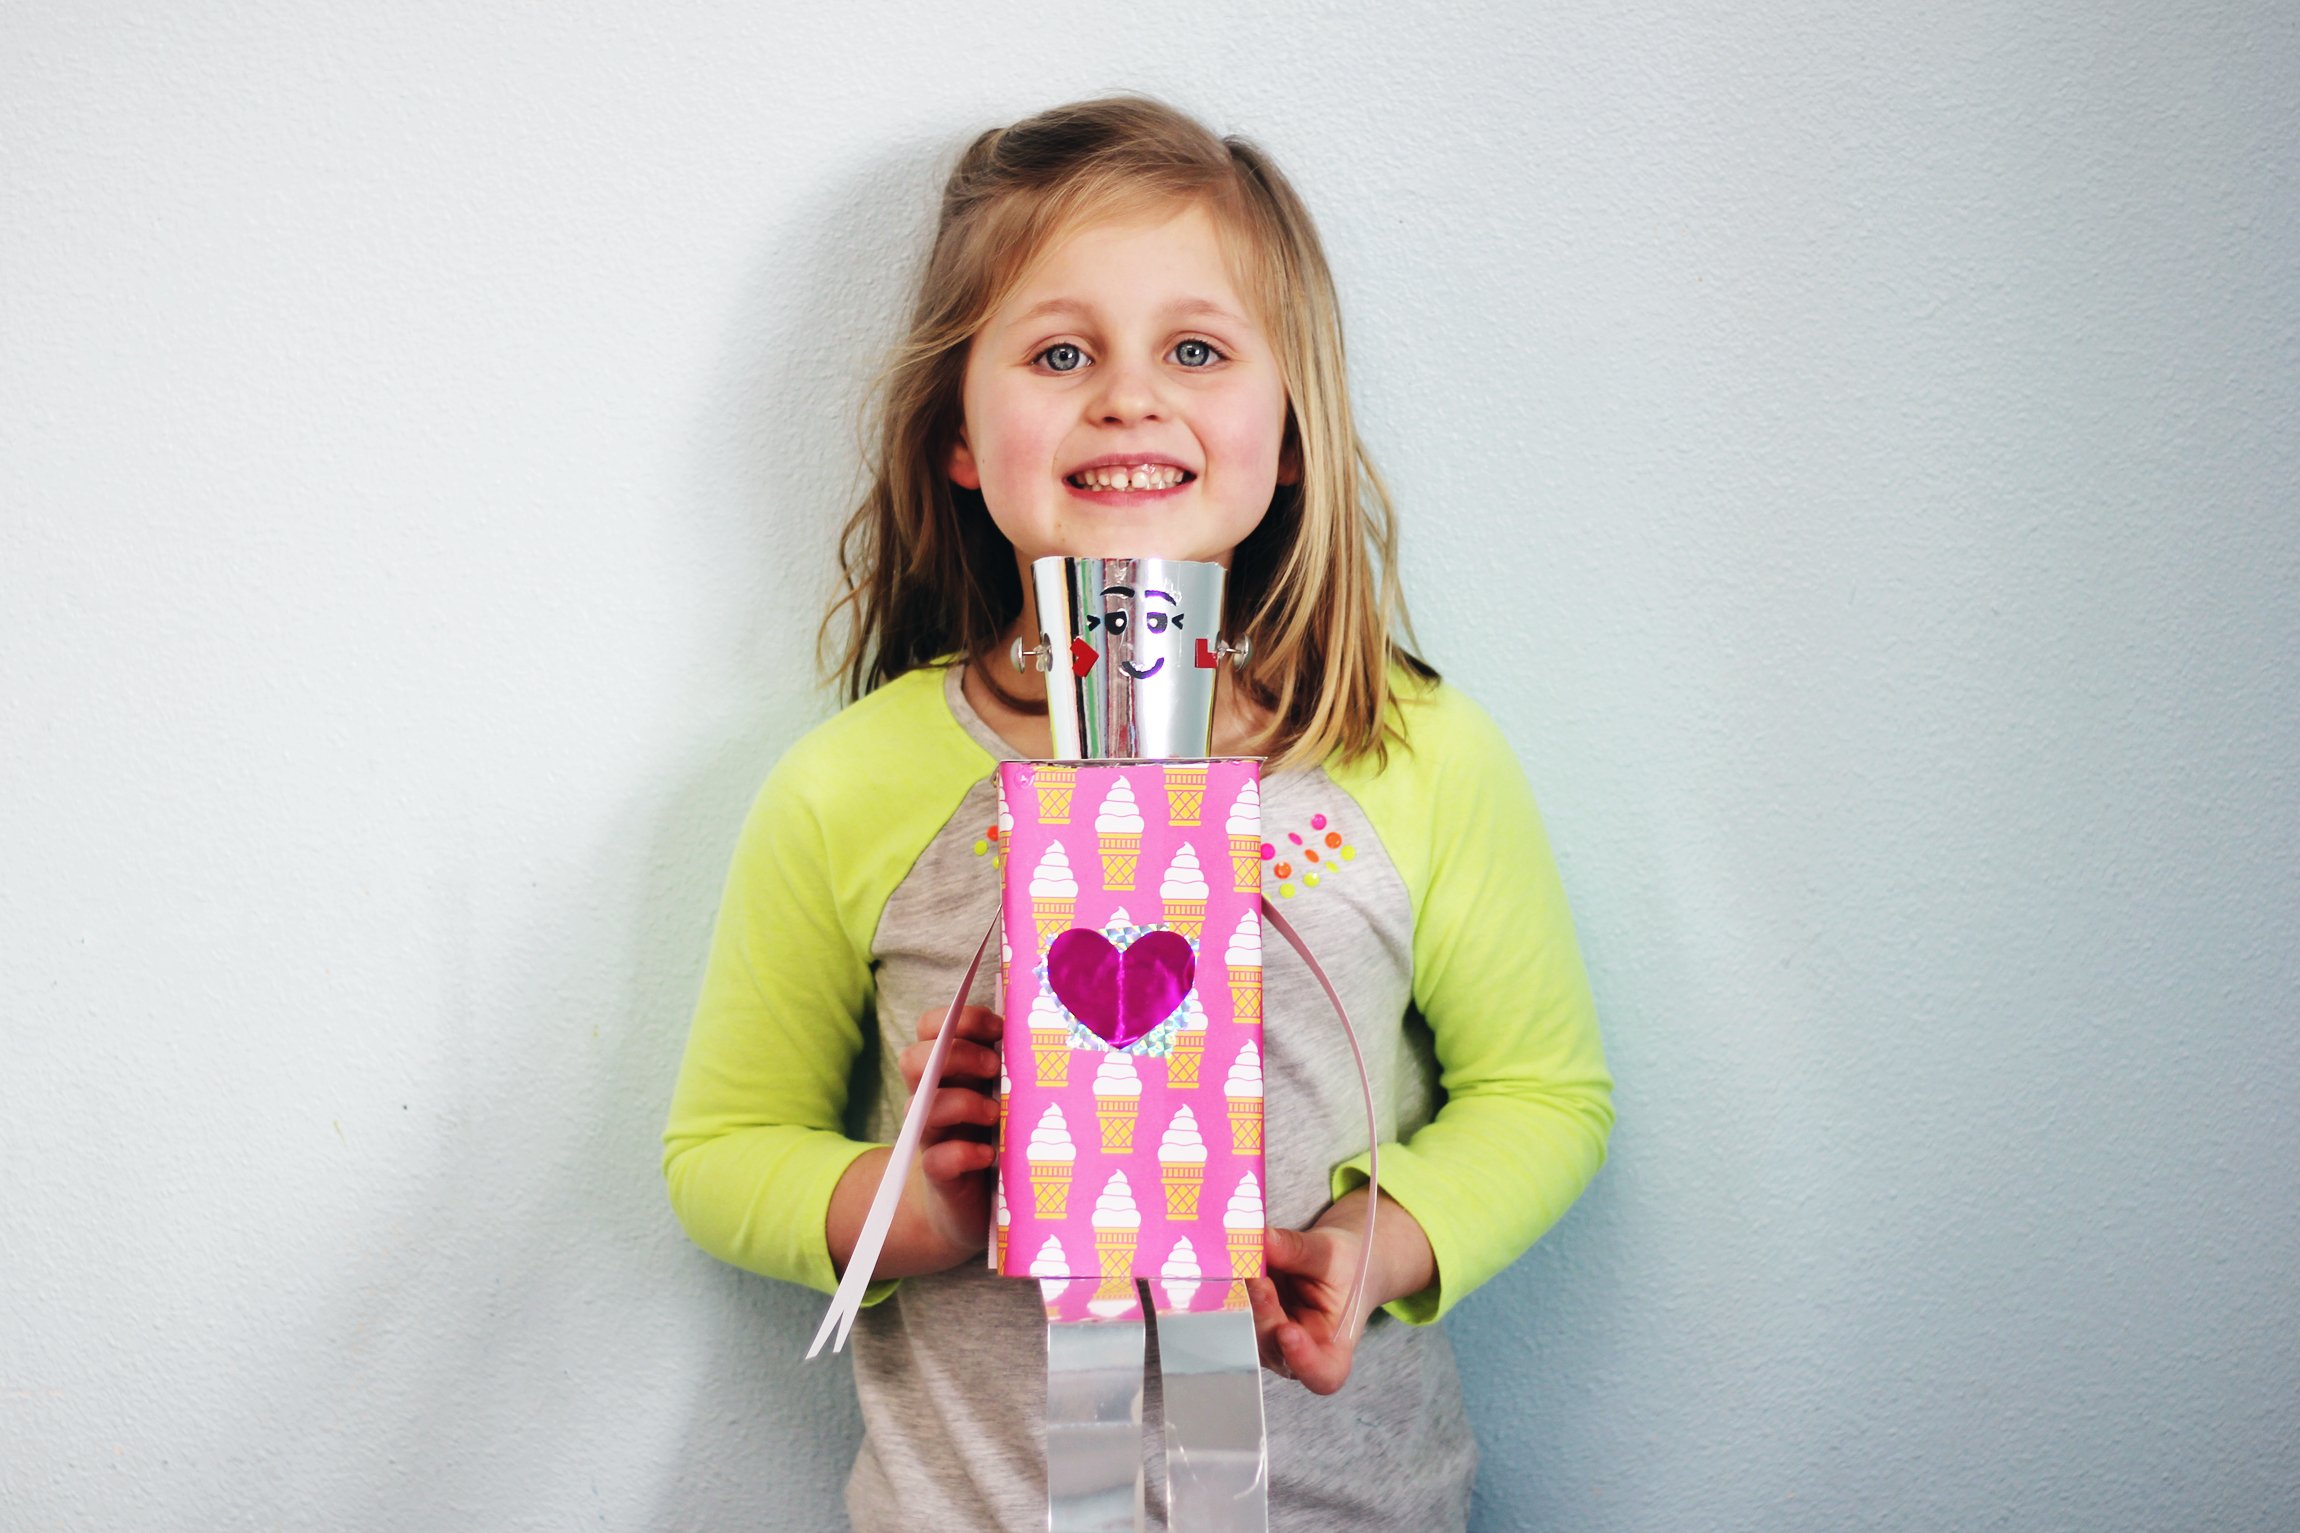
This super cute Valentine’s Day Robot DIY is a pretty easy Kids’ DIY to make with an adults help, and it will help you start decorating for Valentine’s Day! This projects is also a good idea if you’re a teacher needing a project for your class ... what better to collect adorable Valentine's from your classmates with than these Valentine’s Day Mailboxes? Have fun making these and getting ready for LOVE month!

❤️Check out our Youtube video of our Valentine’s Day Robot Mailbox below, or scroll down to see the written + photo step by step.
MESSY LEVEL: 1
This project isn't very messy, there is some gluing with the hot glue gun and paper cutting.
SUPPLIES:
1/2 gallon juice / milk container [ cleaned out ]
16 oz to-go coffee cup [ re-use / reduce?! we did! ]
Scissors
Ruler
Glue gun + glue sticks
Card stock [ in whatever color you choose for robot body ] + mirror card stock [ robot head, arms + legs ]
Foam / cardstock sheet [ robot face details ]
Decorative Tacks [ robot face details ] You can purchase in bulk HERE
Any other metallic supplies you have laying around [ we used New Years noise maker ribbon which was a perfect metallic detail, metallic tape works well too! ]

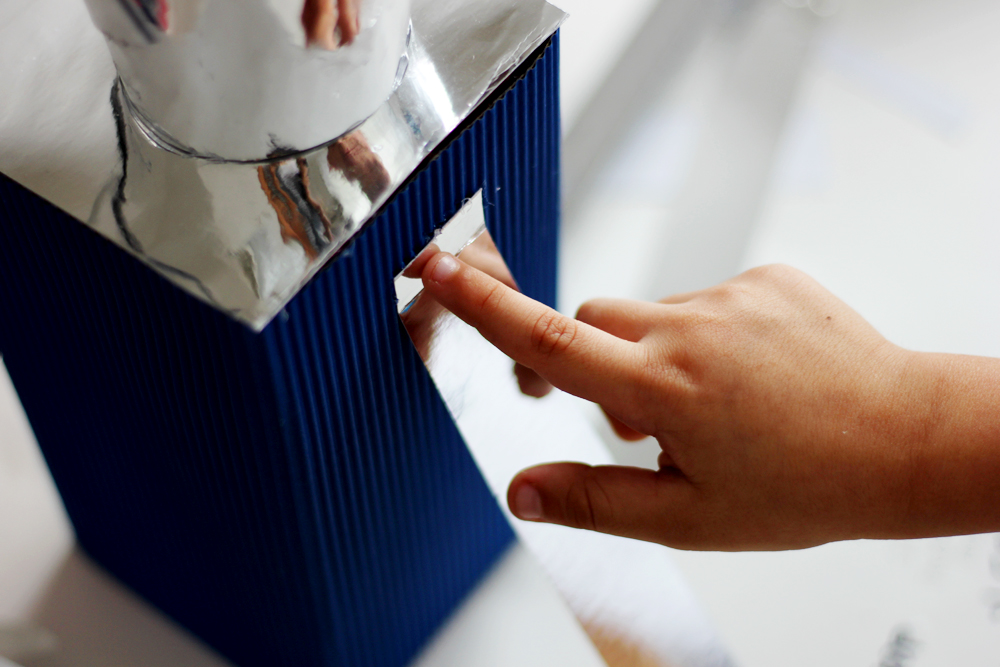
1.) Taking your clean 1/2 gallon container, you will help your little one cut the top part off along the line (unless he/she is an expert with the scissors, they can do it themselves.) Then, you are going to choose what the “back” of your robot mailbox will be and you are going to cut a square starting from the top, down to a little above the halfway point of the gallon. You will work your way across and back up to the top of the gallon forming a square. This will end up being the slot for Valentine’s do go into.
**TIP: I used a pencil to draw a line about halfway down the back of the container.

See example:
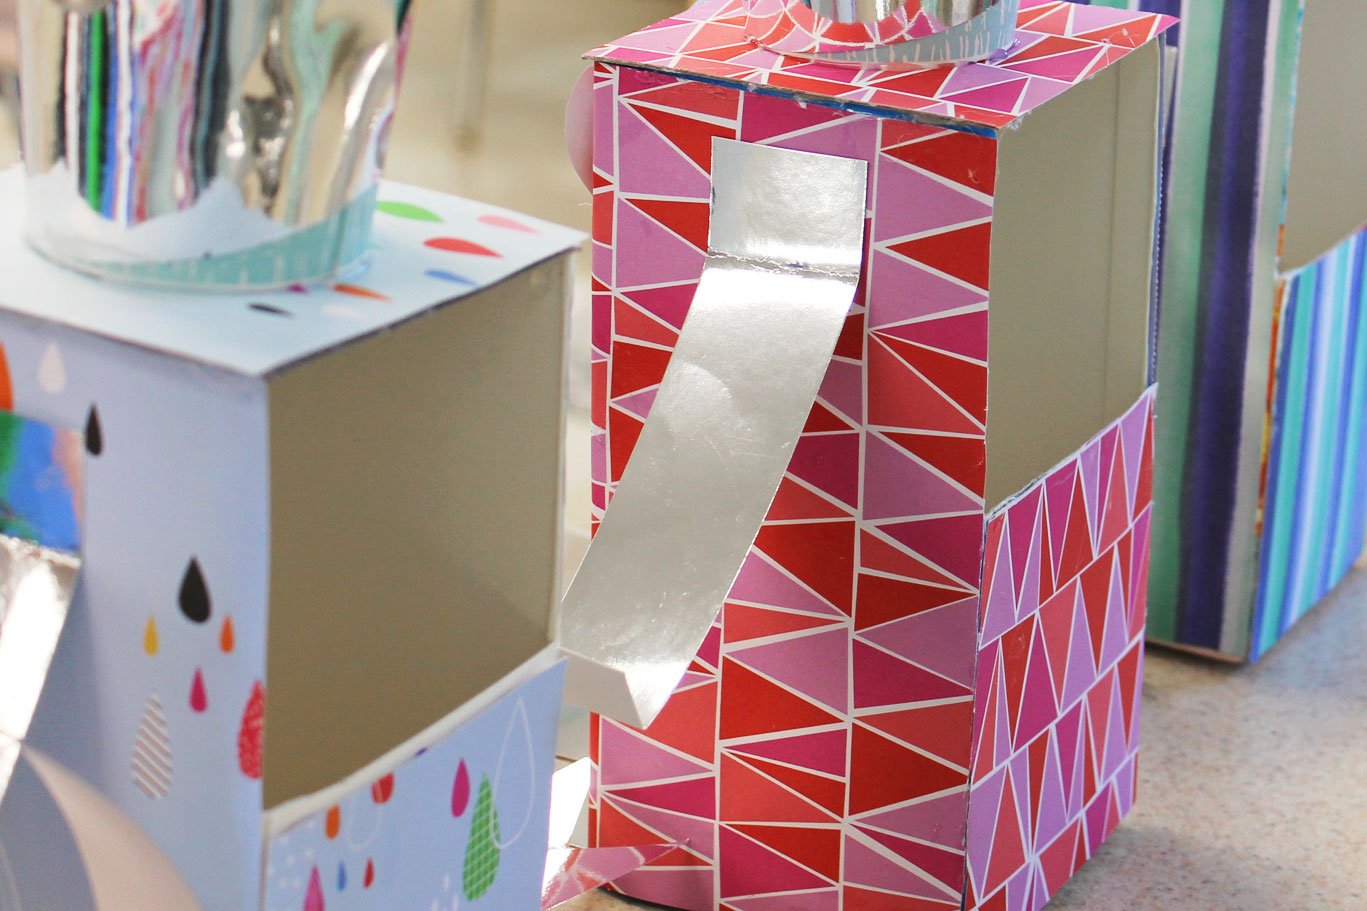
Here is what the back of finished your mailbox cubby will look like on back of robot:
2.) Next measure and cut a thick card stock square to fit over the top opening. You can even use the remaining square that you just cut out to create the mailbox opening on the back of the robot. You won't see this piece in the finished product, it's just to close the opening and for re-enforcement. Glue that down with the hot glue gun.

3.) After that, help your little one measure a card stock piece in the color you want the robots' body to be and cut it out. We used a 12 x 12 card stock piece, so the piece we measured wrapped around 3 sides of our container and we used the remnants of the card stock to cover the shorter back side.

4.) Then wrap your card stock around the container, gluing it down as you go.

5.) The next thing we did was measure, cut, and glue a square piece of the mirror card stock to go over the previous layer of card stock square that covered the top. This will end up being the Robots' shoulders.

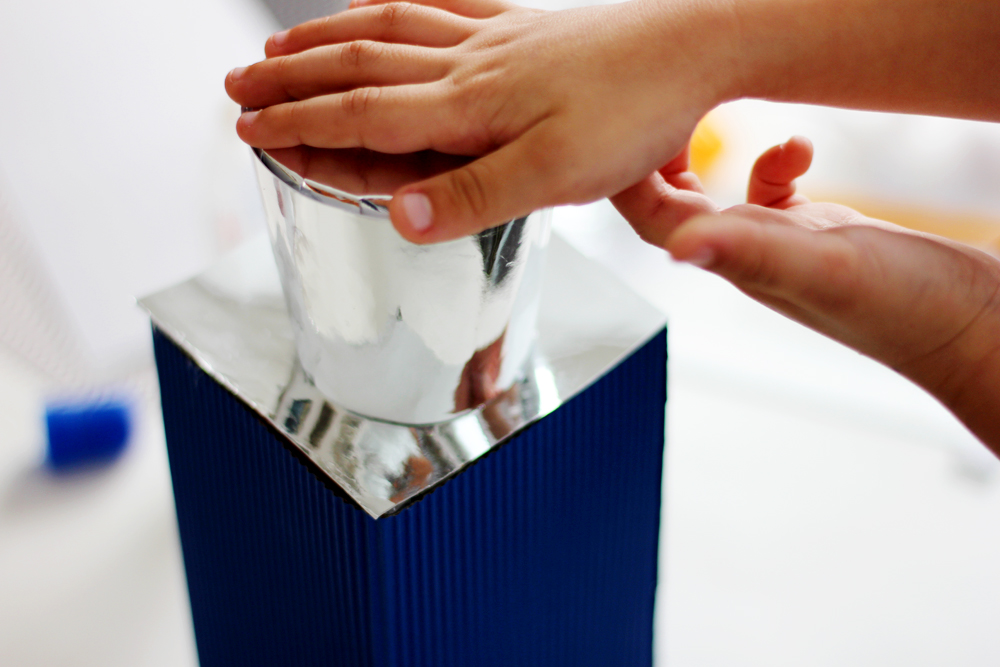
6.) Mark and cut out the bottom part of your cup, this will be your robots' head. We used a glass to help us measure and mark a straight cut all the way around our cup.
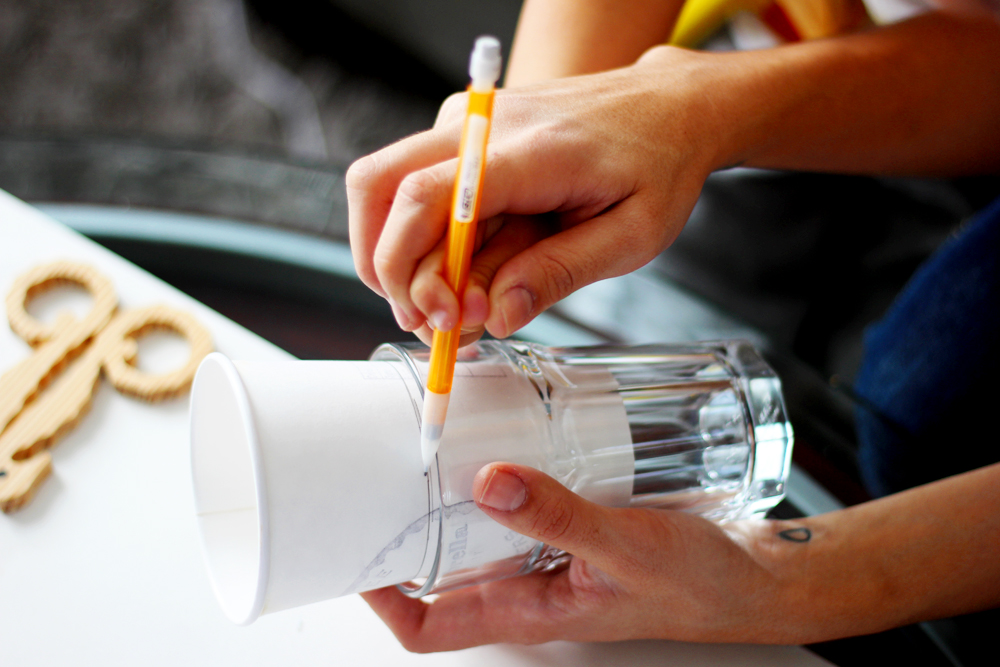

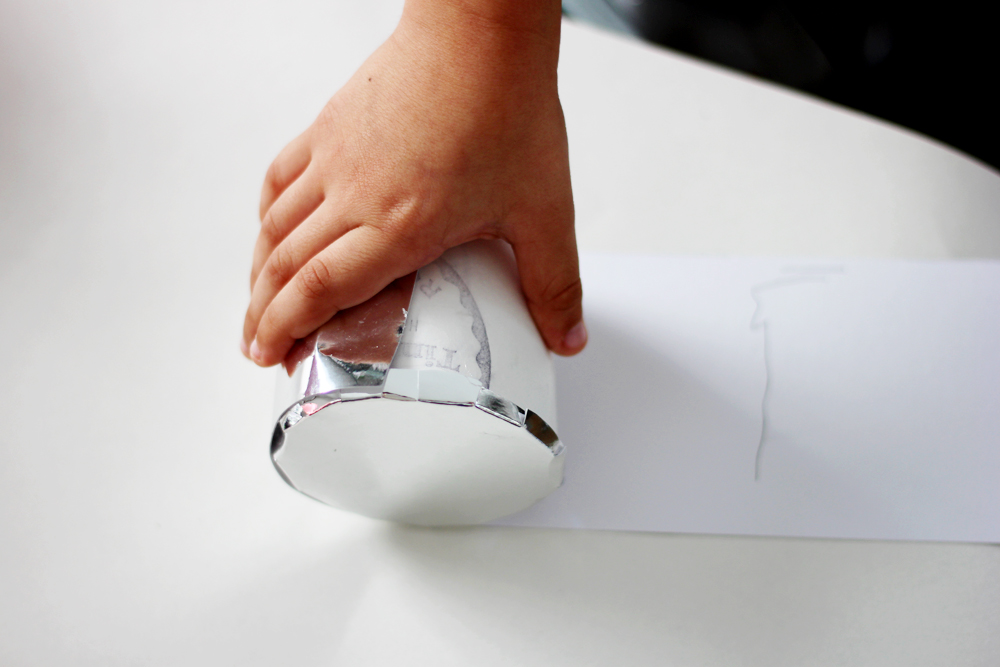
7.) Trace a circle around the top side of your newly cut cup onto the back side of your mirror card stock, then cut a circle 1 cm wider than this circle so that it's easier to attach the card stock to your cup (the top of your robots' head). I cut little tabs all around my circle and folded them in which made it easier to glue down to the top of the cup.


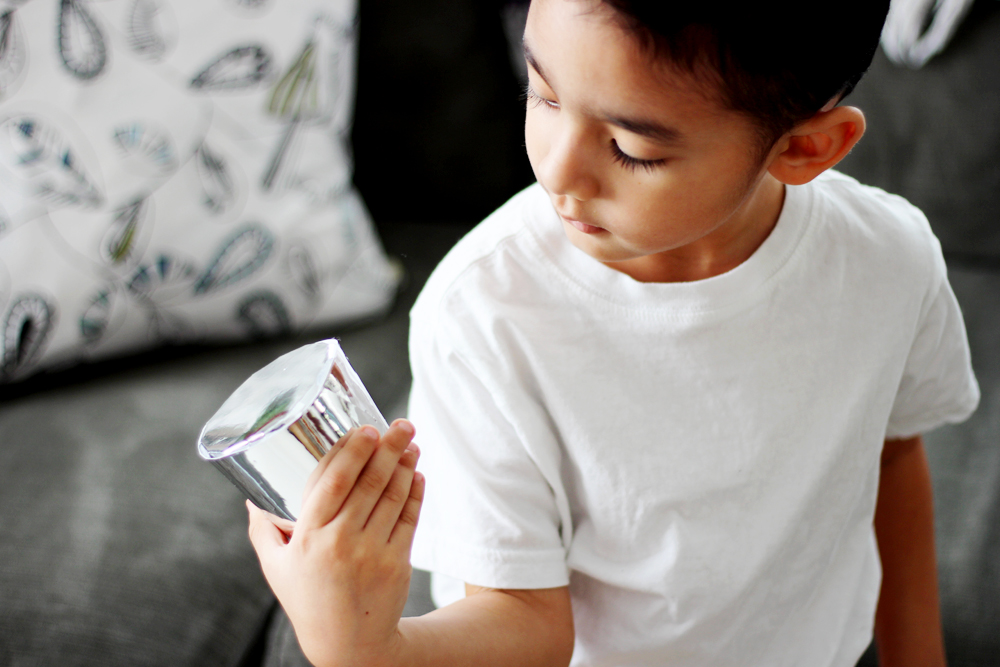
8.) After you glue down the top of your robot's head; measure, cut and wrap a piece of the mirror card stock all around the width of the cup (gluing it down as you go). Then you can glue this to the carton top (this will be your robots head and body).
9.) Cut 4 pieces of mirror card stock 1 inch wide, making 2 pieces 9 inches long and 2 pieces 11 inches long (these will be the arms and legs). Glue to the robots' body.

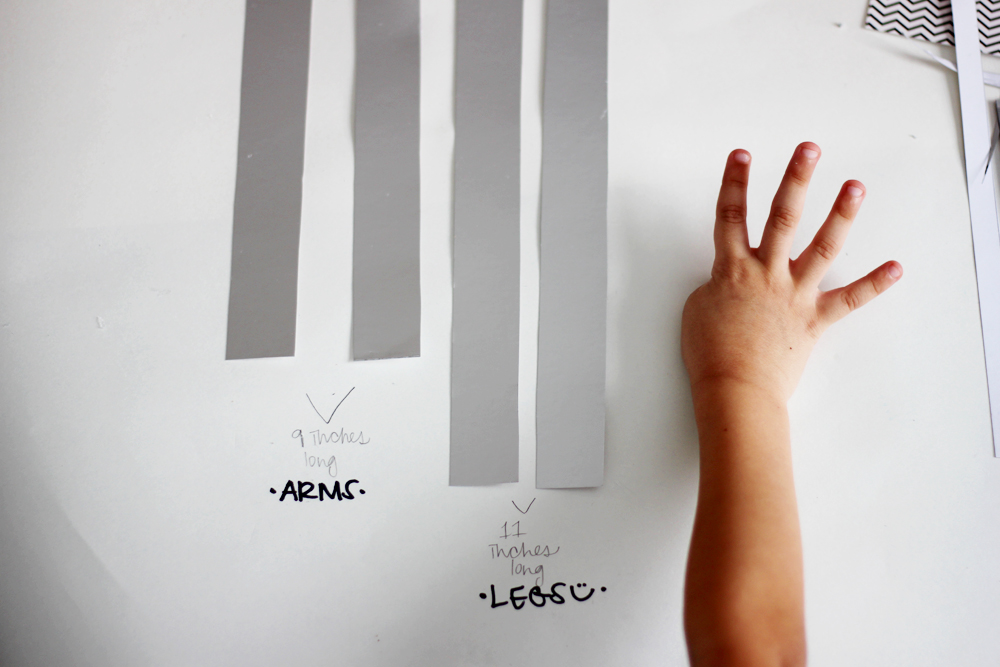
// We folded our legs accordion style, then cut + glued pieces of New Years' noise maker ribbon into each fold to make them more fun. The metallic blue went perfectly with our robot and once more: reuse / reduce :)


10.) Create a face out of sticky foam sheet and attach. I drew it and then cut it out. I had my little man attach it. I also added white puffy paint dots to give the eyes a little of dimension.

11.) Glue as many decorative tacks as you would like to the top and sides of the head. I also created a little tube with a piece of mirror card stock to lift the top pin, this is optional. You and your little one(s) can decorate your robot as much or as little as you'd like.

// Add little pieces of love :)

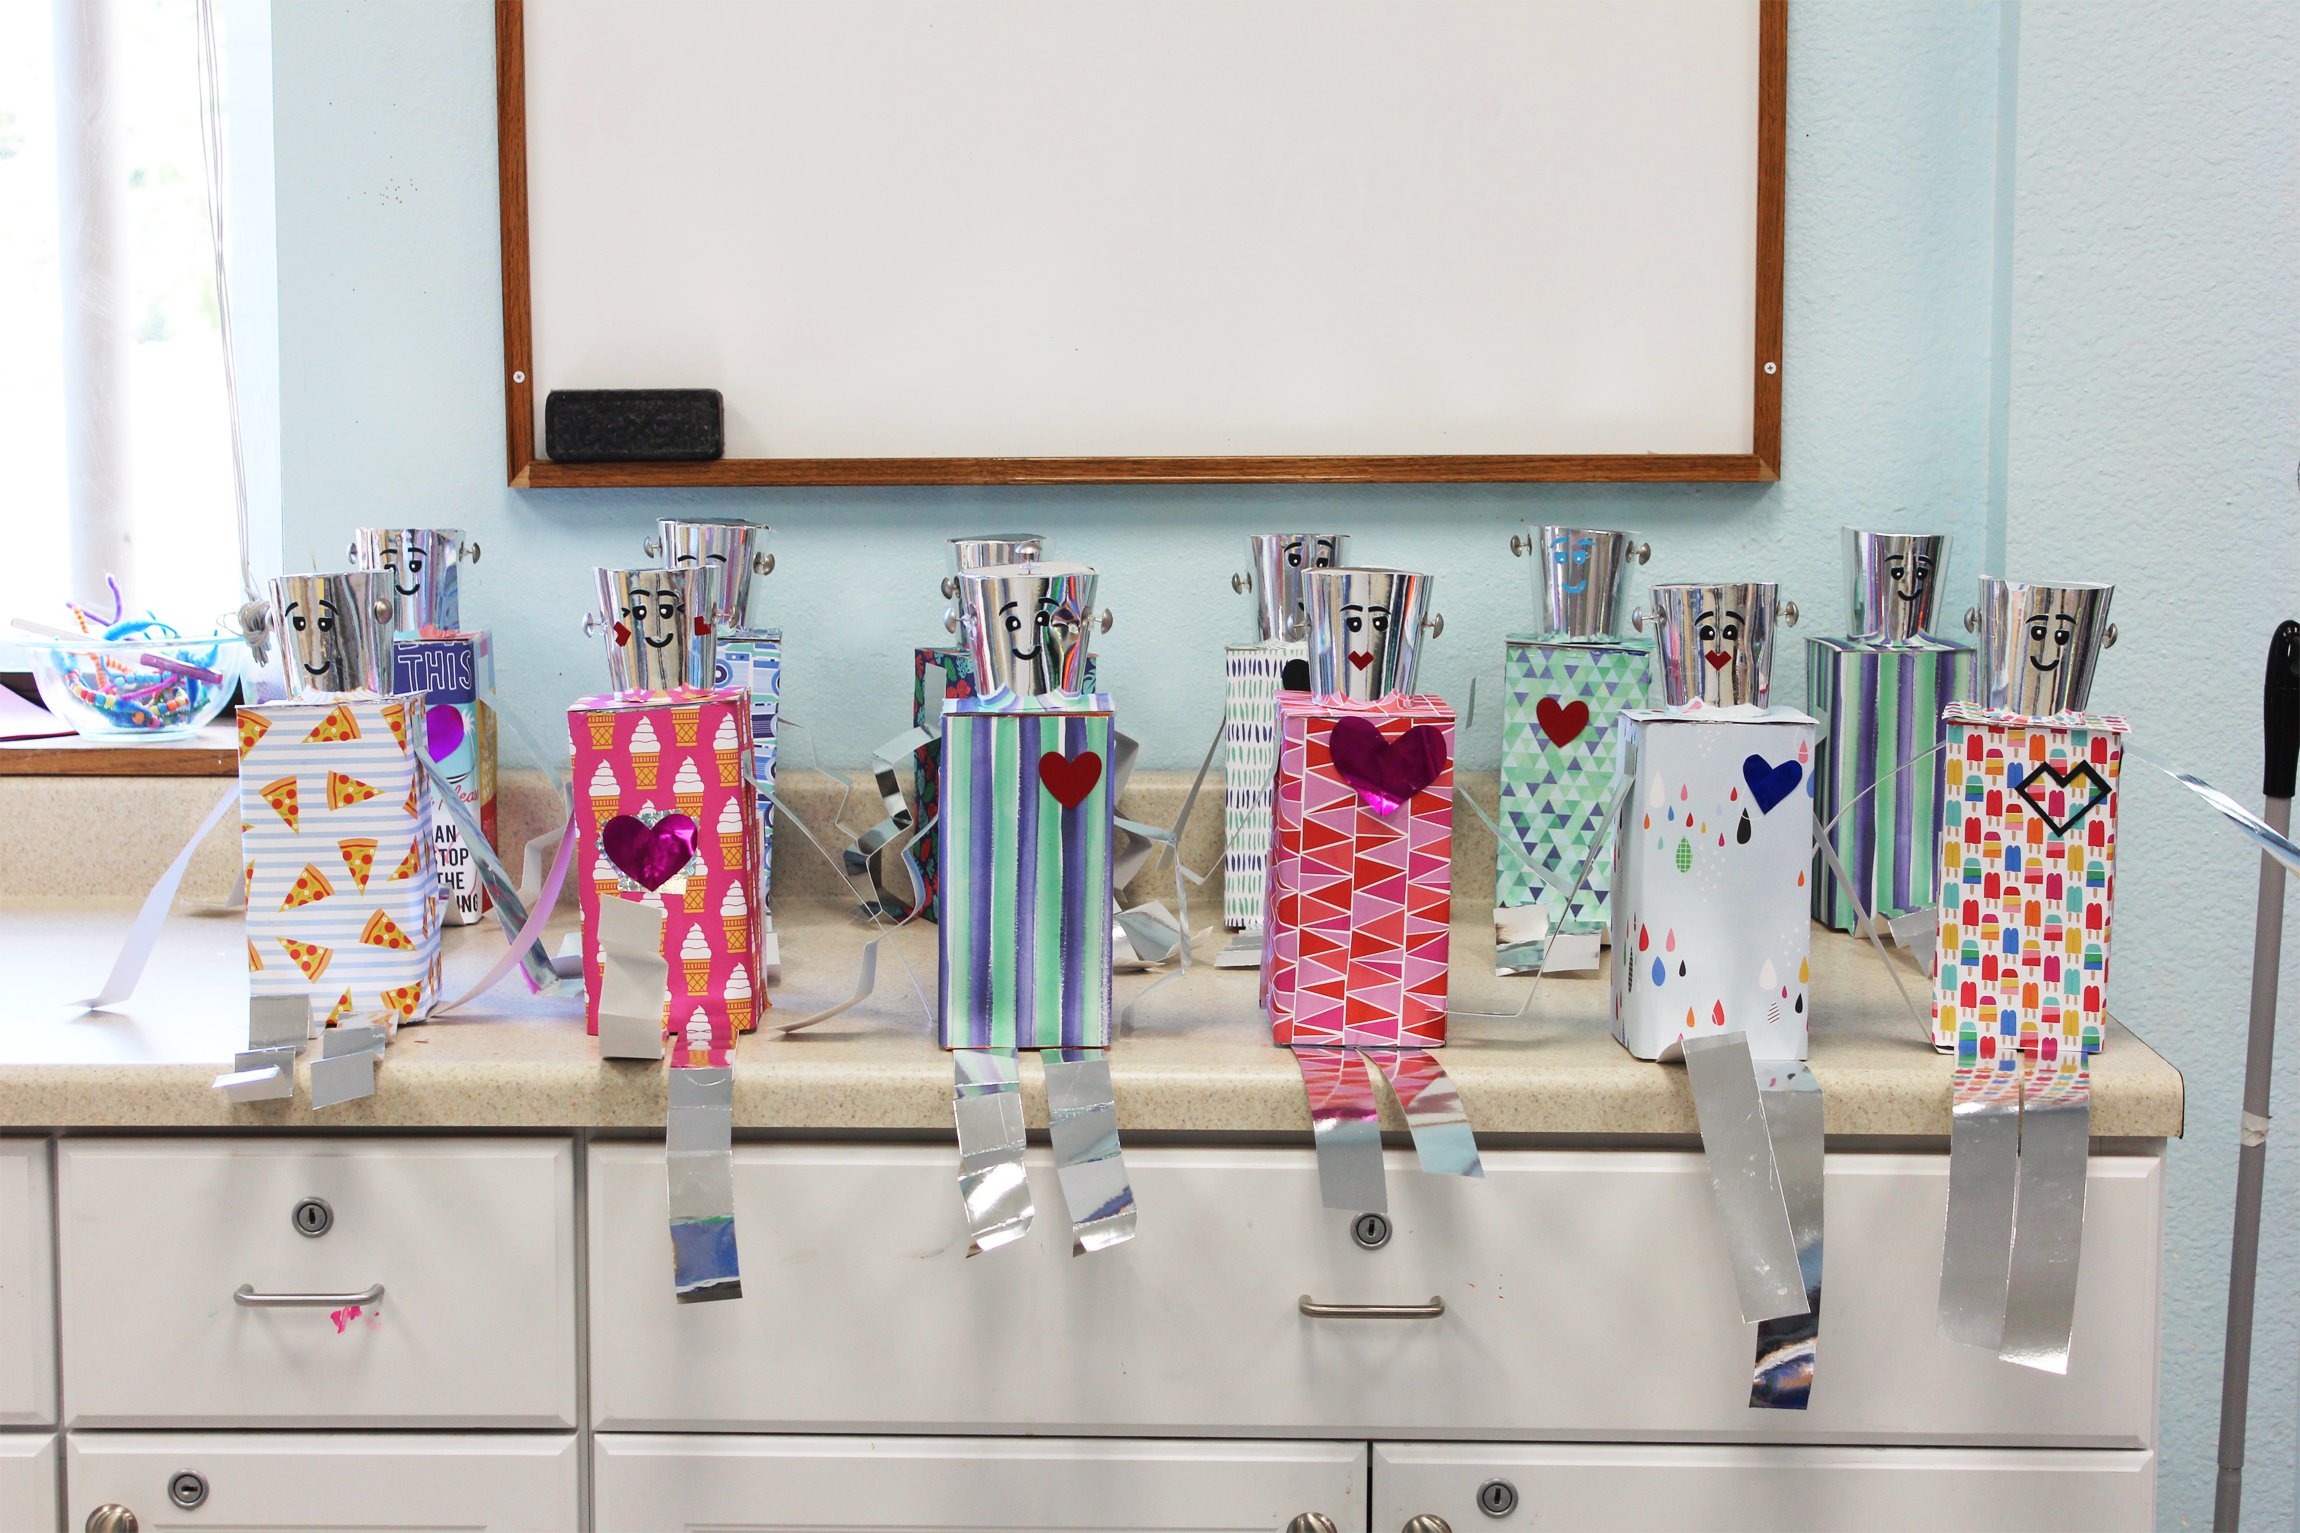
// Cuddle with your Valentine's Day Robots + sit them on your favorite shelf, don't forget to revisit the Valentine's inside reminding you how amazingly loved you are. Have fun making these and tag @allkidsaregifted so that we can see how yours turned out! Can't wait to see!!


TAUGHT IN CLASS
Here is a peek at when I taught the Valentine's Day Robot Mailbox DIY in my son’s Kindergarten class:


OUR TAKE ON THE HOT WHEELS VALENTINE'S 💌
Last year around this time, I was browsing through the kids category on iTunes and my oldest little happened to see the icon for the movie "Cars" flash by. "I want the MCQUEEN movie!" He screamed. I was kind of confused because I was so sure that we've owned that movie for years now, I said "Don't we have that already?" I of course, had to go into our purchased movies to prove to our then 4 year old that I was right, only to find that I was SO wrong. He owns "Cars 2" but not the first movie that was the cause of his obsession with Lightening McQueen for about a year and a half after he turned two. Therefore I bought it (I swore we had it all along) and this started his FULL ON obsession once more.

A few days later when we went to look for Valentines' that he could give his friends in class during their Valentine's Day Party he said "I want MCQUEEN Valentine's mom!!". We looked and looked through all the isles but since the super cool car movie hasn't released any new releases recently (until the one coming this summer! Stay tuned loves!!) there were none to be found. I REALLY didn't want to go from store to store and he insisted on being present and hadpicking them himself, so ordering online was out of the question. Therefore, I had to get creative with a good compromise.
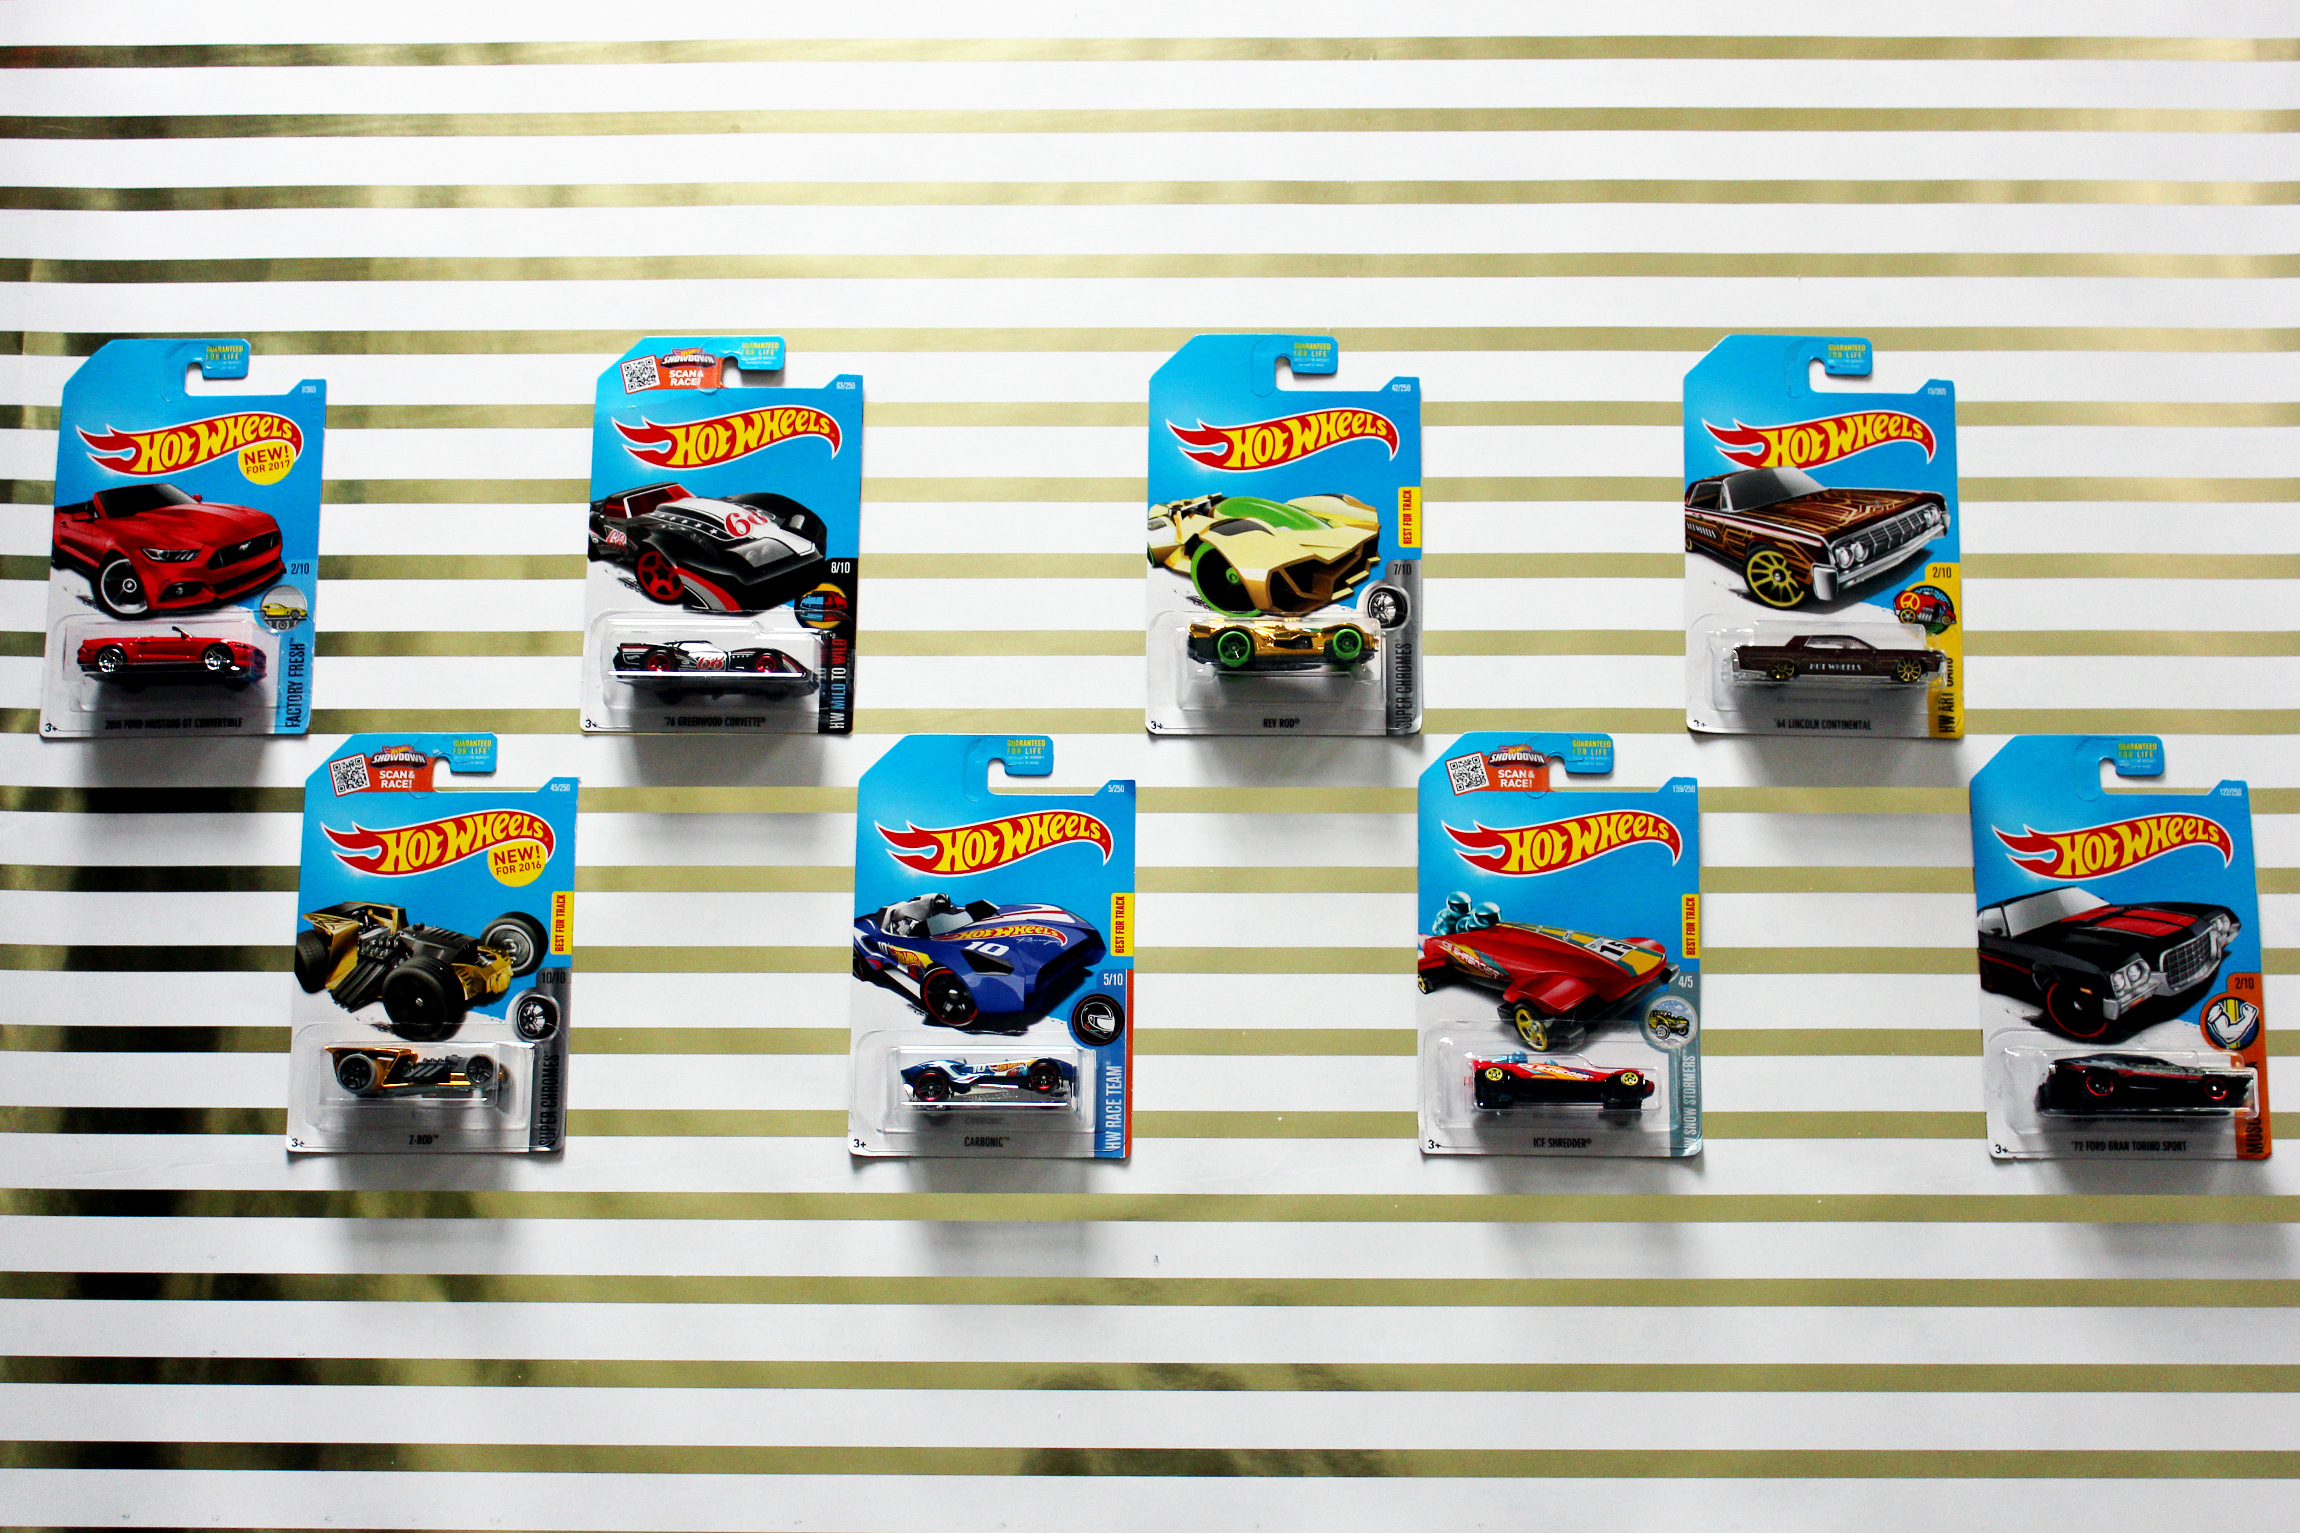
We found some "Cars" themed Valentine's stickers and he is also a fan of Hot Wheels cars (raise your hand if your kid has TONS of these tiny things lying around, waiting for you to trip over 🙋🏻) so then it clicked: Hot Wheels Valentines + Cars stickers to seal them! I had seen something on Pinterest where the Mama's / Daddy's did just that and I knew I had supplies stocked to make them easily, so I decided to make our own version of this apparently popular idea.
Me: "Hey! Why don't you help me pick our a Hot Wheels car for each of your friends, and we can make a small road to tie them to, add some candy, put them into a bag and seal them with your McQueen stickers, yeah?!"
Connor: "YES MOM THAT'S SO COOL!!!!!"
Cue the car noises and squealing as he goes into full "McQueen" mode and "drives" off en route to the toy isle. I'm feeling SO proud of myself as I run after him, I mean come on! After that reaction? I HAVE to make these with him! After all, how long is he going to think I'm SO right and SO cool?! Gotta take it while I can right?

I did like this Hot Wheels inspired printable that I found on Pinterest, so I printed some out on card stock and gathered all the rest of the materials I thought would make this project come together. We then got to work and we honestly had SUCH a fun time doing it, I'm so glad we decided to go this route!


// All packed up in a CARS bag of course!

// Ready for delivery! 📬

These were SO fun to make and it made our oldest little man so proud to hand them out + it's another memory for our memory book which I love! Have fun making these, they could be used for so many things: party invites, party favors, or Valentine's day coming up before you know it. Can't wait to see what you come up with!
* it's netflix time! *
AKAG
M IS FOR MERMAID 🐚
You can create Christmas decor using any theme right?! I think so! As little girls, my sisters and I spent countless hours playing pretend that we were mermaids. We would take the pillow covers off of our pillows and put them over our legs, then narrate an underwater world to life. 🐚
Playing make believe with my sisters are my most cherished childhood memories and trust me … we have TONS of stories!
While I was photographing the Hotwheels Christmas Wreath DIY I was thinking about what a fun wreath would be for a little girl (if she didn't care for cars) and I was SOOOO very excited when the word MERMAIDS!!!!! came into my mind. I got right to work and hand drew + cut out all of these little underwater ladies out of foam, got to gluing them together and started attaching them to this beautiful white wreath.

// Are there any seashell collectors out there? 🙋🏻 I spend hours collecting shells on the beach when I get a chance to go and my collection is finally being put into good use! I picked some of my favorites and painted them with watercolors.

// This part was fun! I wasn't sure how the paint would adhere to the shells but I was pleasantly surprised at the richness of color that I got and the texture in the shells made each of them a beautiful piece of art!


// I glued these shells on with a glue gun around the mermaids, attached some mini trees and DONE!


* If you love and want to re-create this wreath but don't want to hand draw all your mermaids, comment "DIY PLEASE" below and I will draw out a free downloadable template for you to print for them! I will include it (along with a few instructions to make them) into this post for you to access it! Happy Christmas memory making loves! * ❤️❄️🐠

HOT WHEELS CHRISTMAS WREATH DIY 🎄
If you didn't know this by now, then I think after this post you will for sure know that my boys LOVE hot wheels cars! When I thought of the idea for this wreath, I was really excited to see their reaction to the finished product. Just like I thought that they would: they jumped, laughed and yelled "COOOOL!!!!!". These reactions are always so rewarding, keep the ideas flowing, and my heart so full! I love making my little men happy! ❤️
MESSY LEVEL: 1
This project isn't very messy, there is some gluing with the hot glue gun and string cutting.
SUPPLIES:
Wreath of your choice
Hot wheels cars
String
Racing words printed on cardstock + cut out (optional). Download for racing words available HERE.
Paper straws in color / pattern of choice.

1.) The first thing you're going to need is a wreath of your choice.

2.) Then round up all the Hot Wheels cars that you want to use.
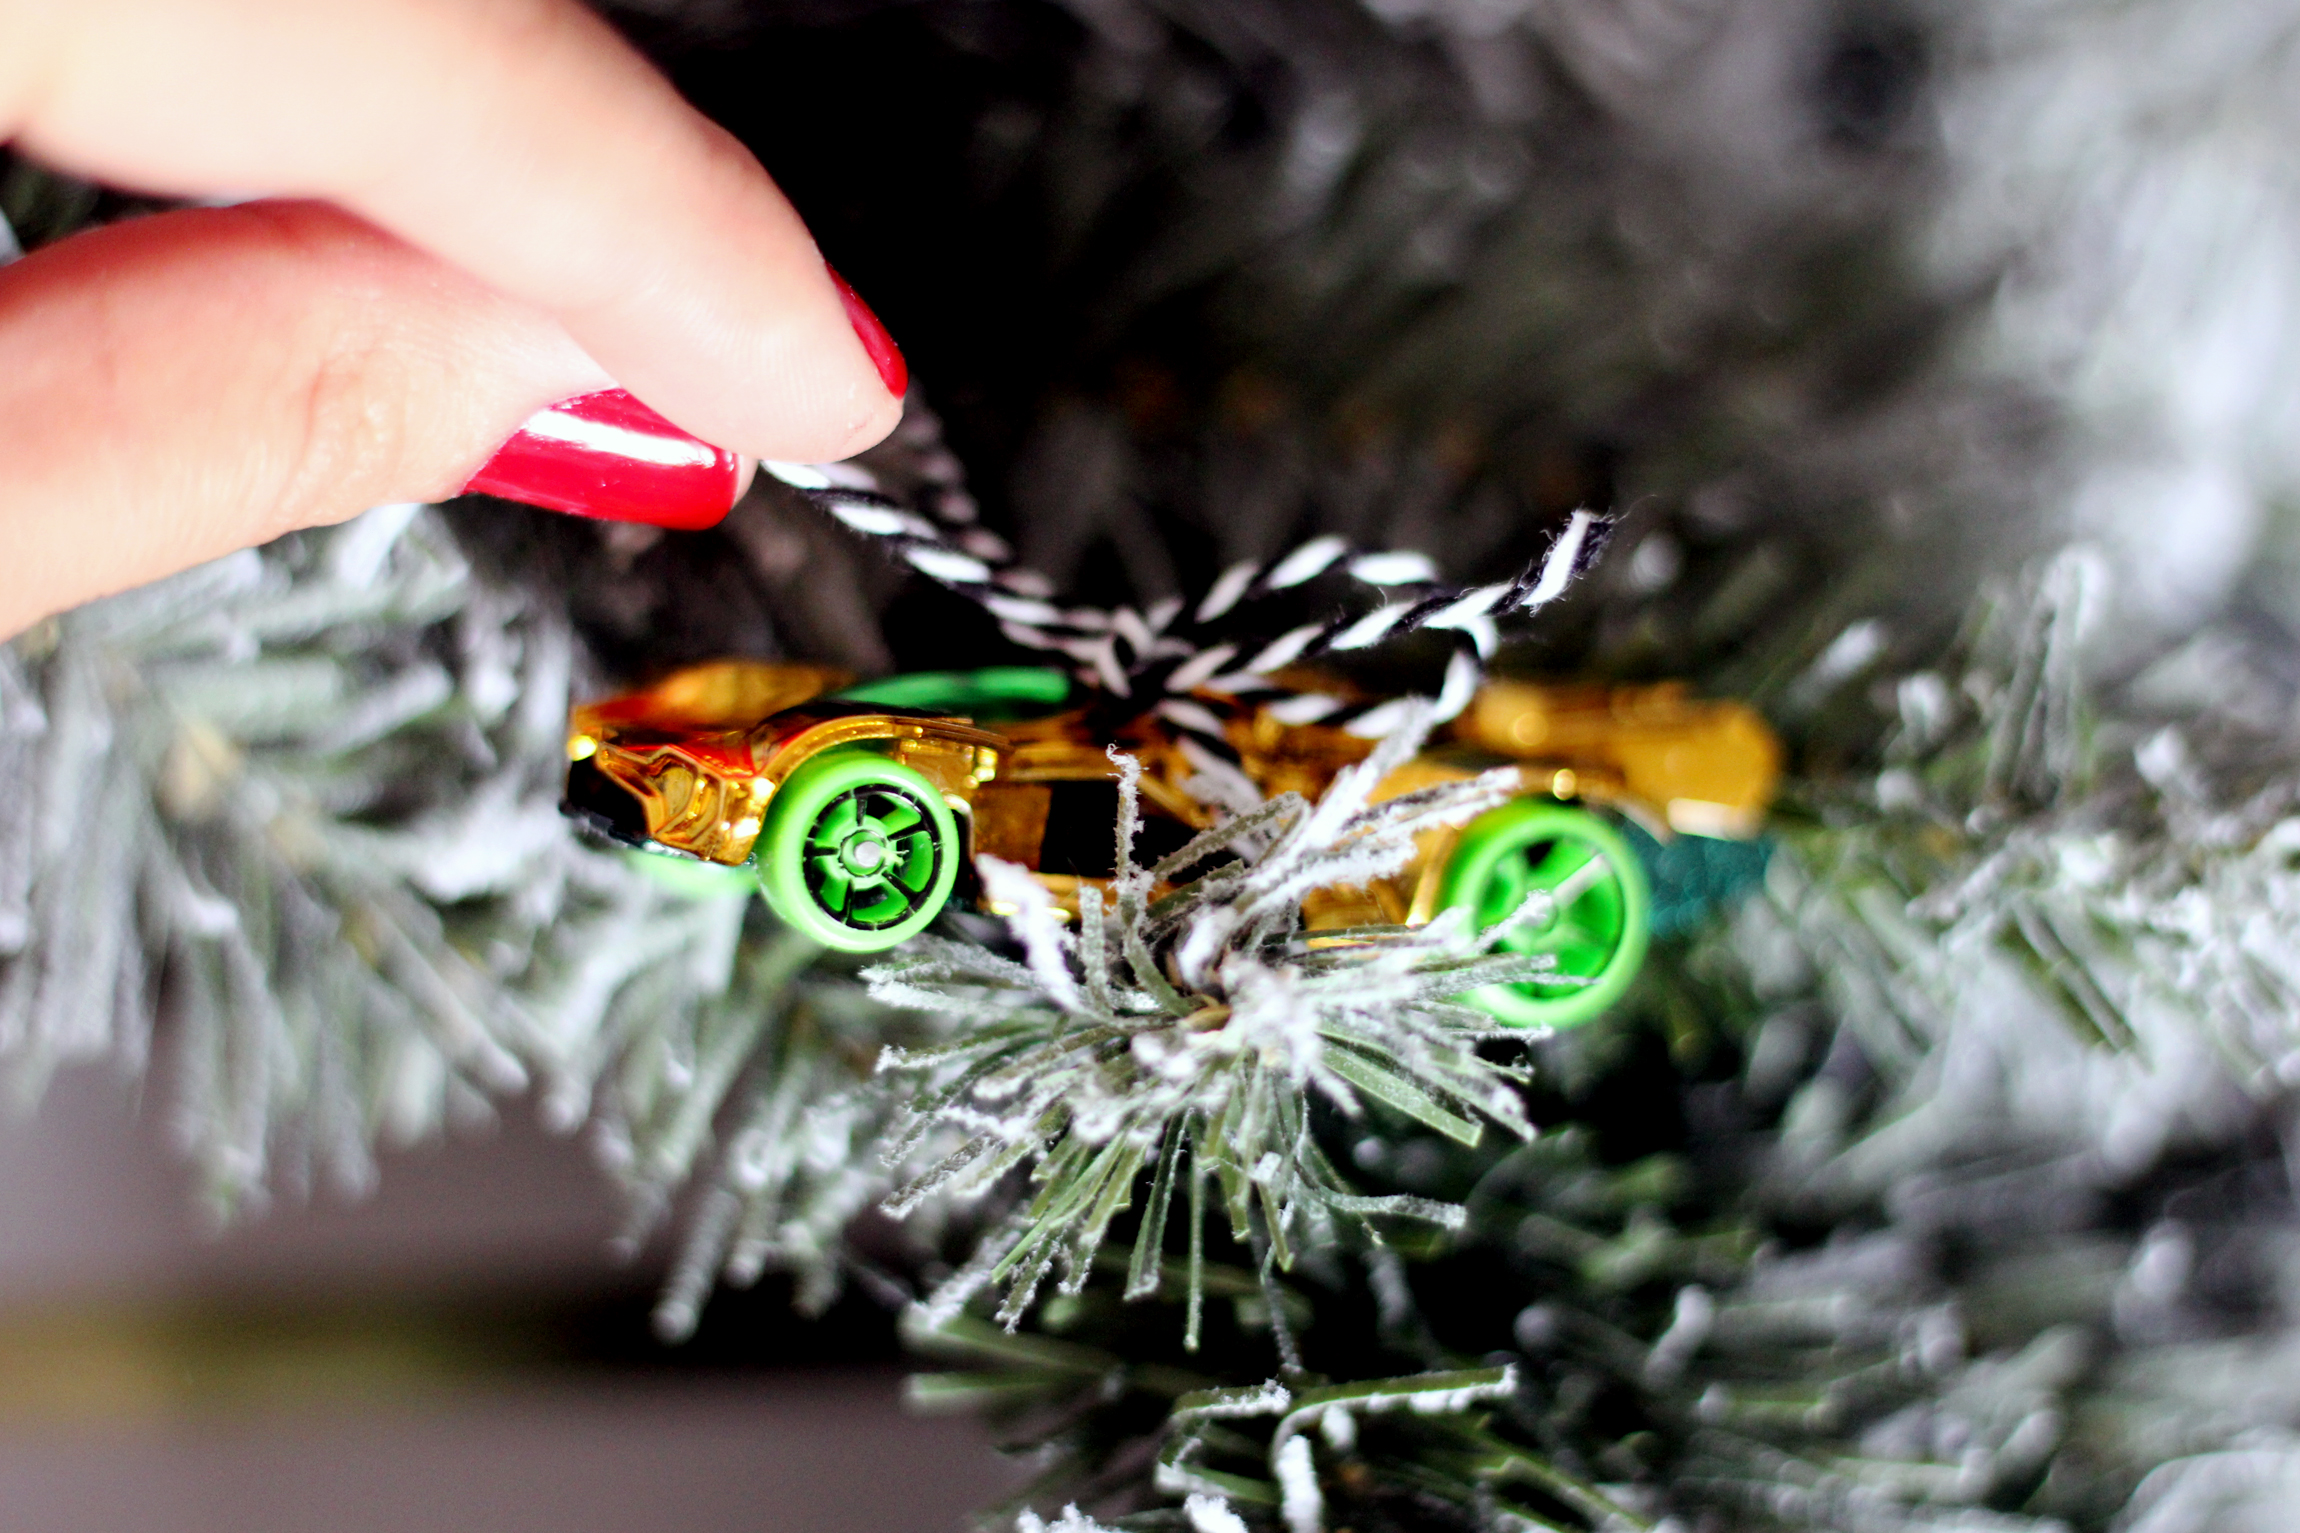
3.) It was helpful for us to stage them on the wreath where we were going to want them to go. (This step is optional)

4.) Then you start to cut your string into 5 inch pieces, cut as many pieces as there are cars. You'll be using these pieces to tie your racers all around your wreath! Wrapping the string around the cars twice, then tying held them on more securely.
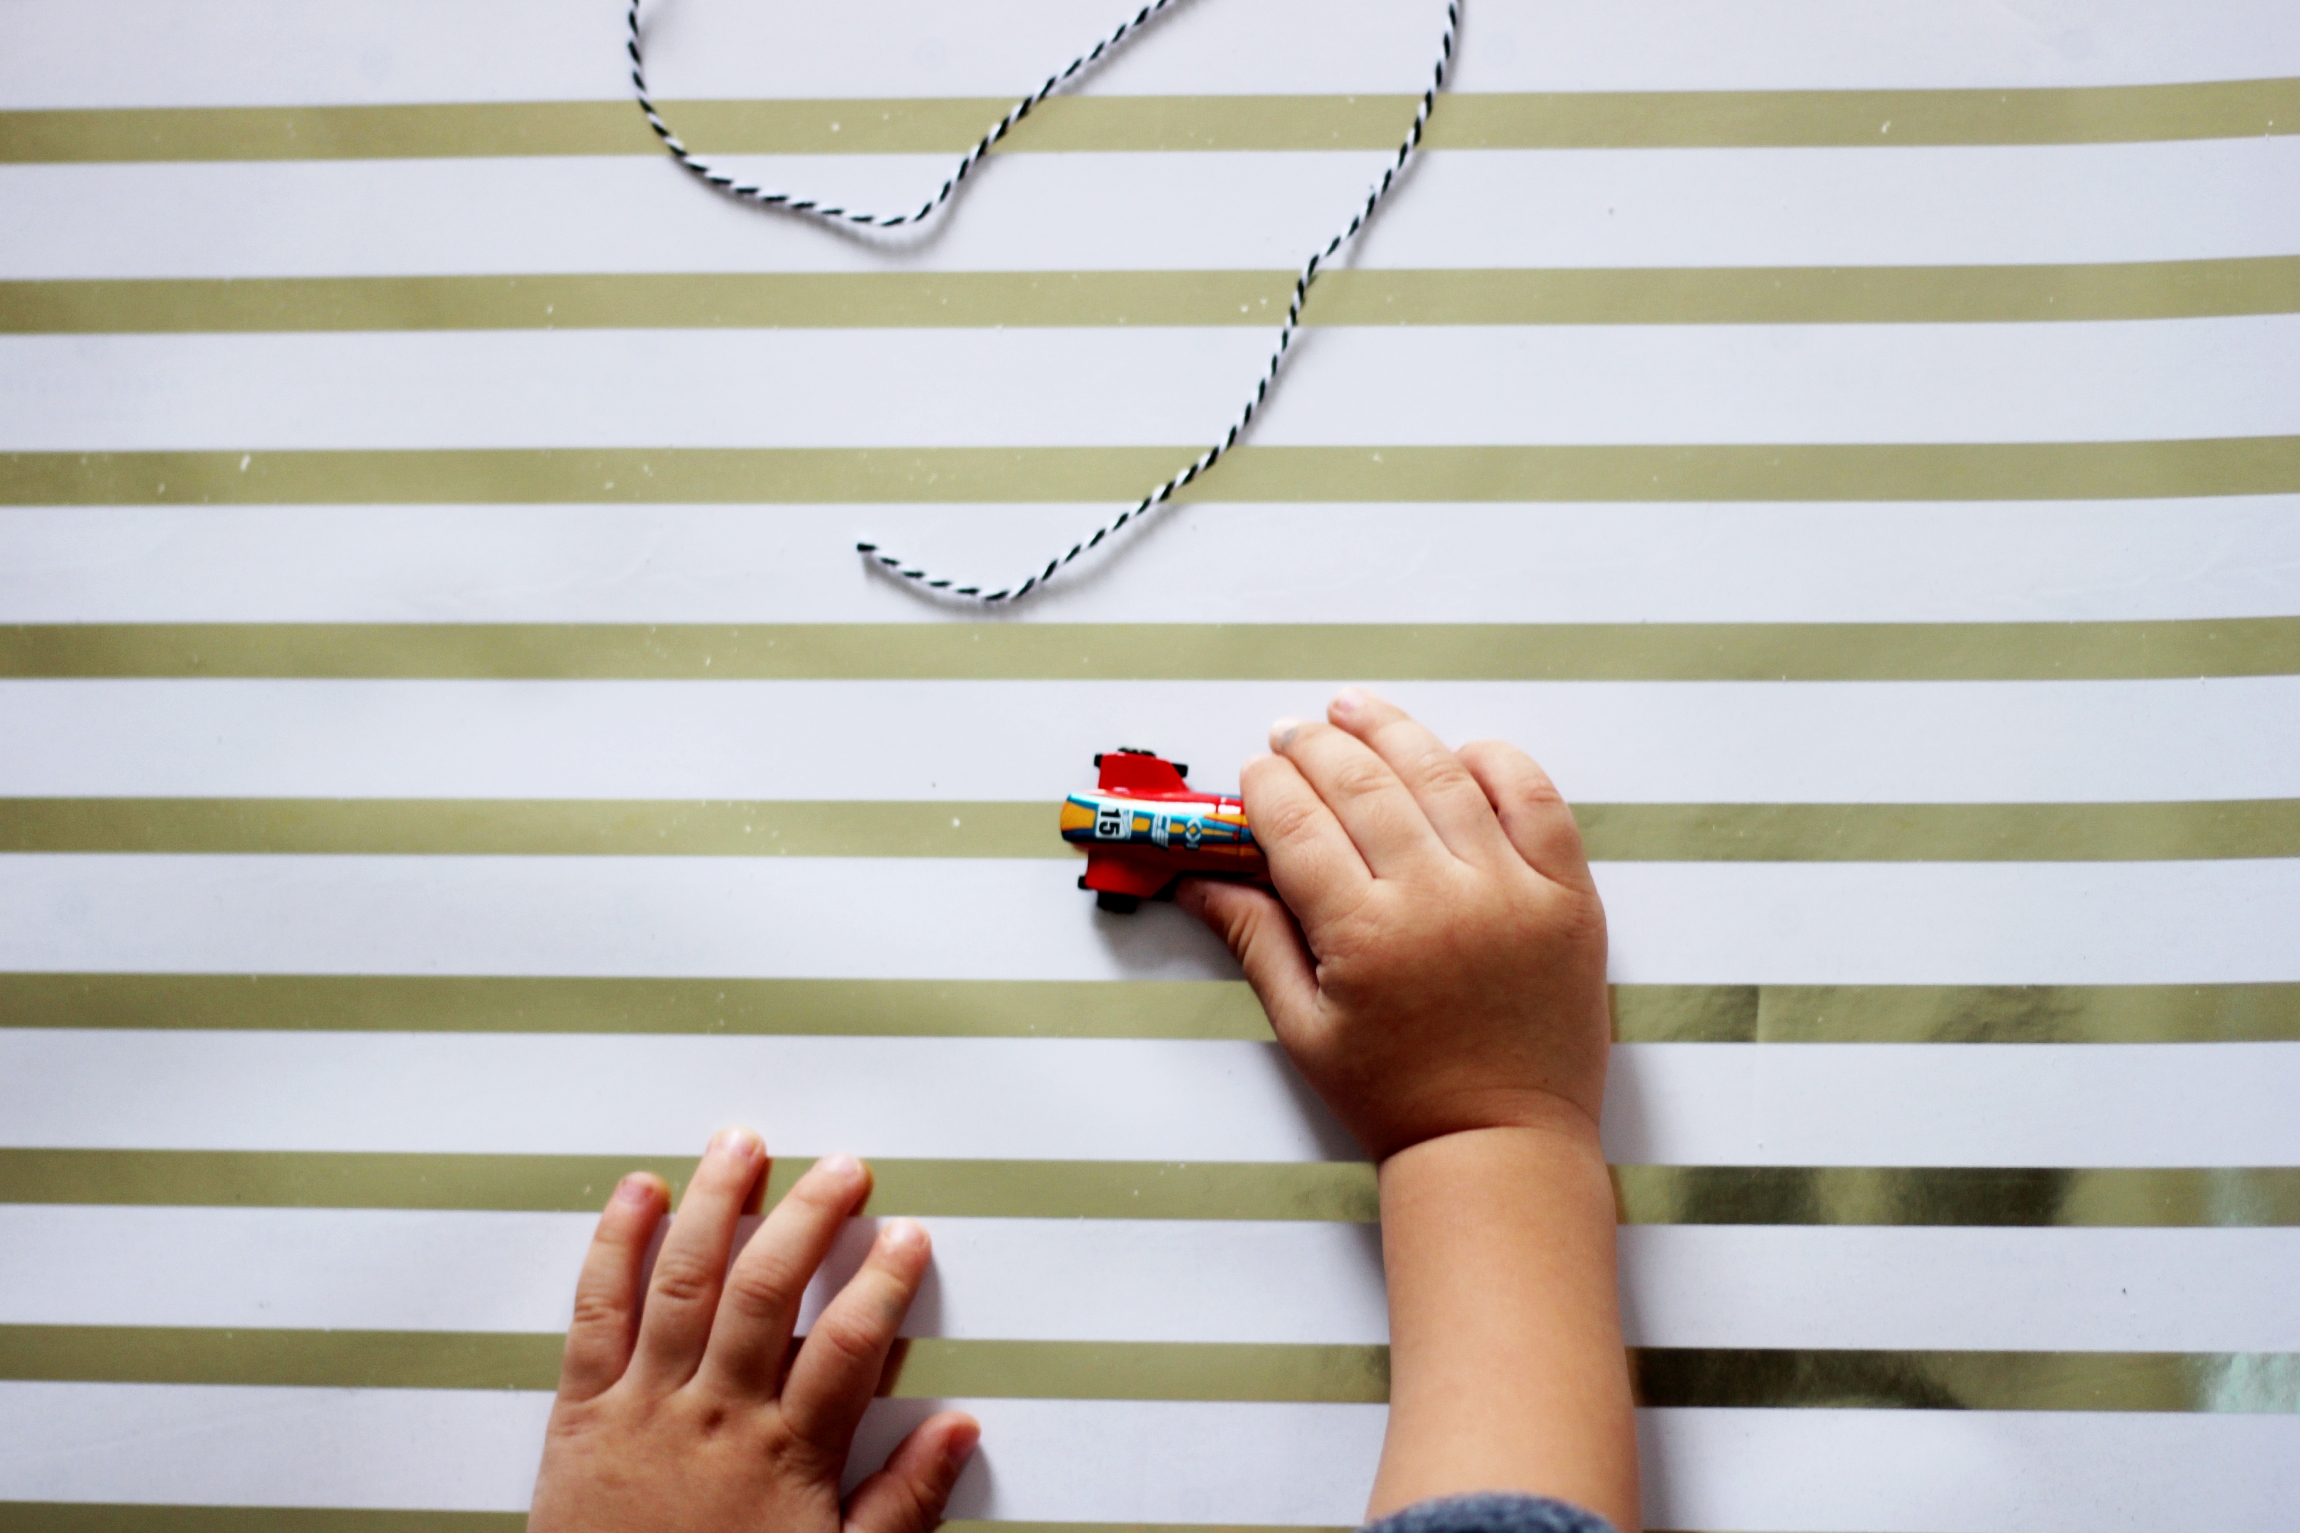


5.) If you decide to use the racing words, you can print the download out on cardstock. Cut each letter out and glue each word to a paper straw. You can then cut the remnant of each straw off. This made it easier for me to attach the words to the wreath. Then you can glue your words with a hot glue gun all around your wreath.

// That's it! Your Hot Wheels race car wreath is done + ready to hang!


// Also, how cute are these little Hot Wheels cars that we attached reindeer antlers + a red nose to?! 😍

// Have SO much fun making these with your kiddos or on your own to surprise them! The squeals of excitement will leave you so happy that you did! Happy Holidays and have fun decking your halls + joining in all the Holiday festivities! ❤️❄️

MINI SCARECROW DIY 🍂
When I was thinking about a great Fall DIY to create ... one that would also serve as a great Thanksgiving accent or decor; the idea of a small, adorable hand-held scarecrow came to mind. A really stylish one! The more I thought about it, the more I knew it needed to be a reality! The boys were really excited about them too! So I set out to make our scarecrow(s) come to life!
MESSY LEVEL: 3
There is a good amount of gluing and lots of cutting of different materials.
SUPPLIES:
• Body •
Cardboard (for head + torso)
5/16 x 36 wood dowel (can get these at any craft stores)
Cardstock in color desired for details
Small cup + pencil for tracing
Canvas fabric
A bag of Aspenwood excelsior you can purchase HERE or locally in any Joann store.
Glue gun and/or E600 glue
Scissors
Ruler
Sharpie and/or acrylic paint
Clear prepping gesso / gloss to seal canvas fabric
• Outfit •
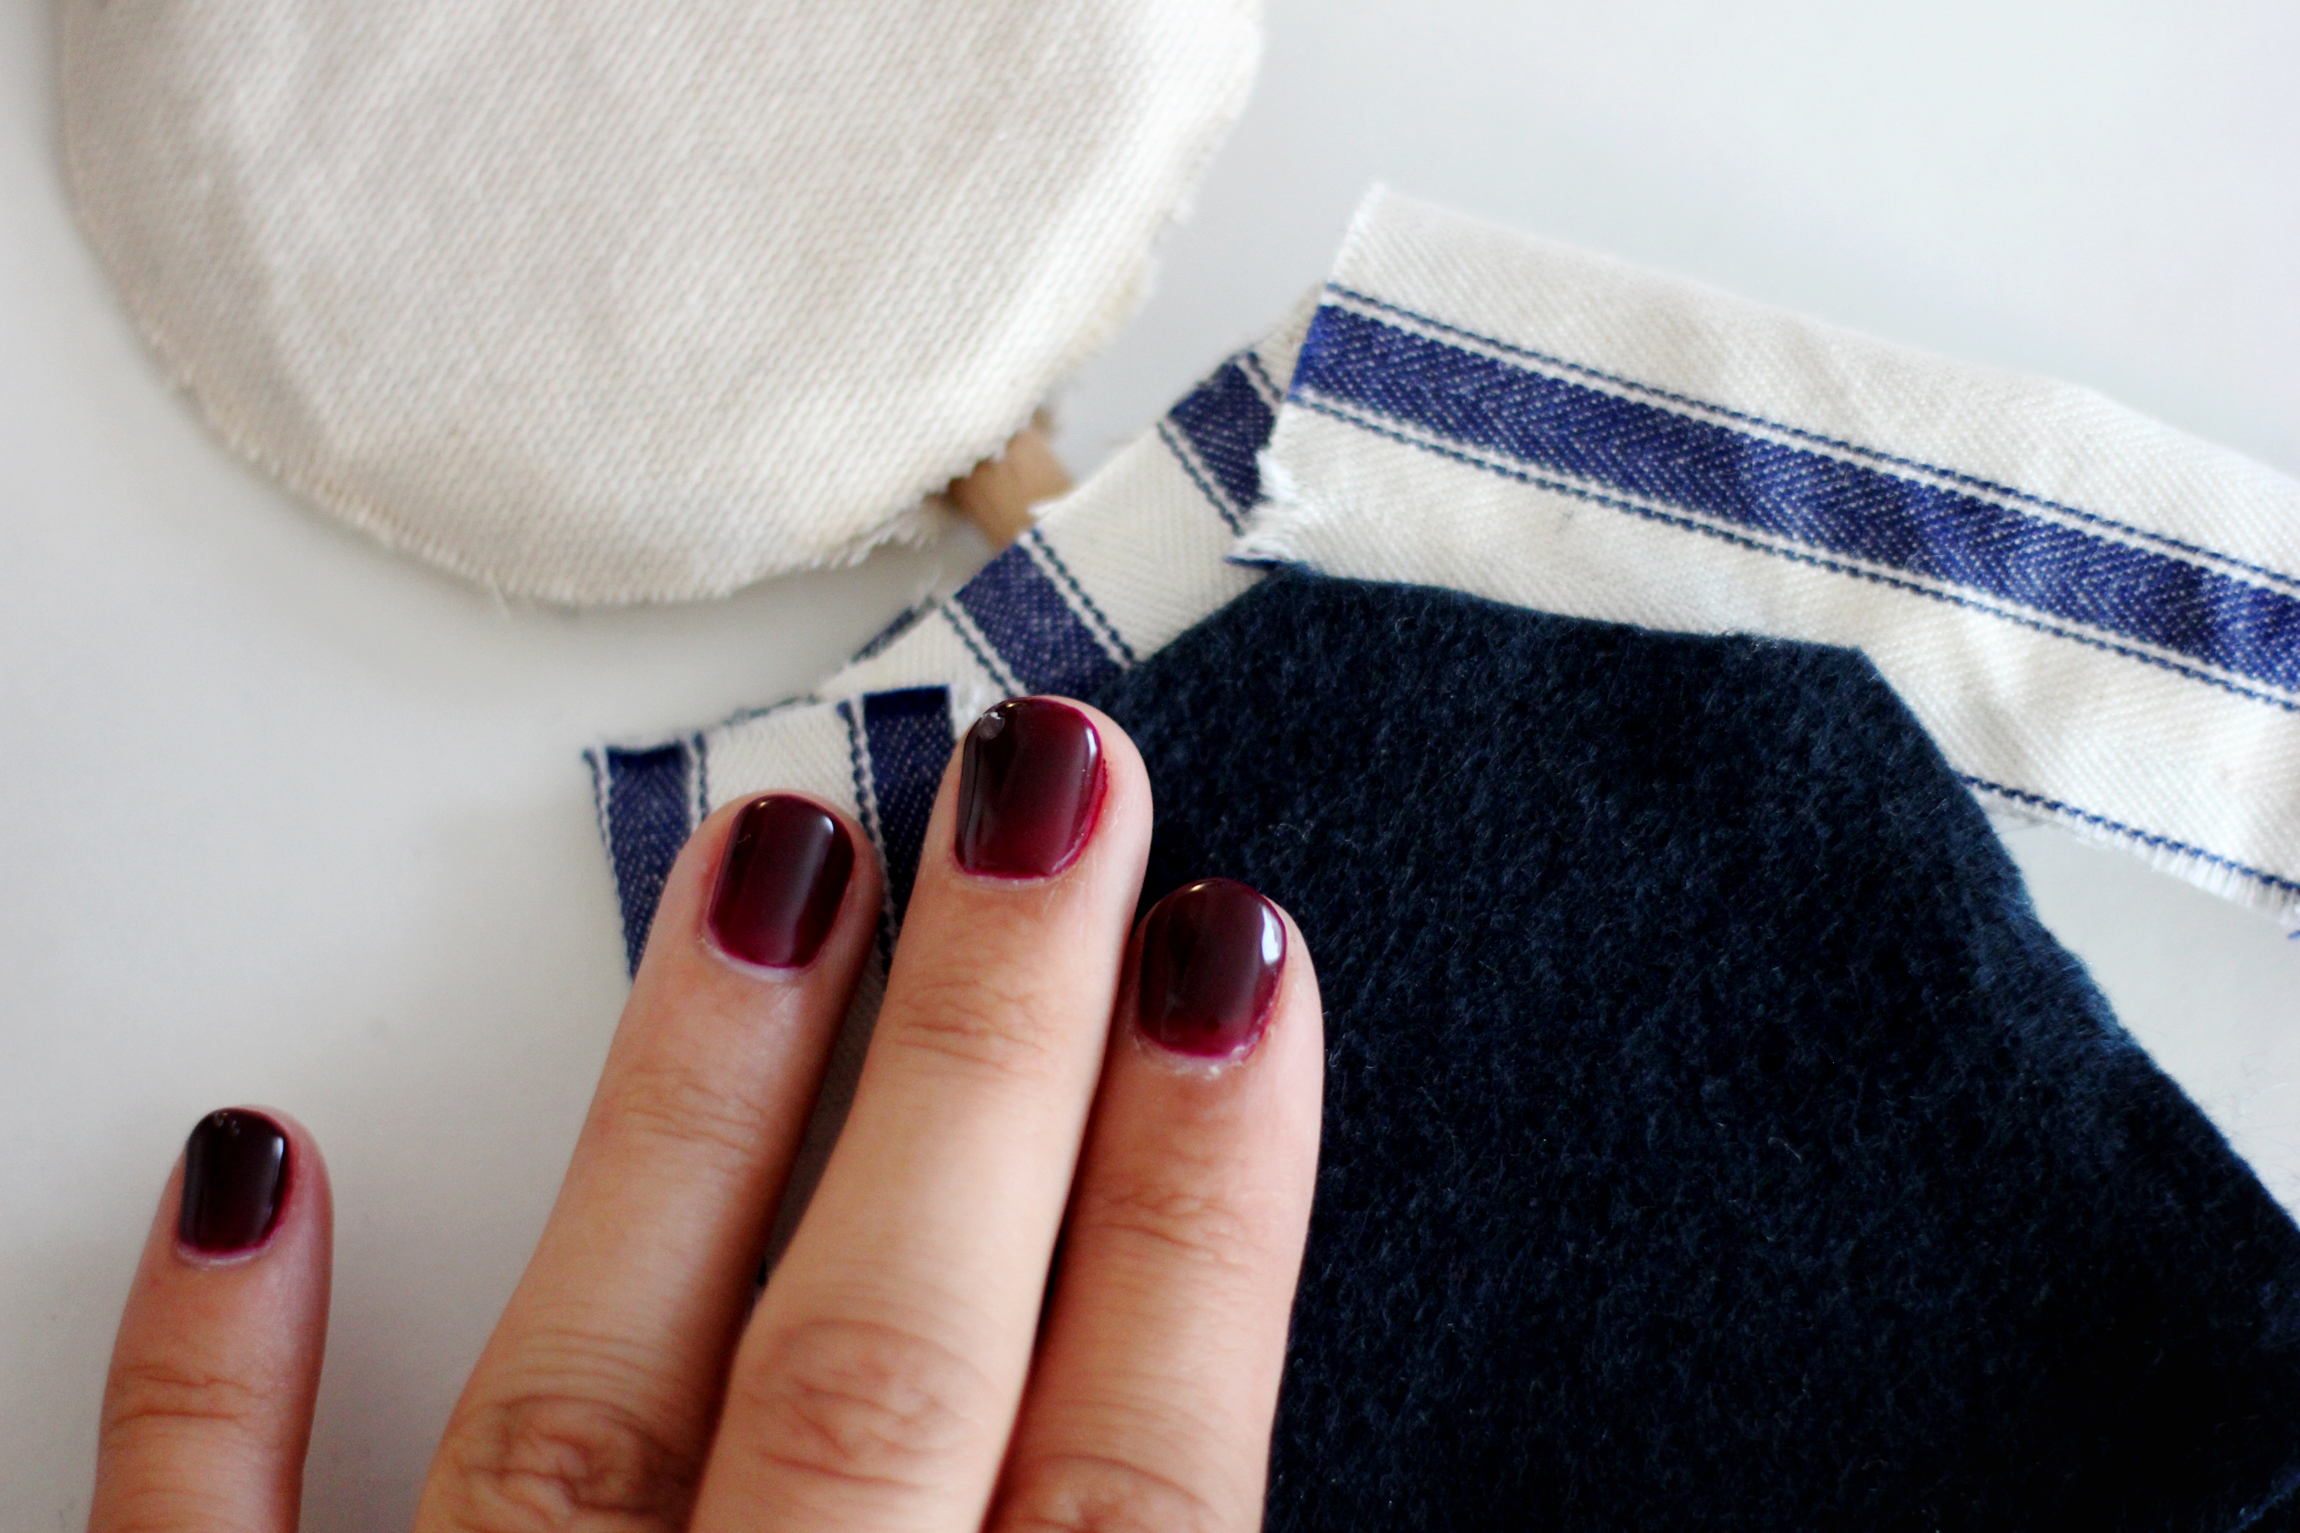
Felt fabric in color desired (we wanted a "denim" look so we went with navy blue)
Plaid fabric (or whichever pattern or look preferred for scarecrow shirt)
Fun patterned fabric for scarf + leggings (optional)
Wire for glasses (optional)

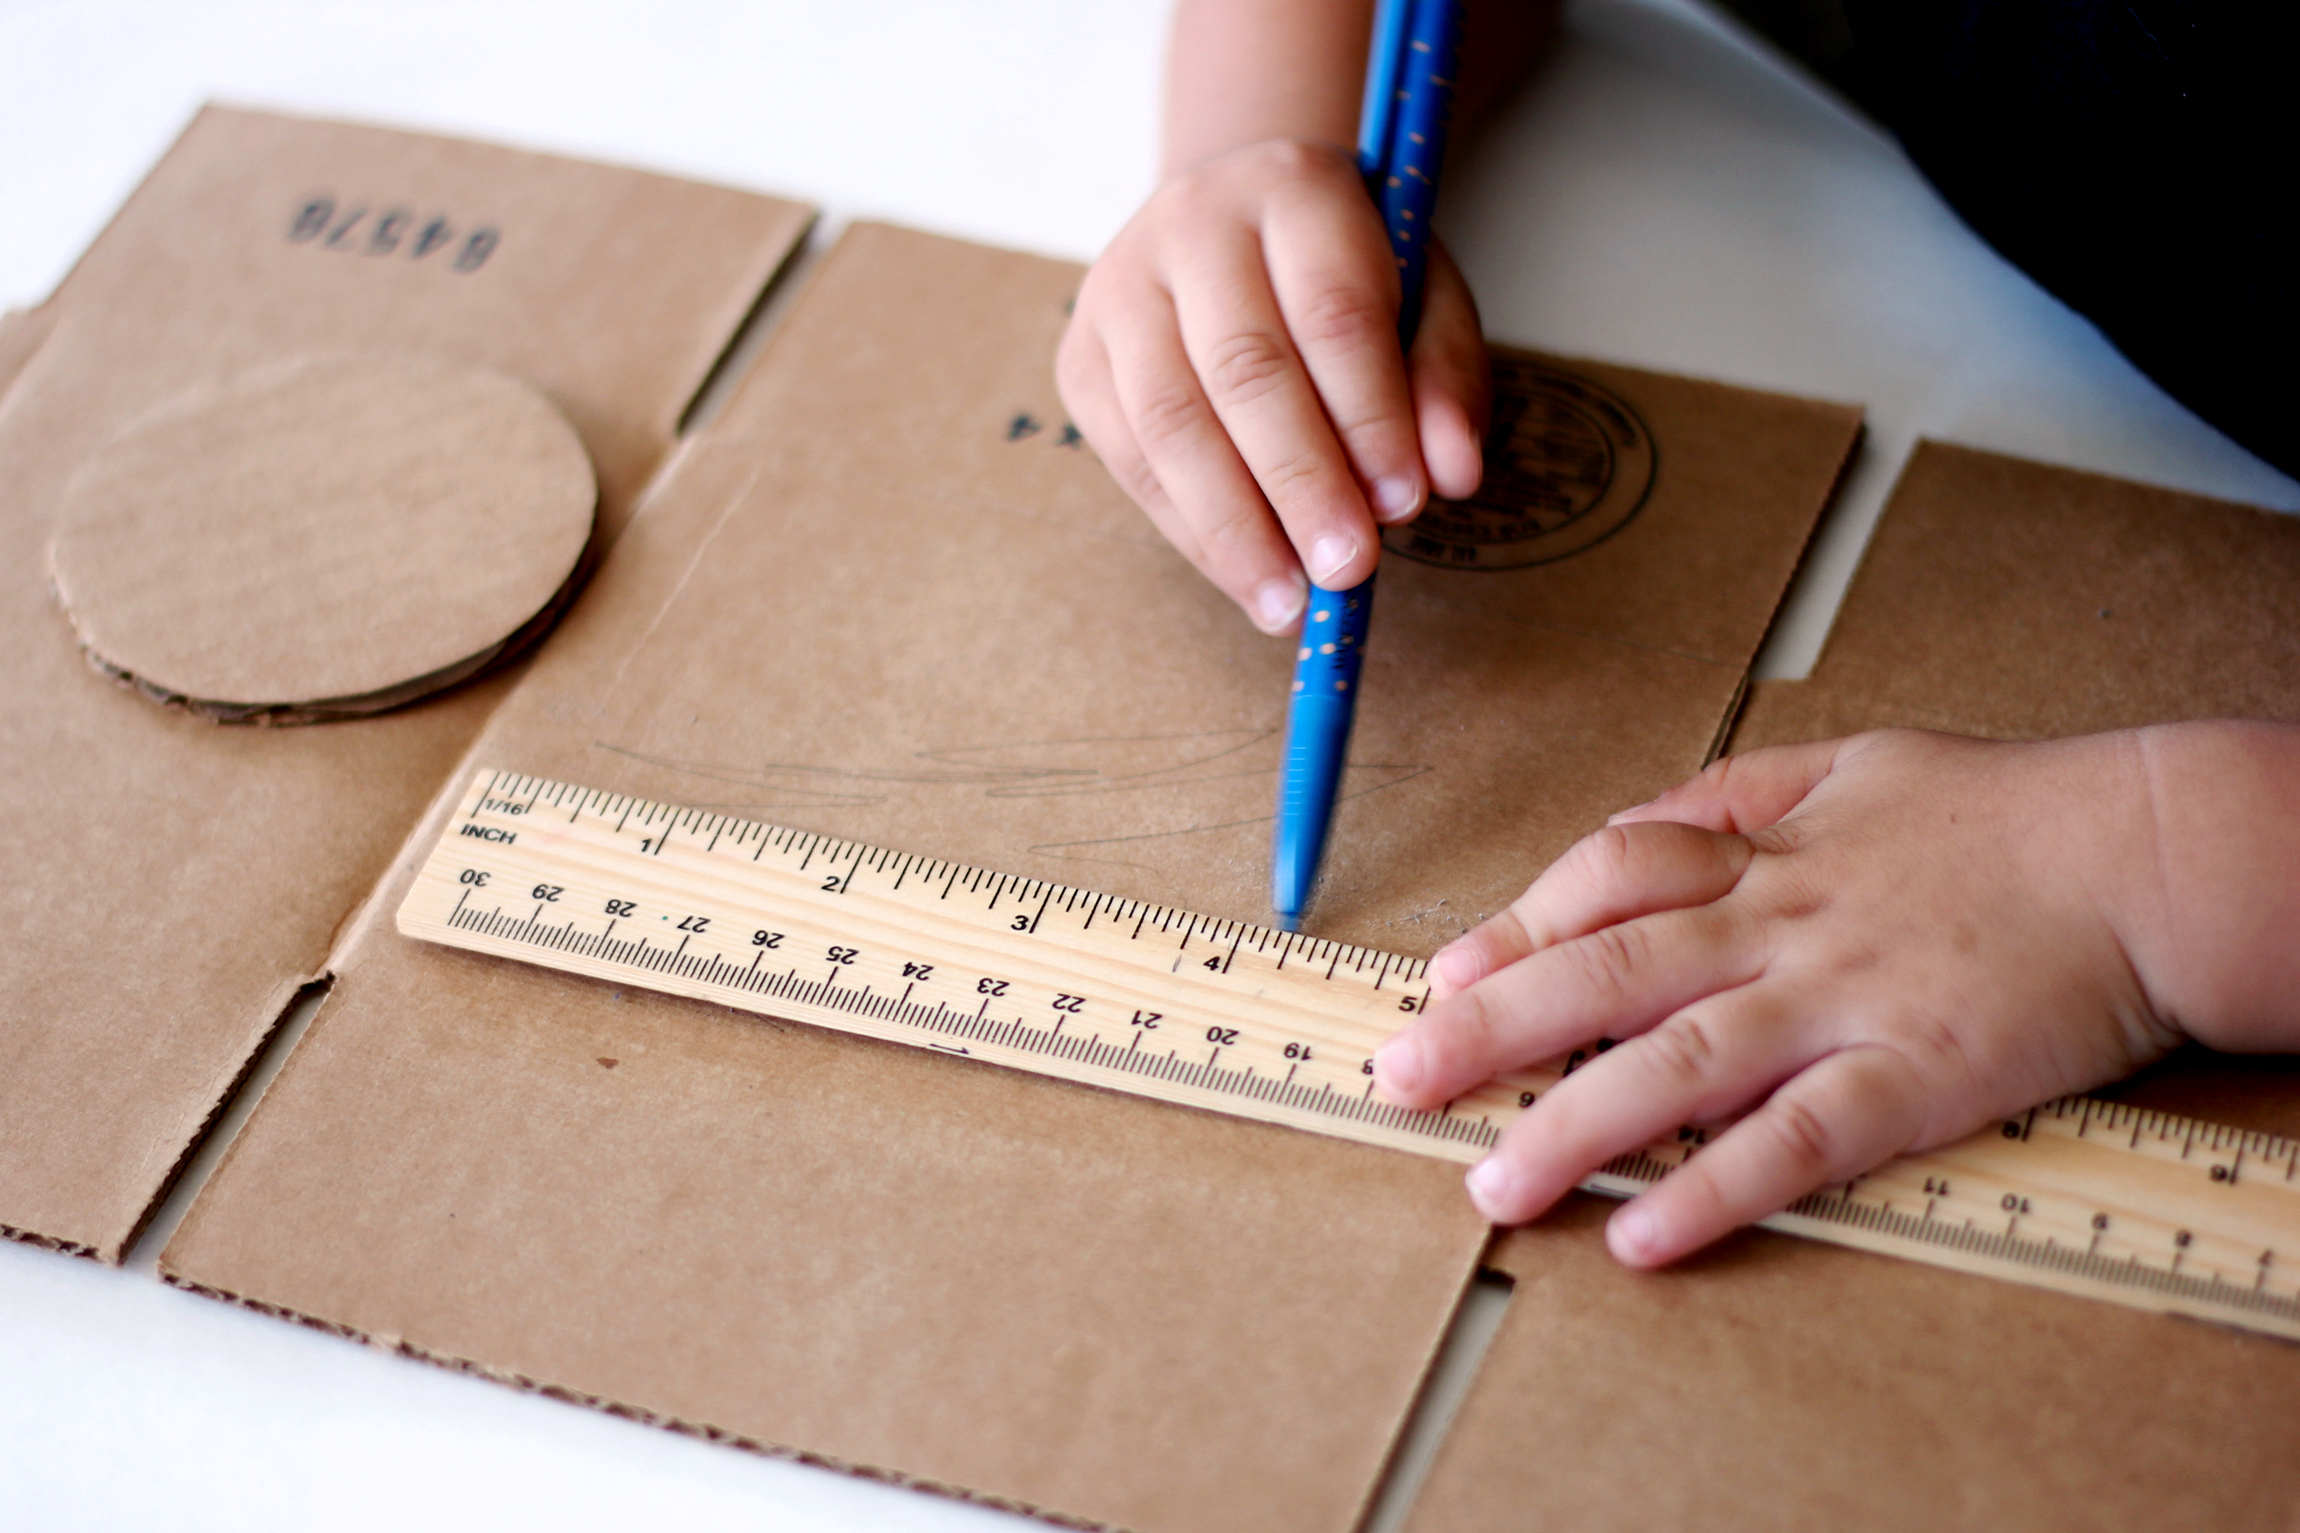
1.) First you're going to create a circle that will be the head of the scarecrow. The size will differ depending on how big you want your scarecrow to be. We traced around a kids cup which is 3 inches wide at the top. Then you'll make a rectangle for the body. We made ours to be 3.5 x 5 inches. After you're done tracing, cut your shapes.


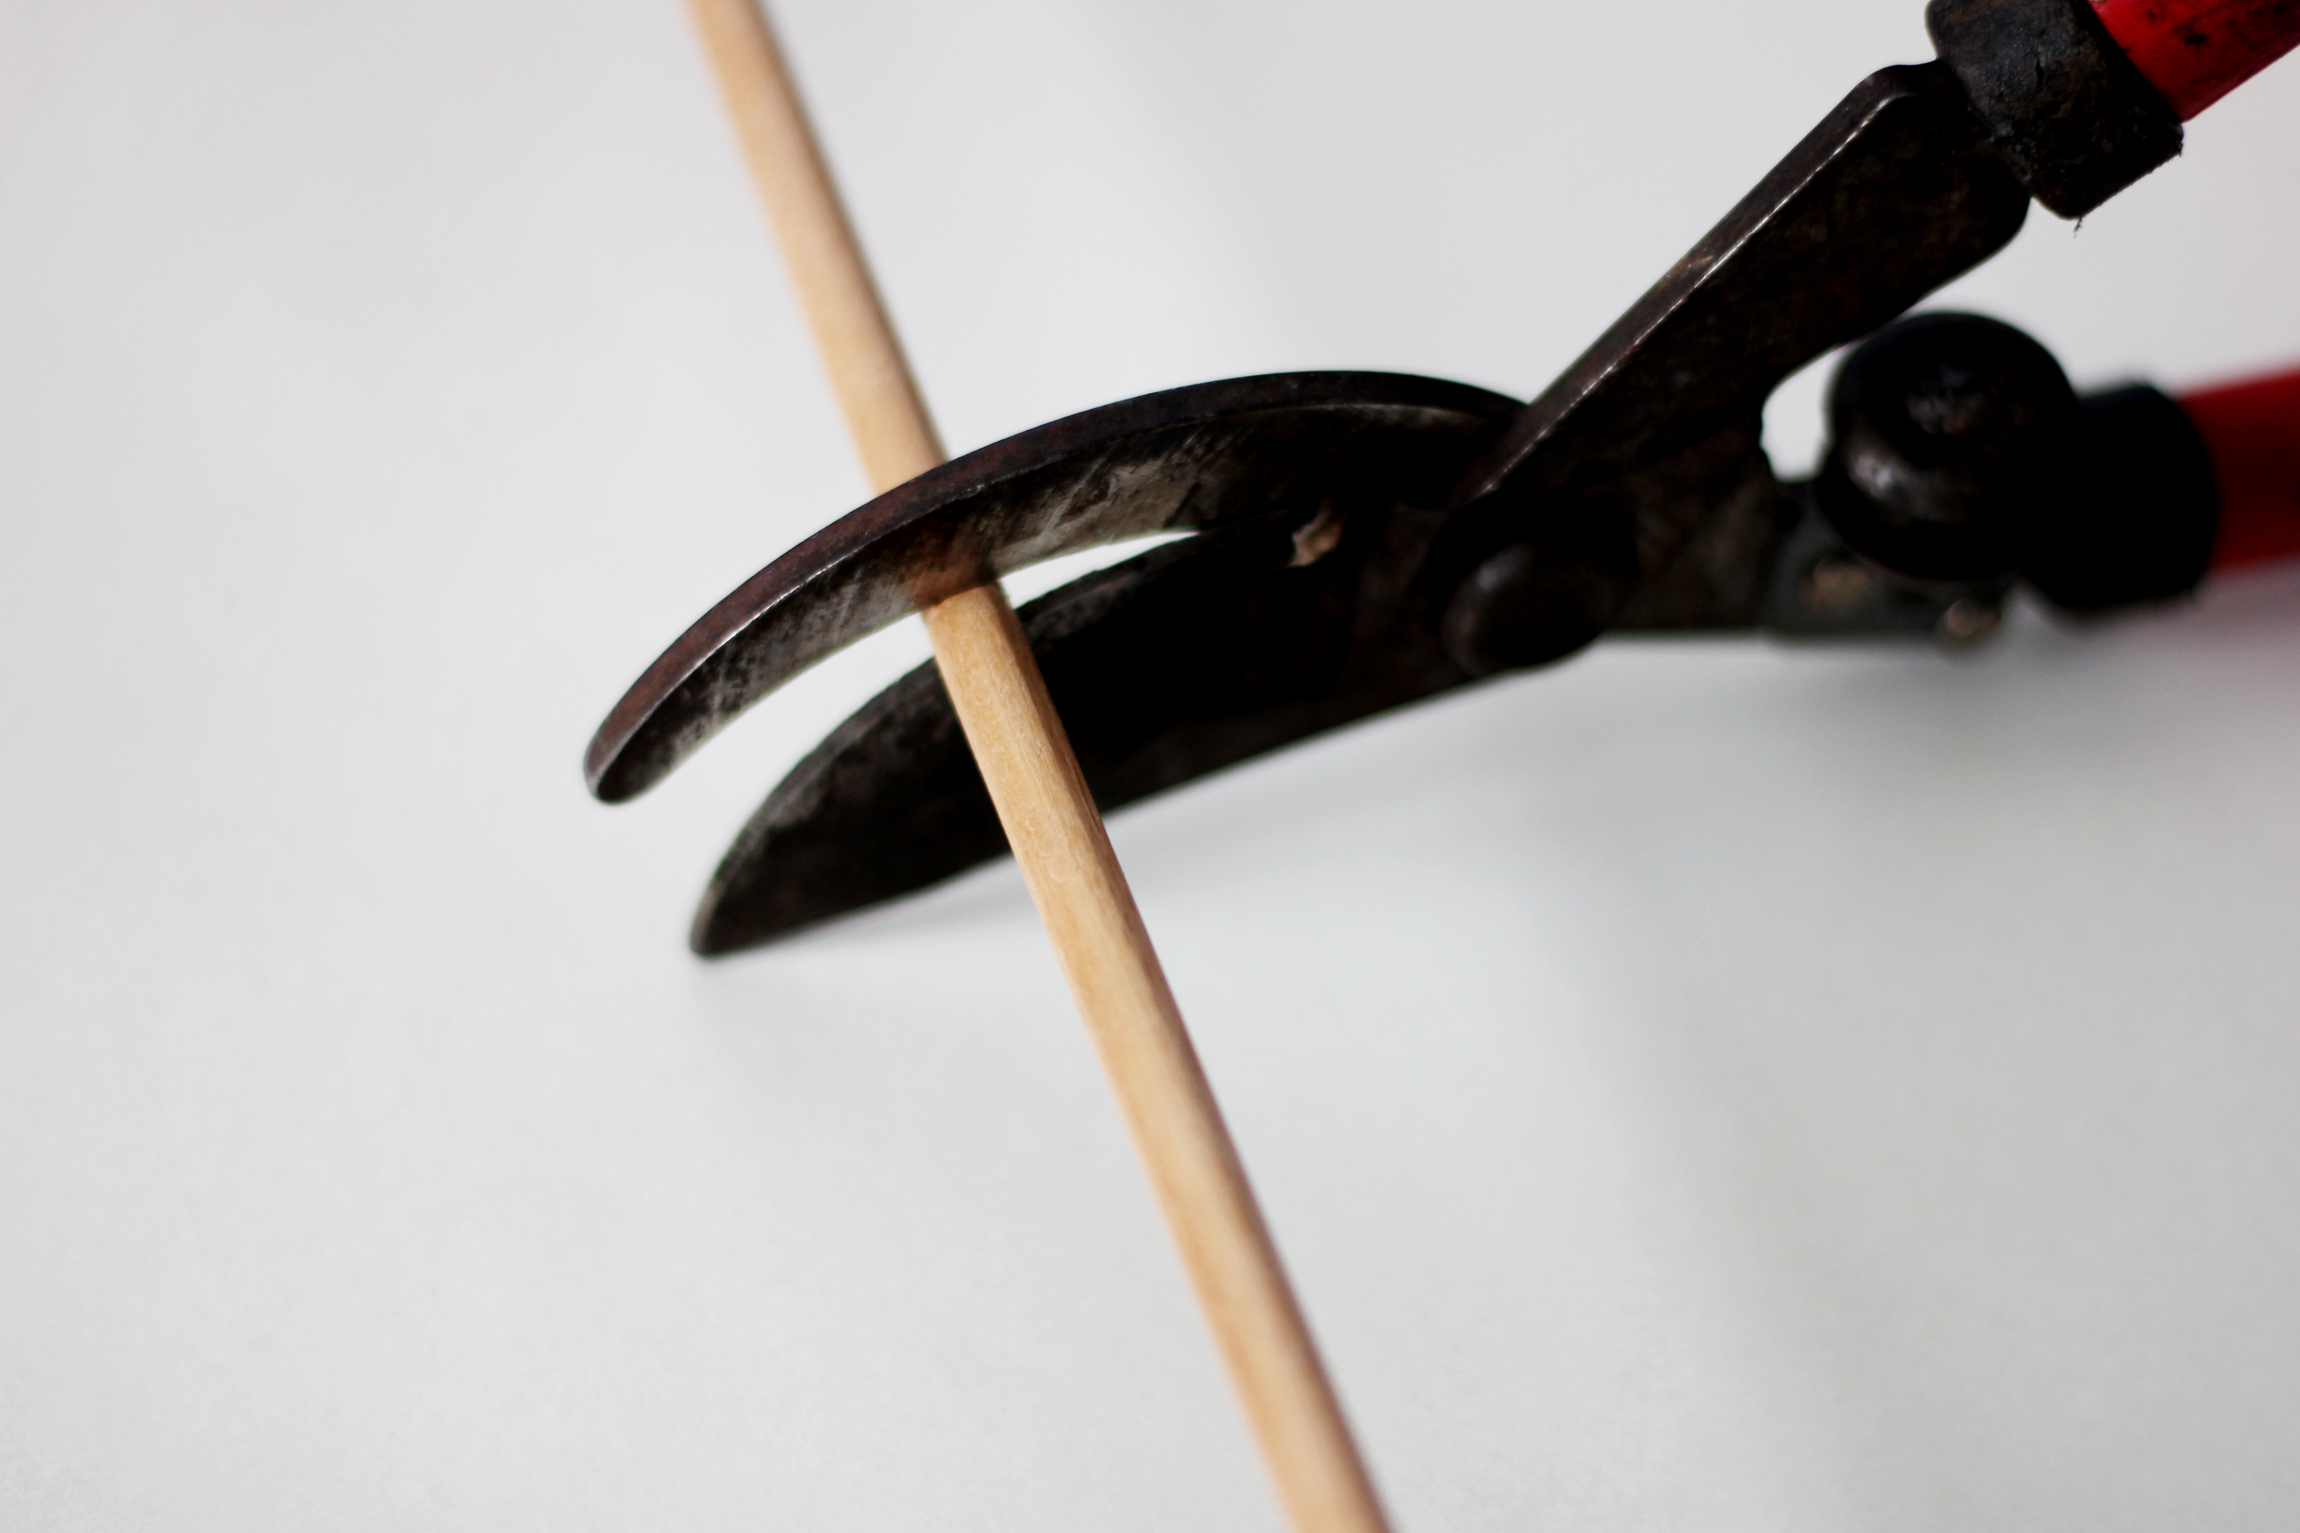
2.) Next you're going to measure and cut your wood dowel, we made ours out to be 10 1/2 inches long. After cutting it, we glued it down to the head and body of the scarecrow. We used E600 glue which you can find HERE, but a glue gun will work as well!


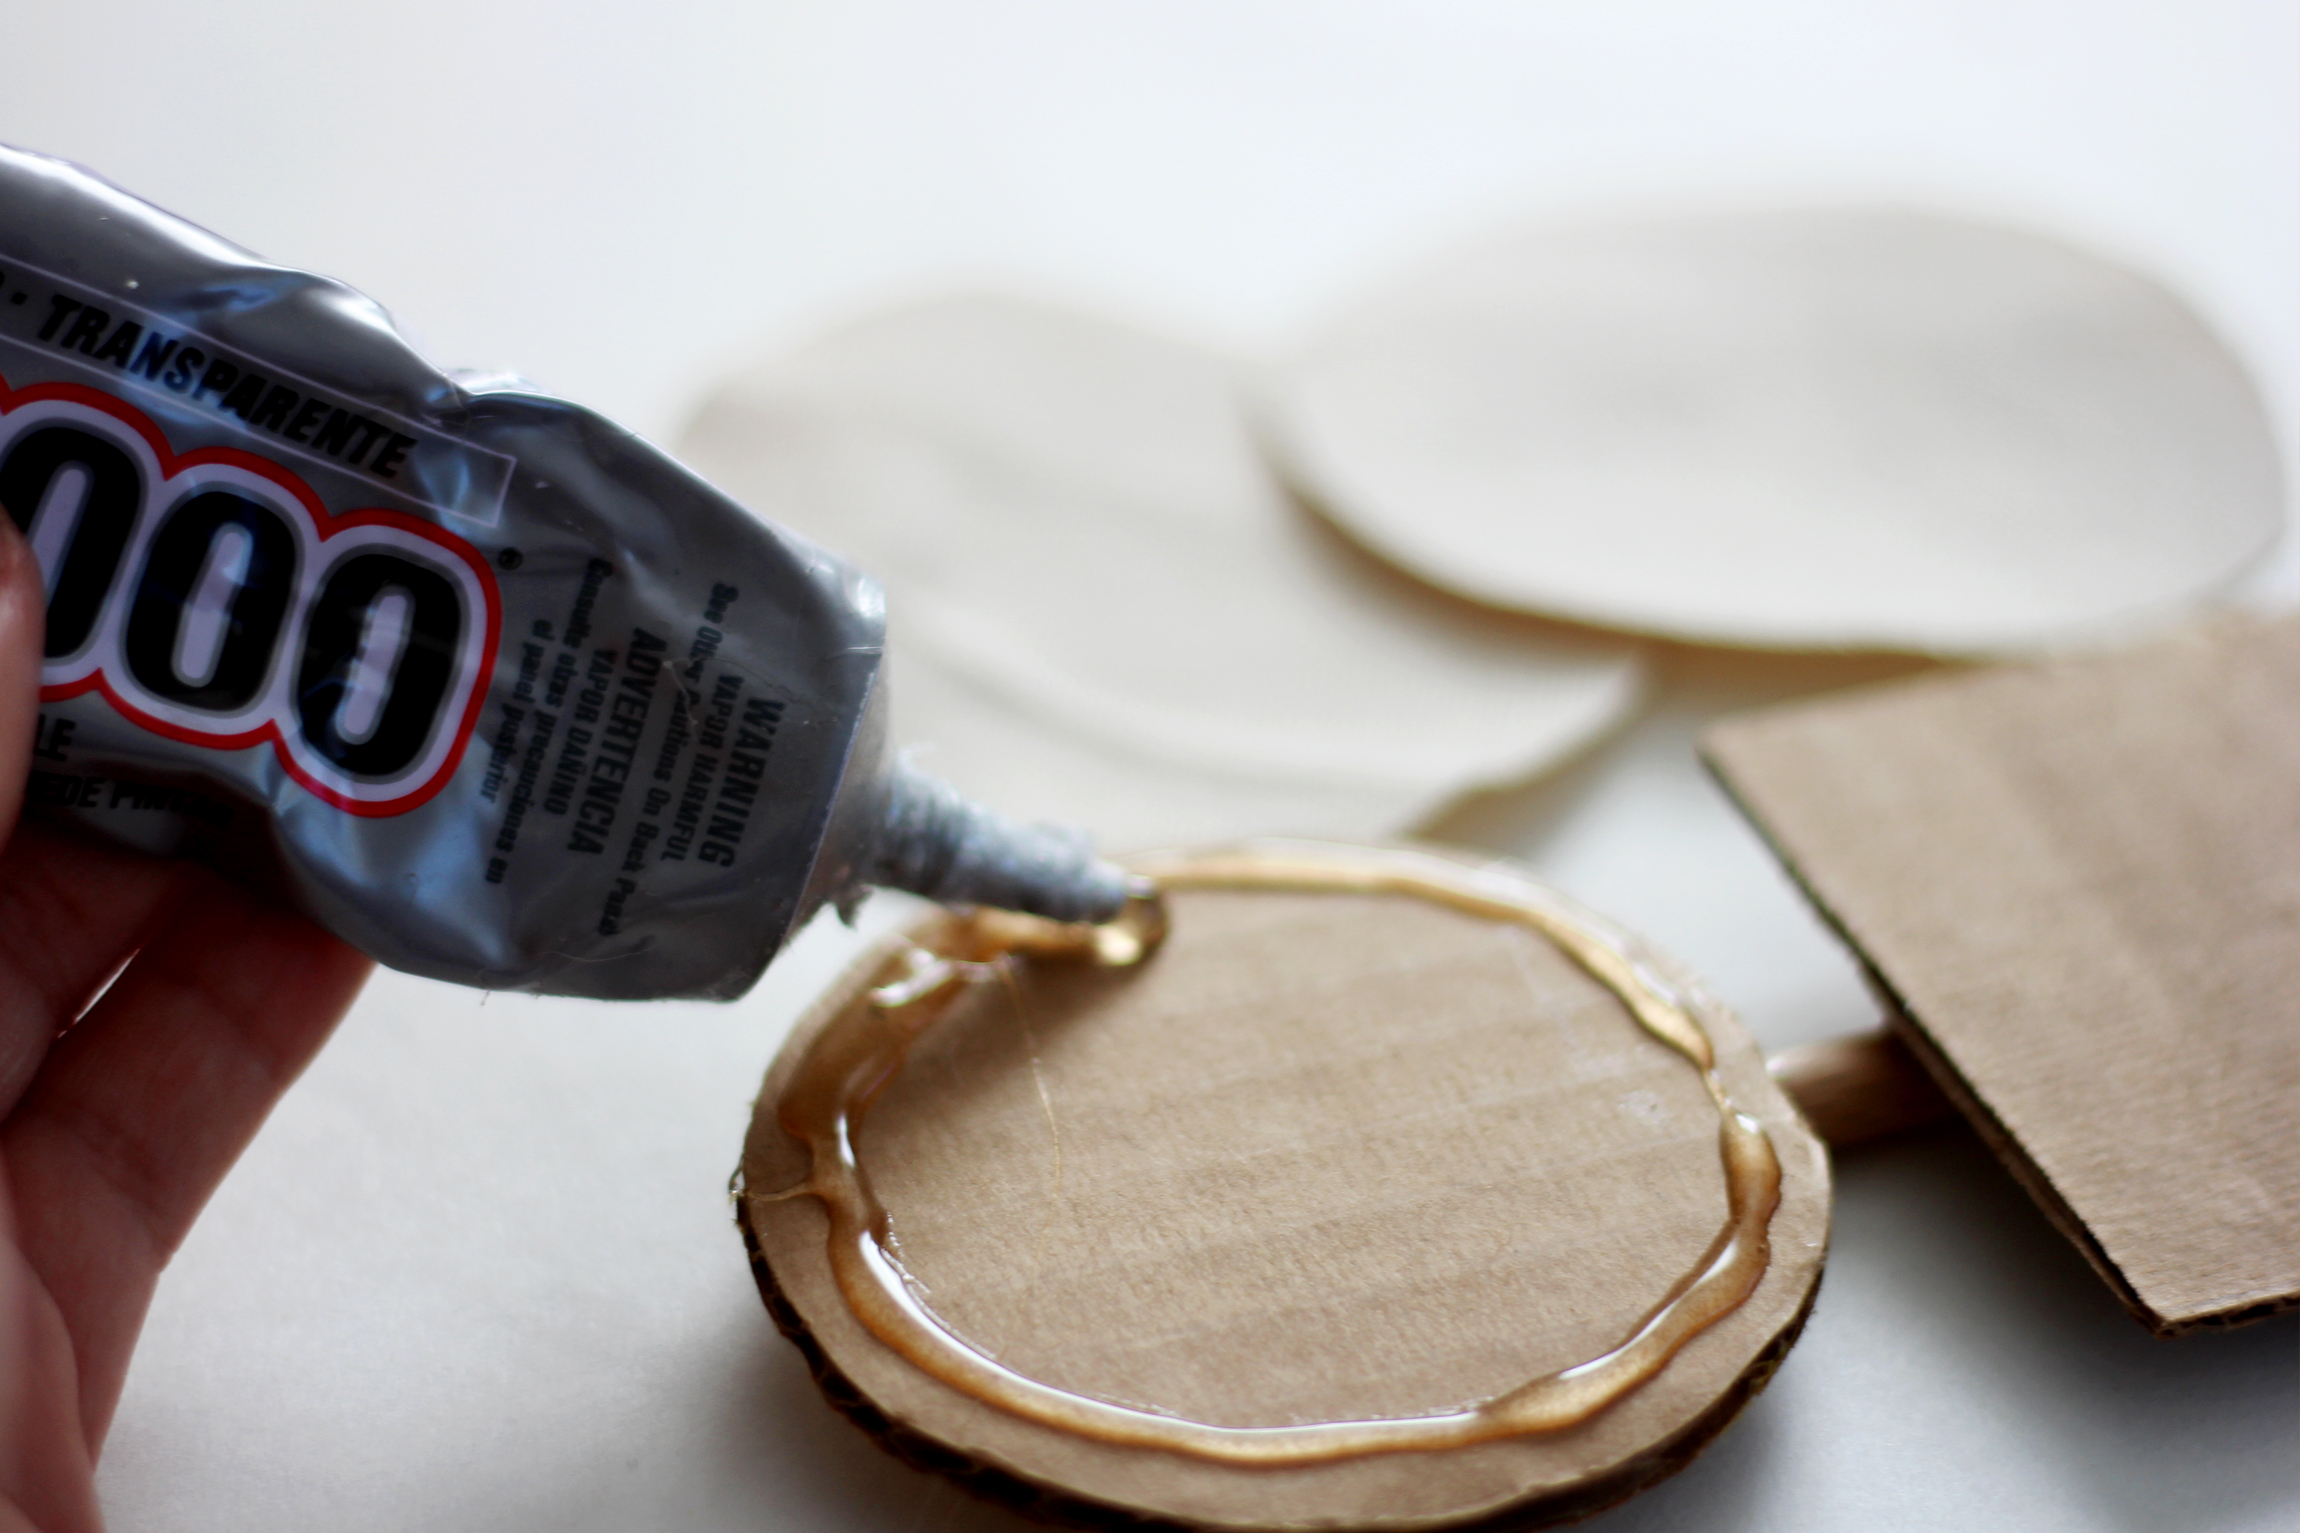
3.) After that, you'll be tracing the head of your scarecrow onto your canvas fabric twice for the front and back of your scarecrow's head and then cutting them out. You'll be left with 2 circles in the same size. We used a canvas fabric and that worked really well! Once you cut your circles out you'll be gluing them to the front and back of the cardboard that makes the scarecrows head.

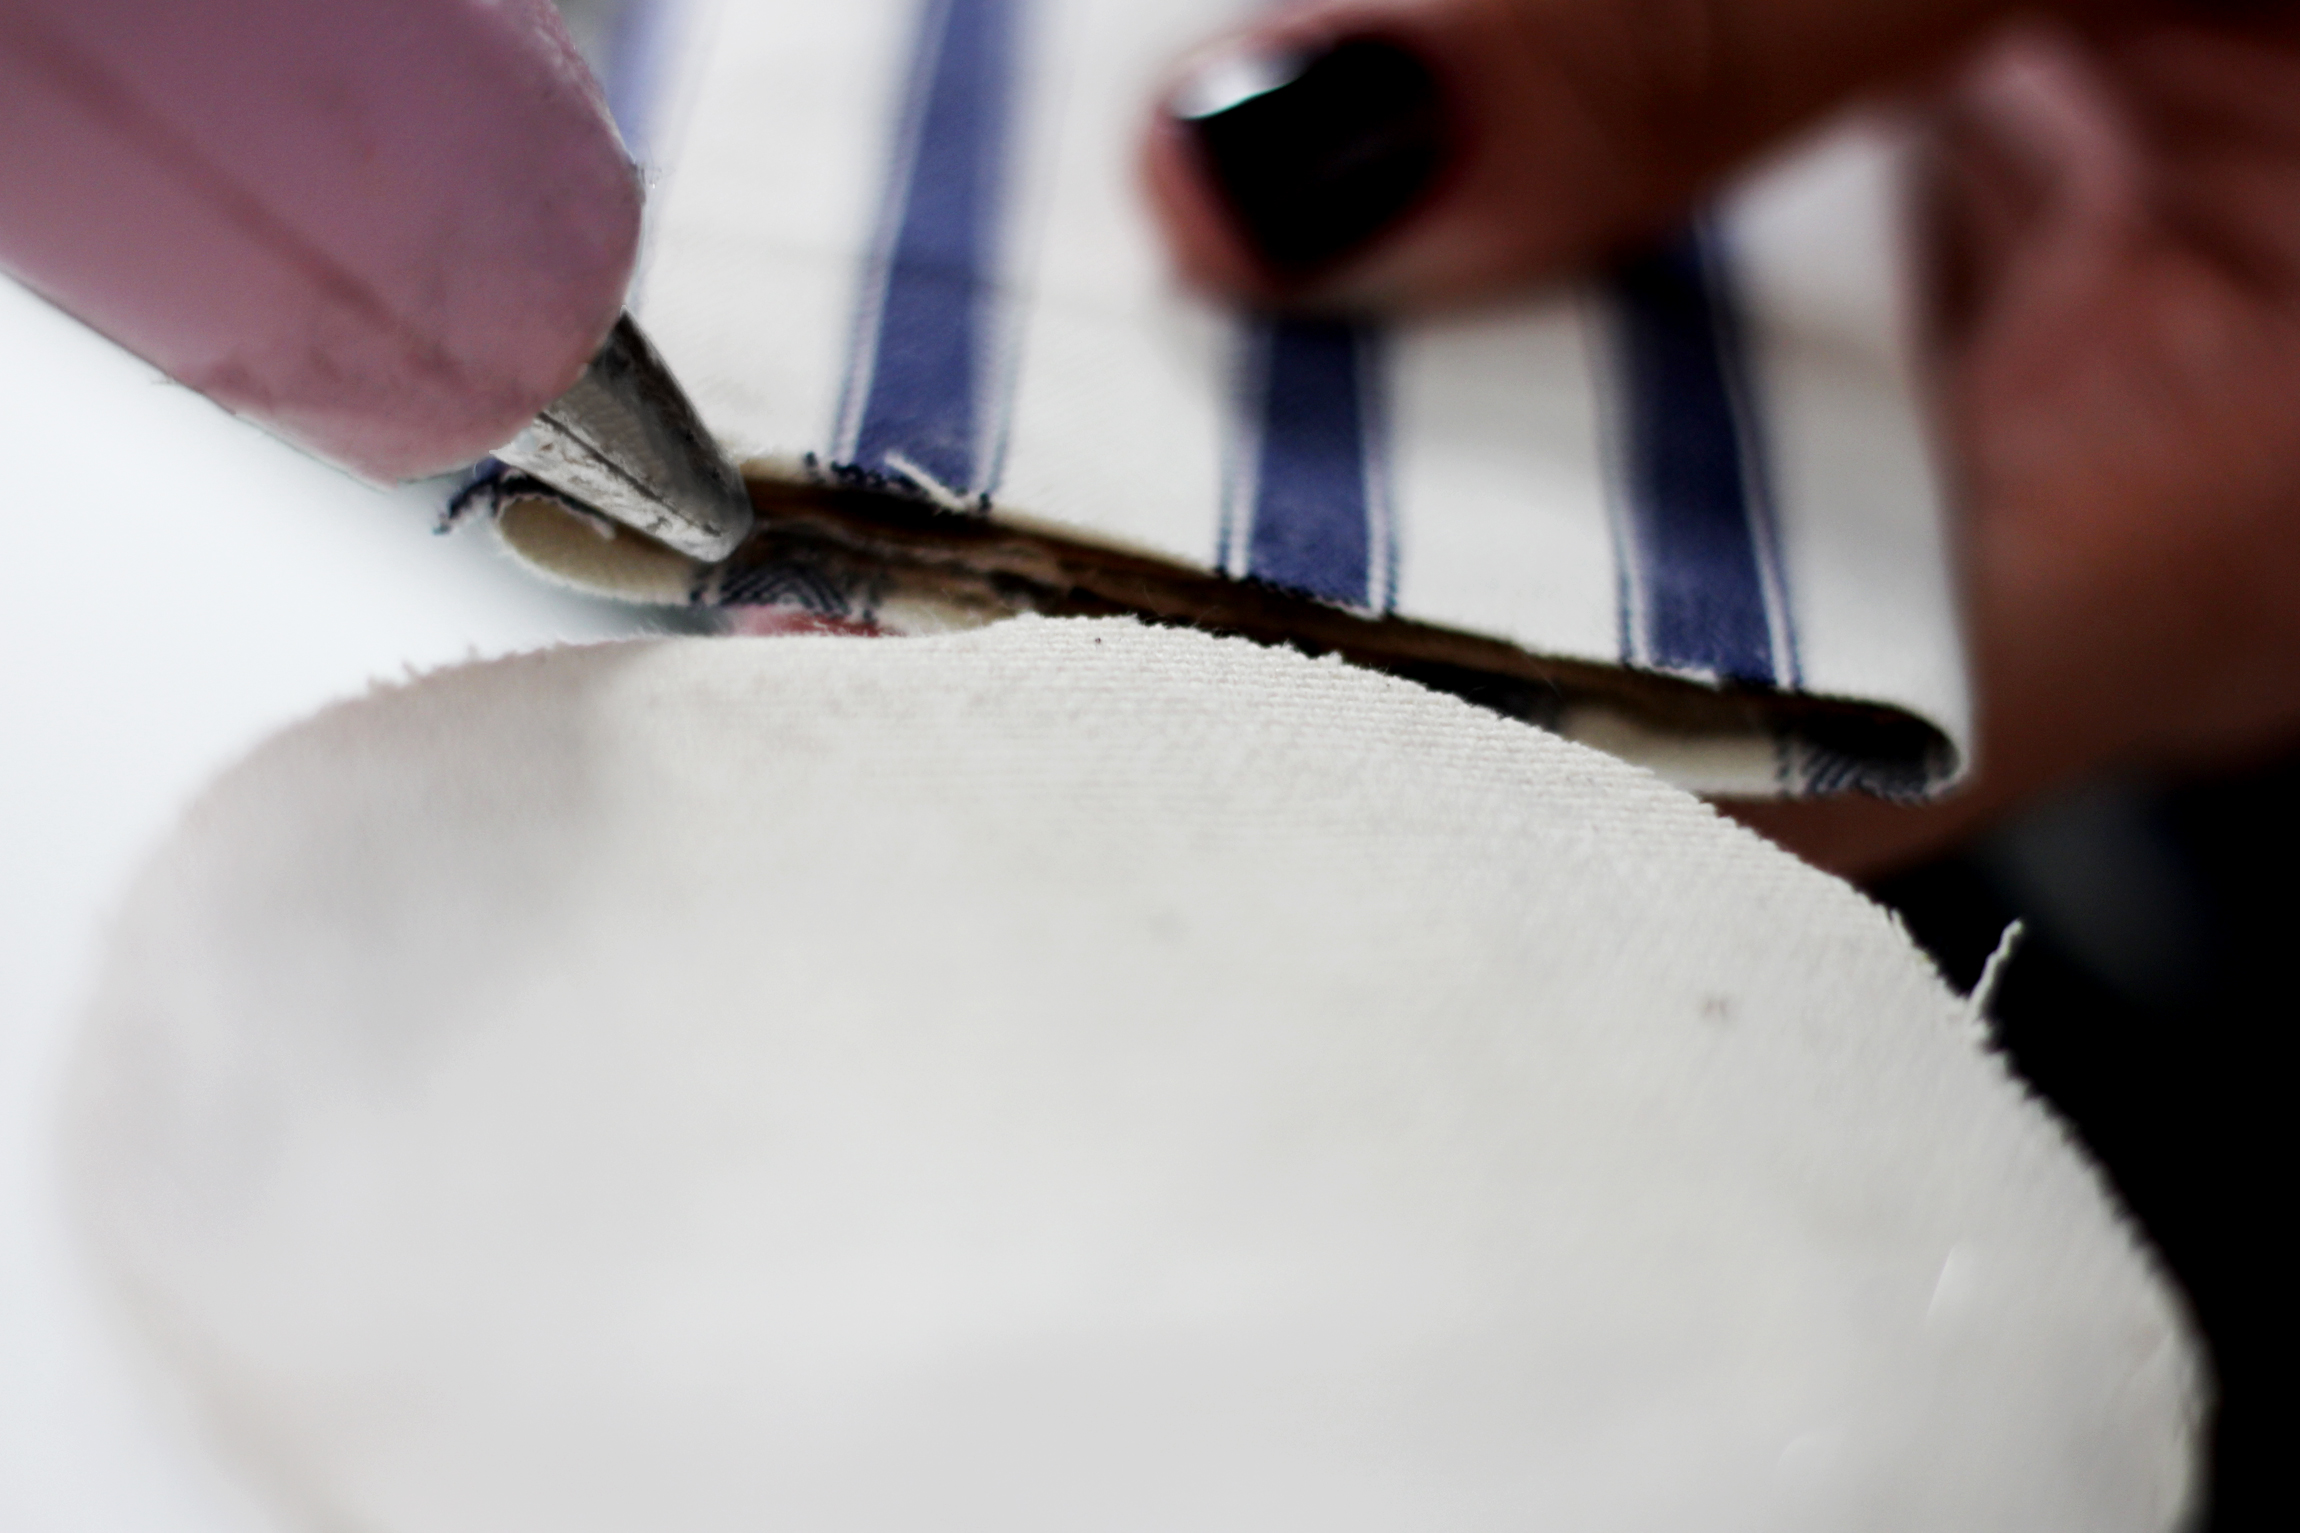
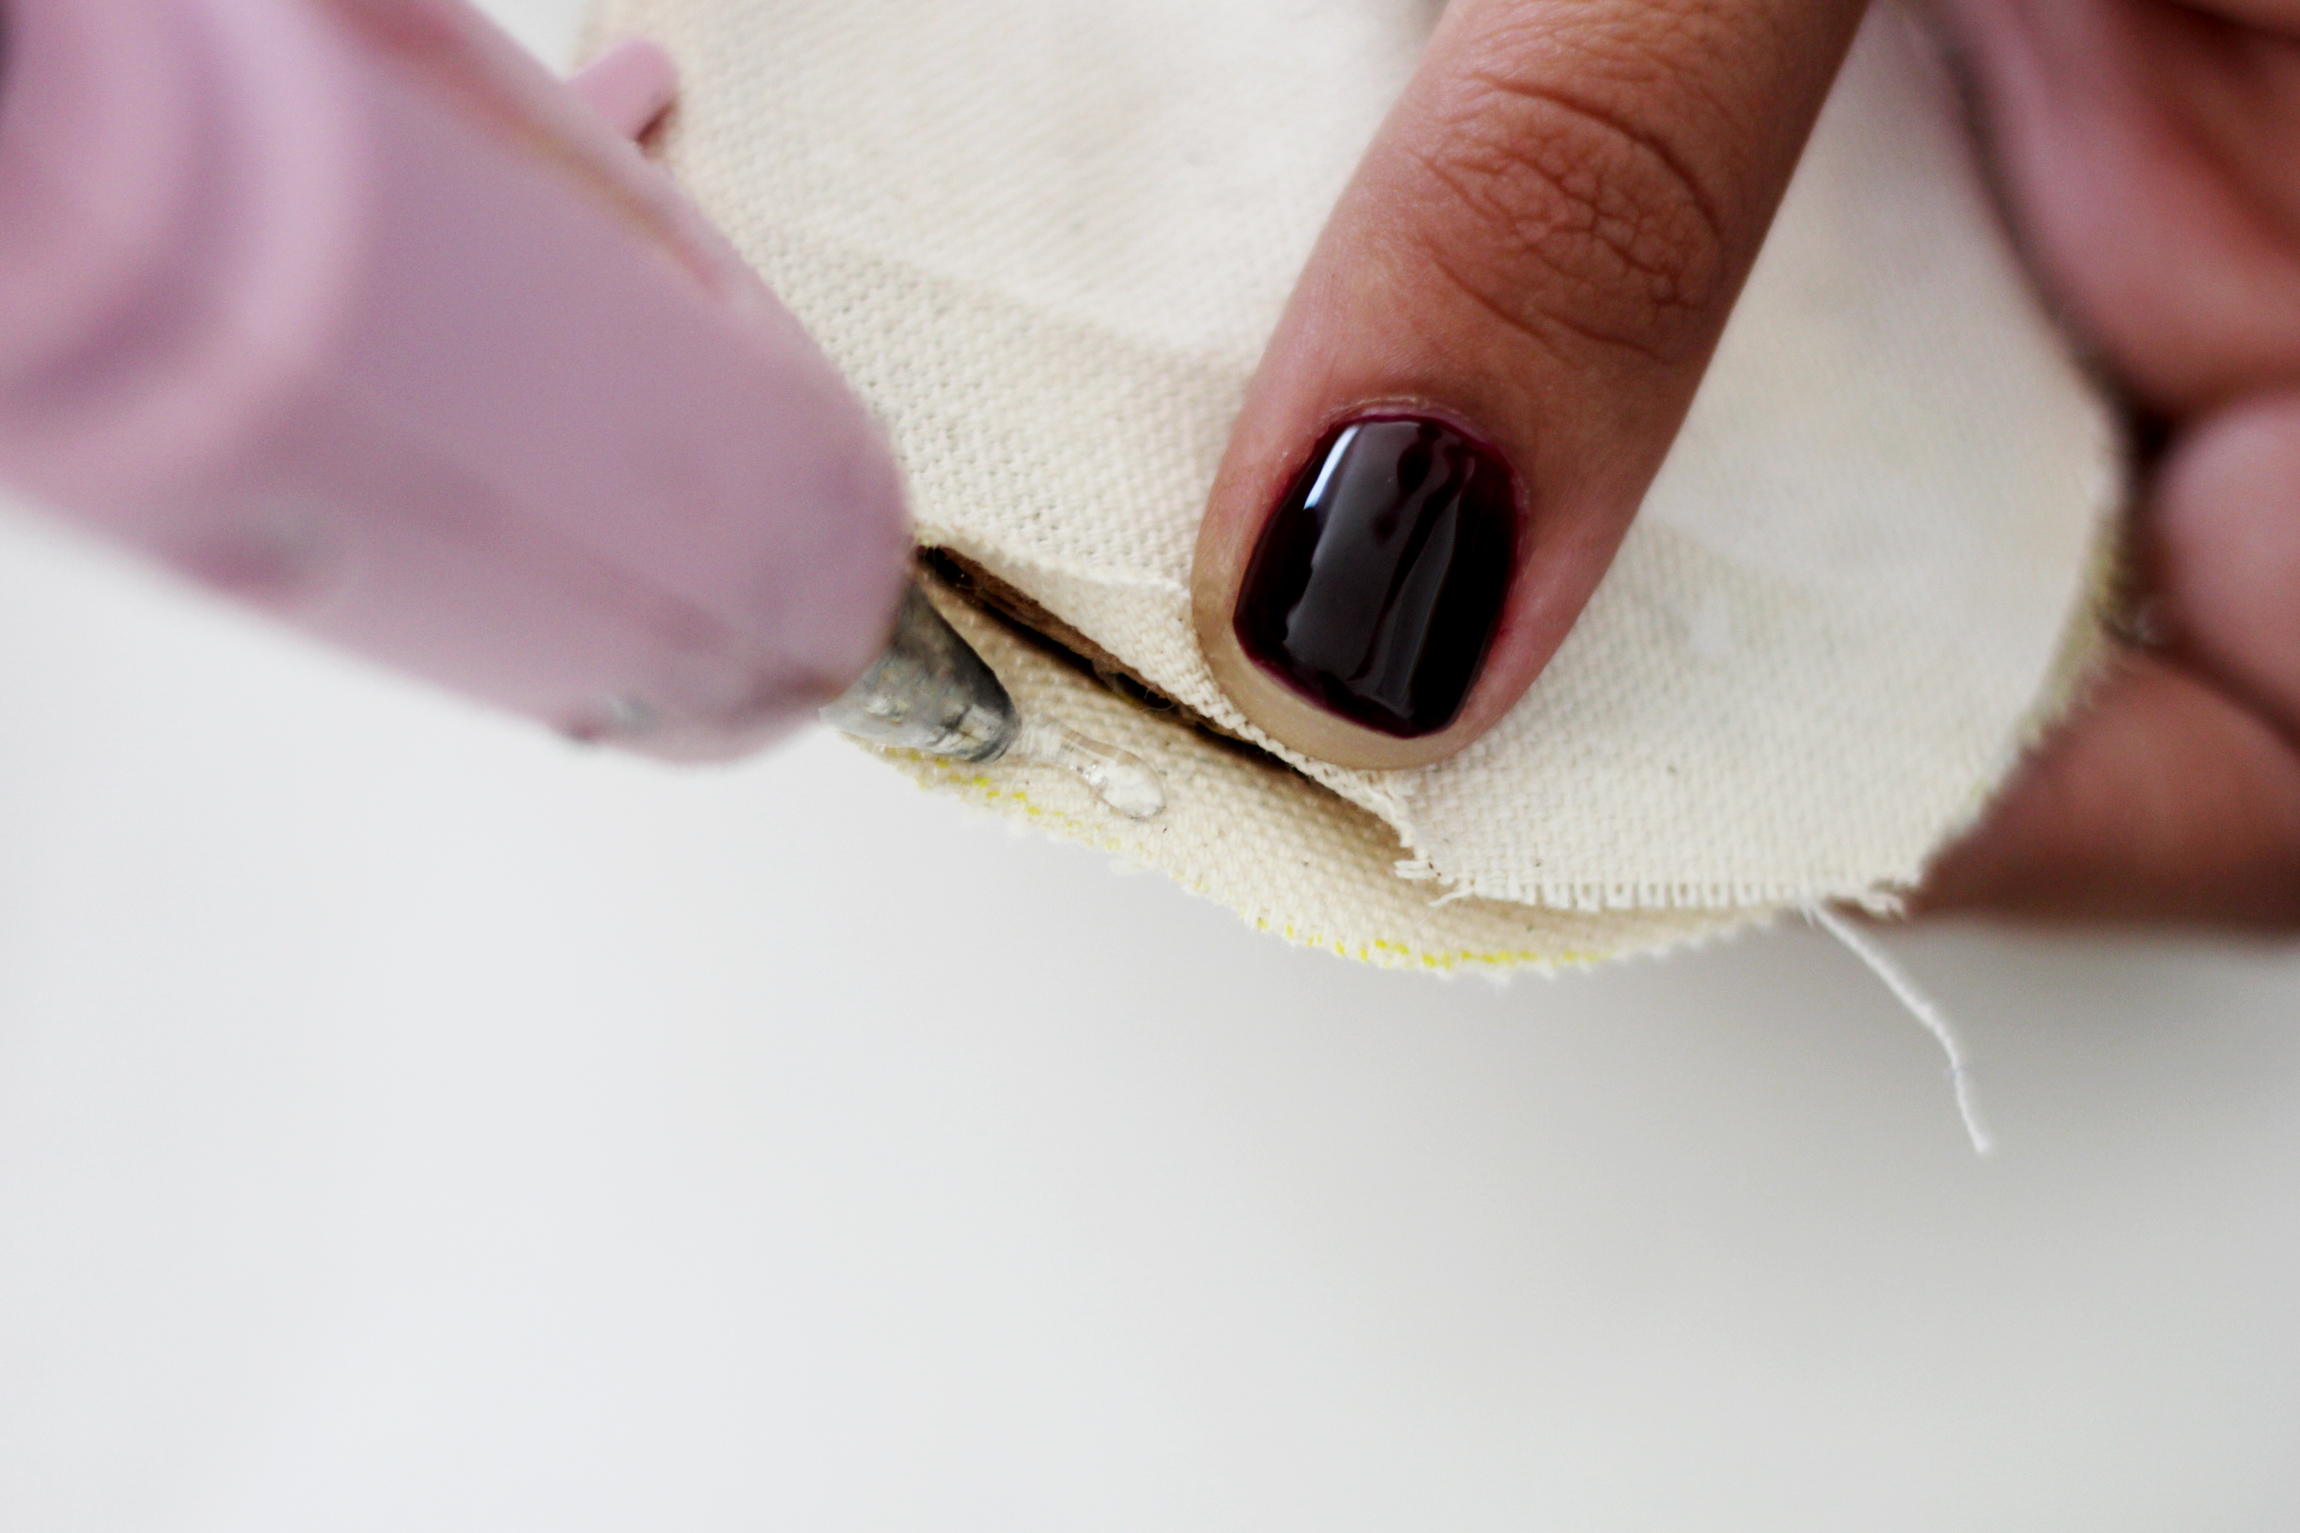
4.) Then it's time to dress your scarecrow! We measured our fabric to the length of our scarecrow's "torso" then folded it over a bit longer. This will hide any raw edges, now cut your fabric. After that you'll want to glue the fabric down. Also make sure you glue down the raw edges that will be visible and cut any loose threads on the fabric and scarecrow's head as well.


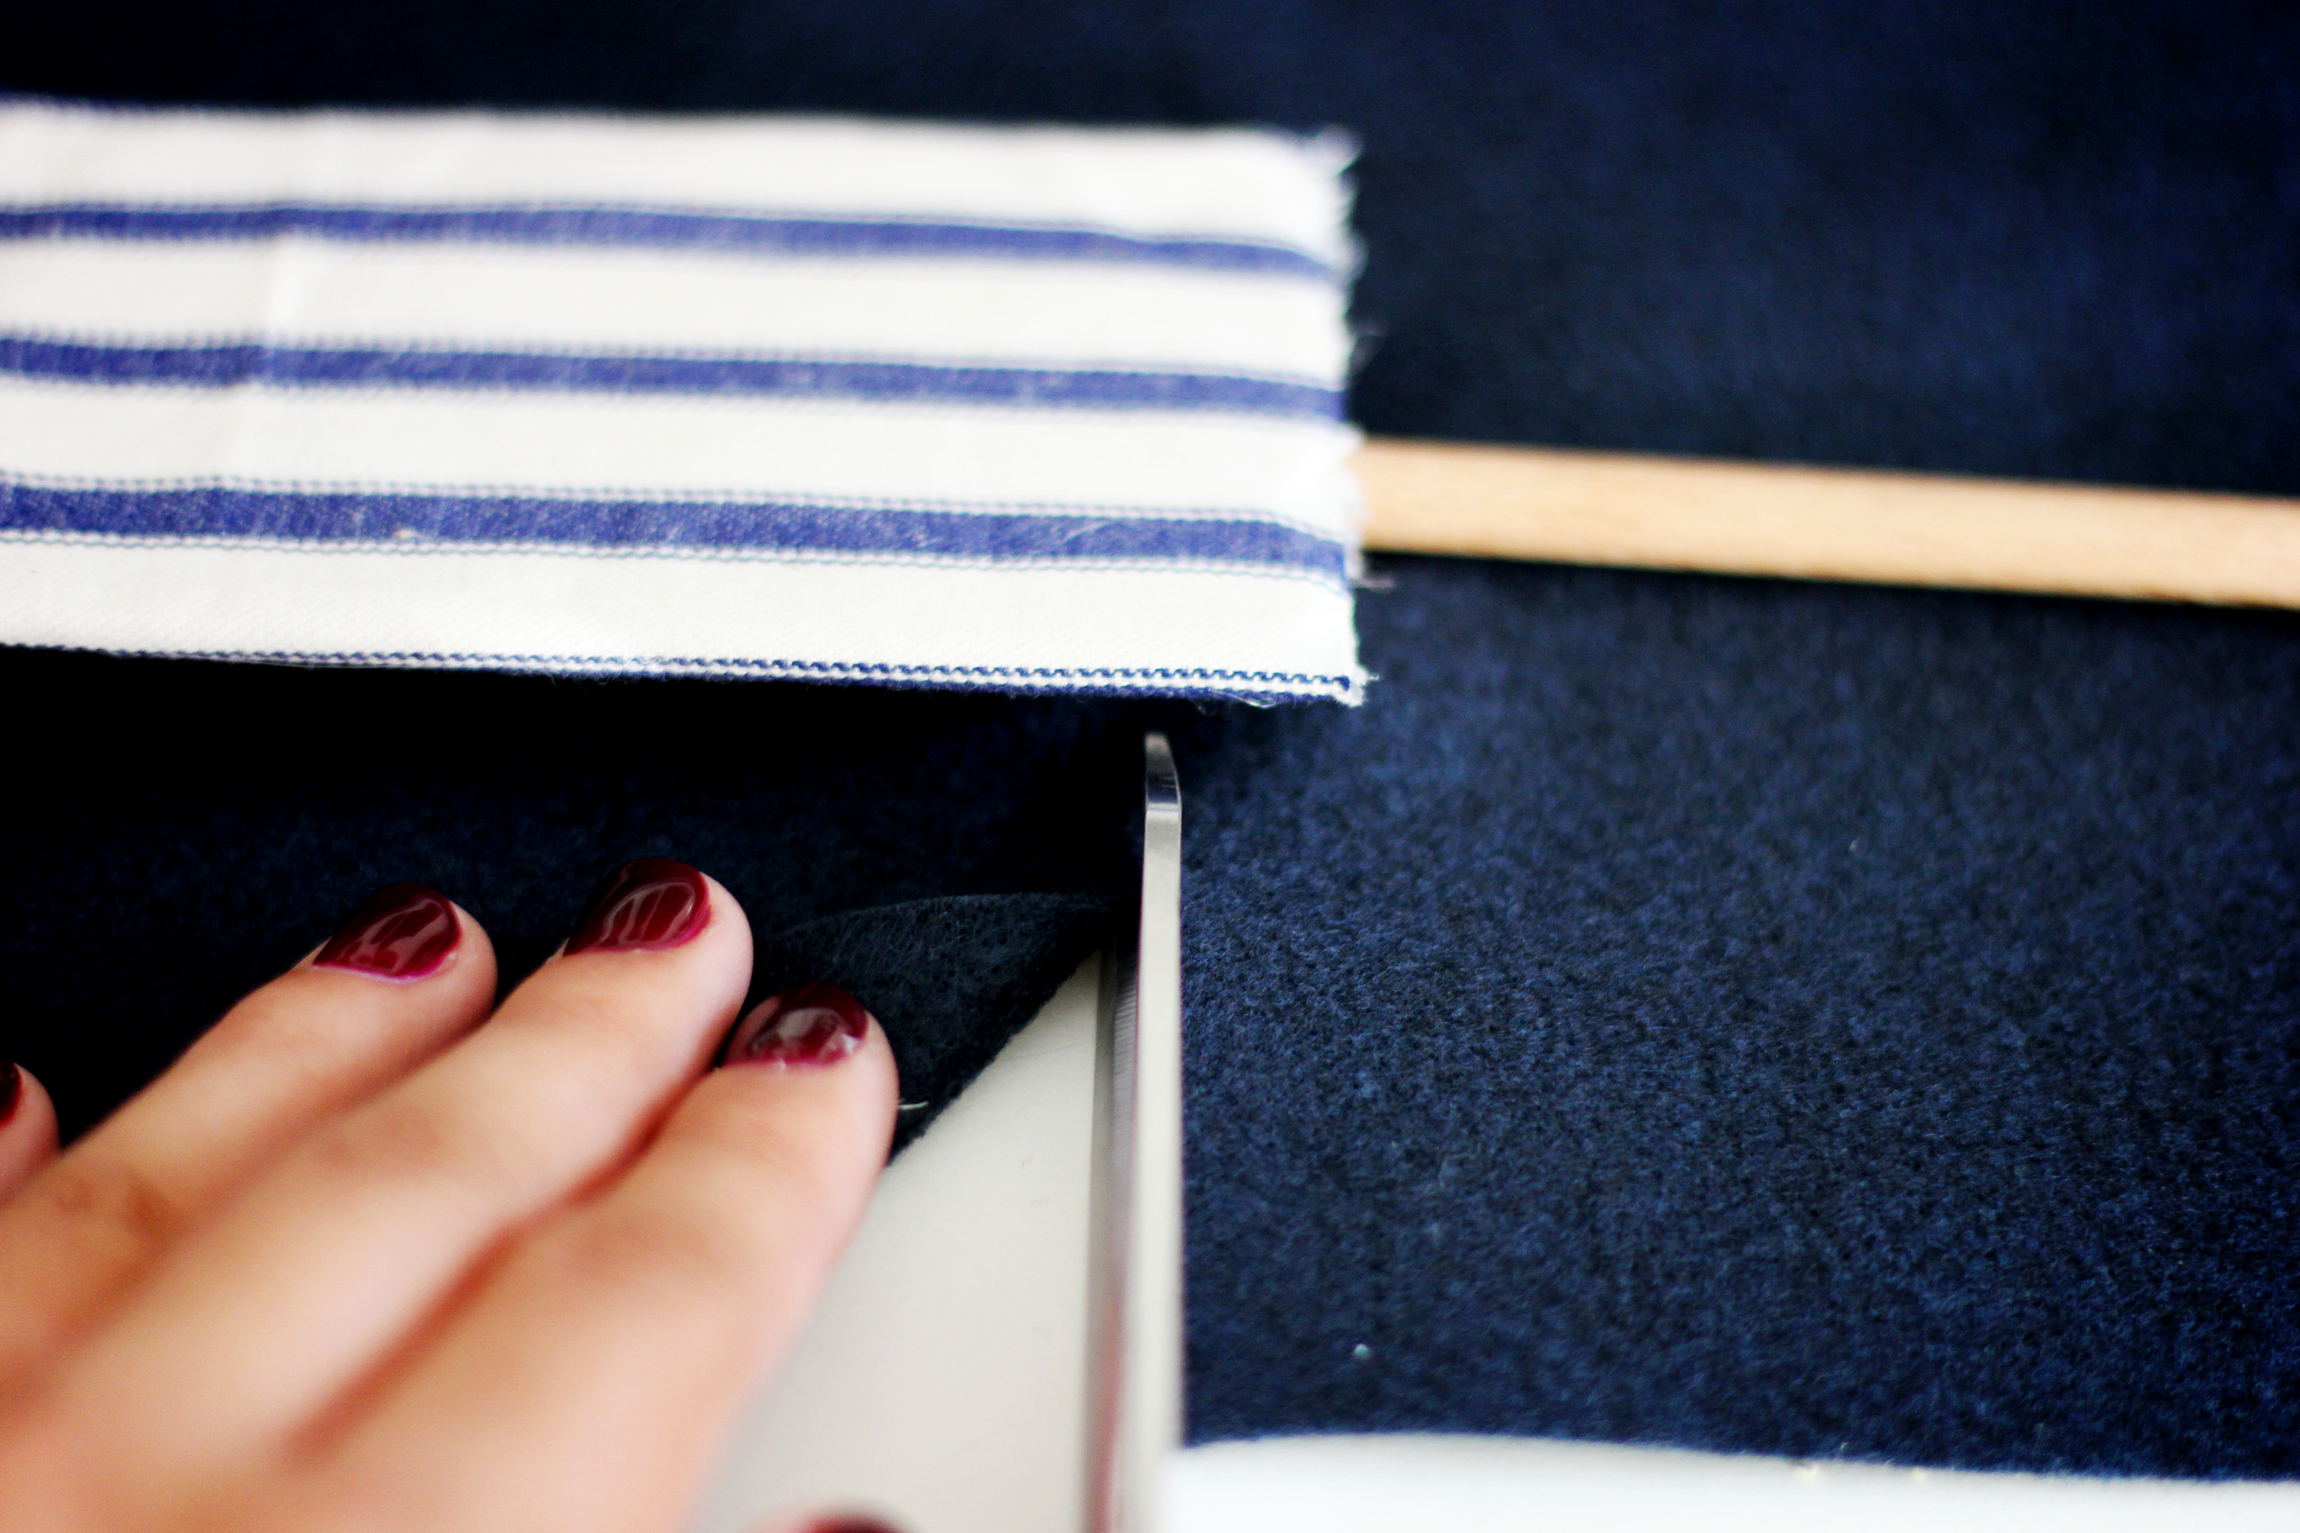
5.) Next are the bottoms, we decided to do " skinny jean overalls". We cut a rectangle wide enough to be able to fold towards the center where the wood dowel is ... from both sides. Basically you'll want to measure so that both the right and left flaps can meet in the middle at the wood dowel. Then we cut the waist of the overalls by making the felt fabric overlap a little with the shirt. We glued the felt fabric down a on the back of the waist so that it wasn't moving around during the next step.


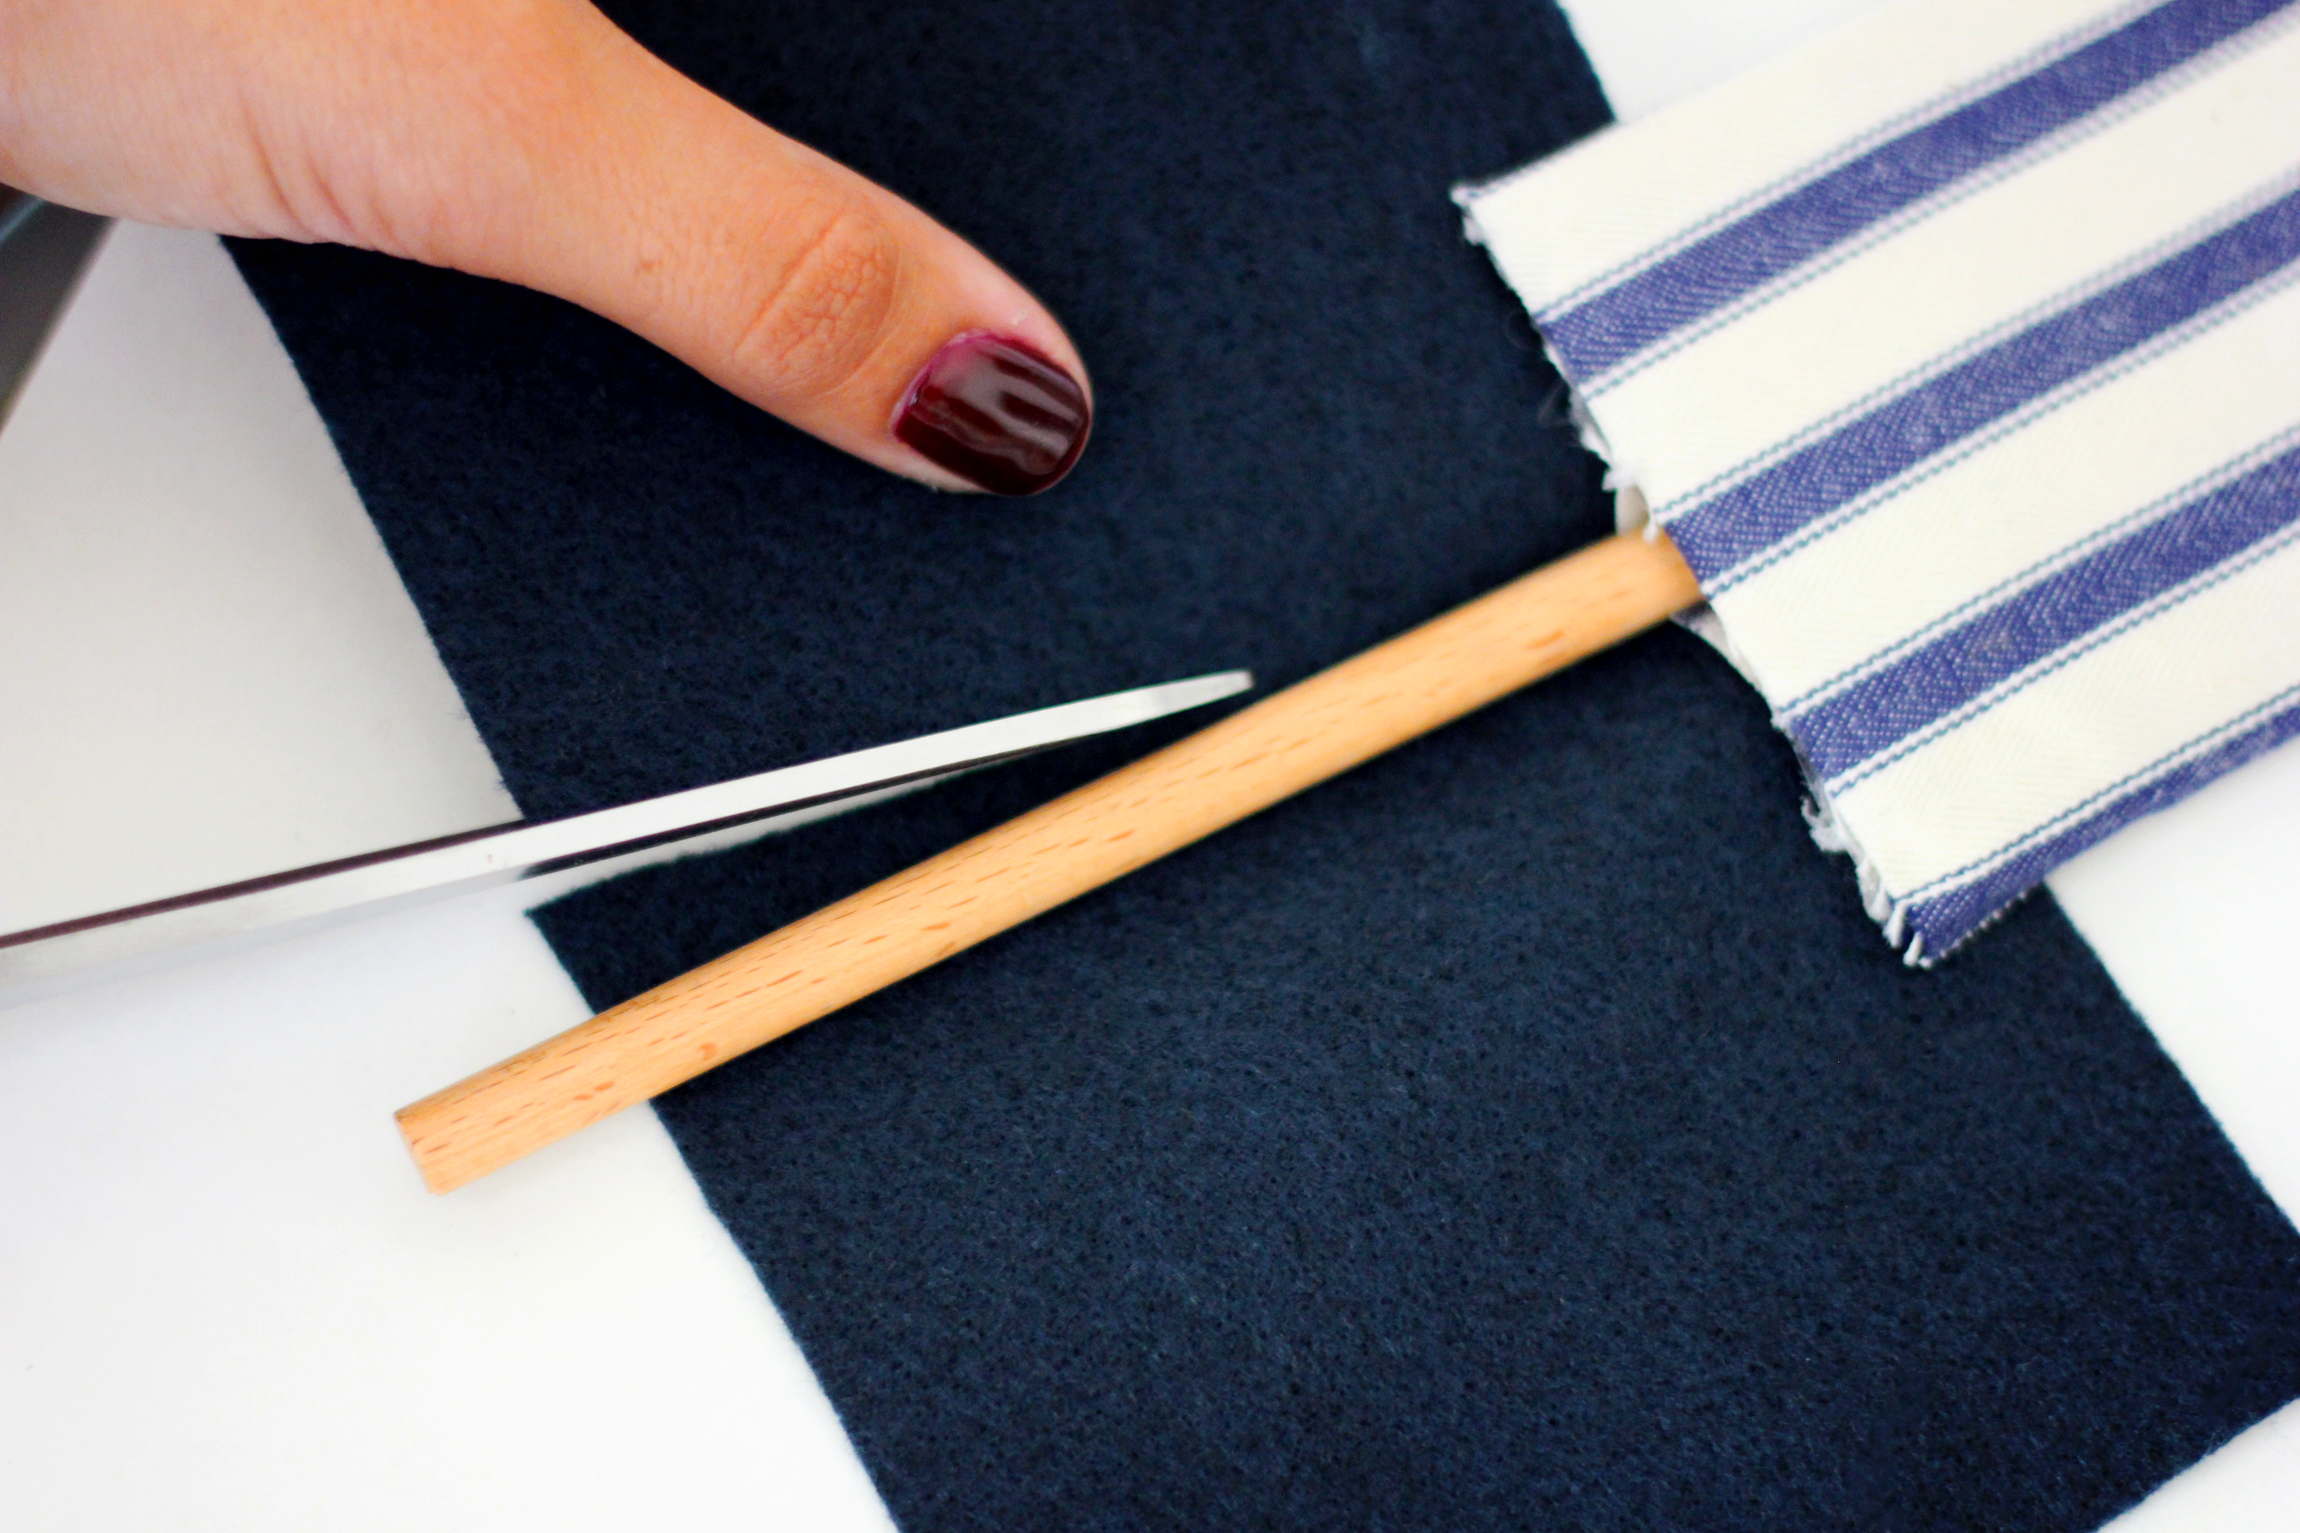
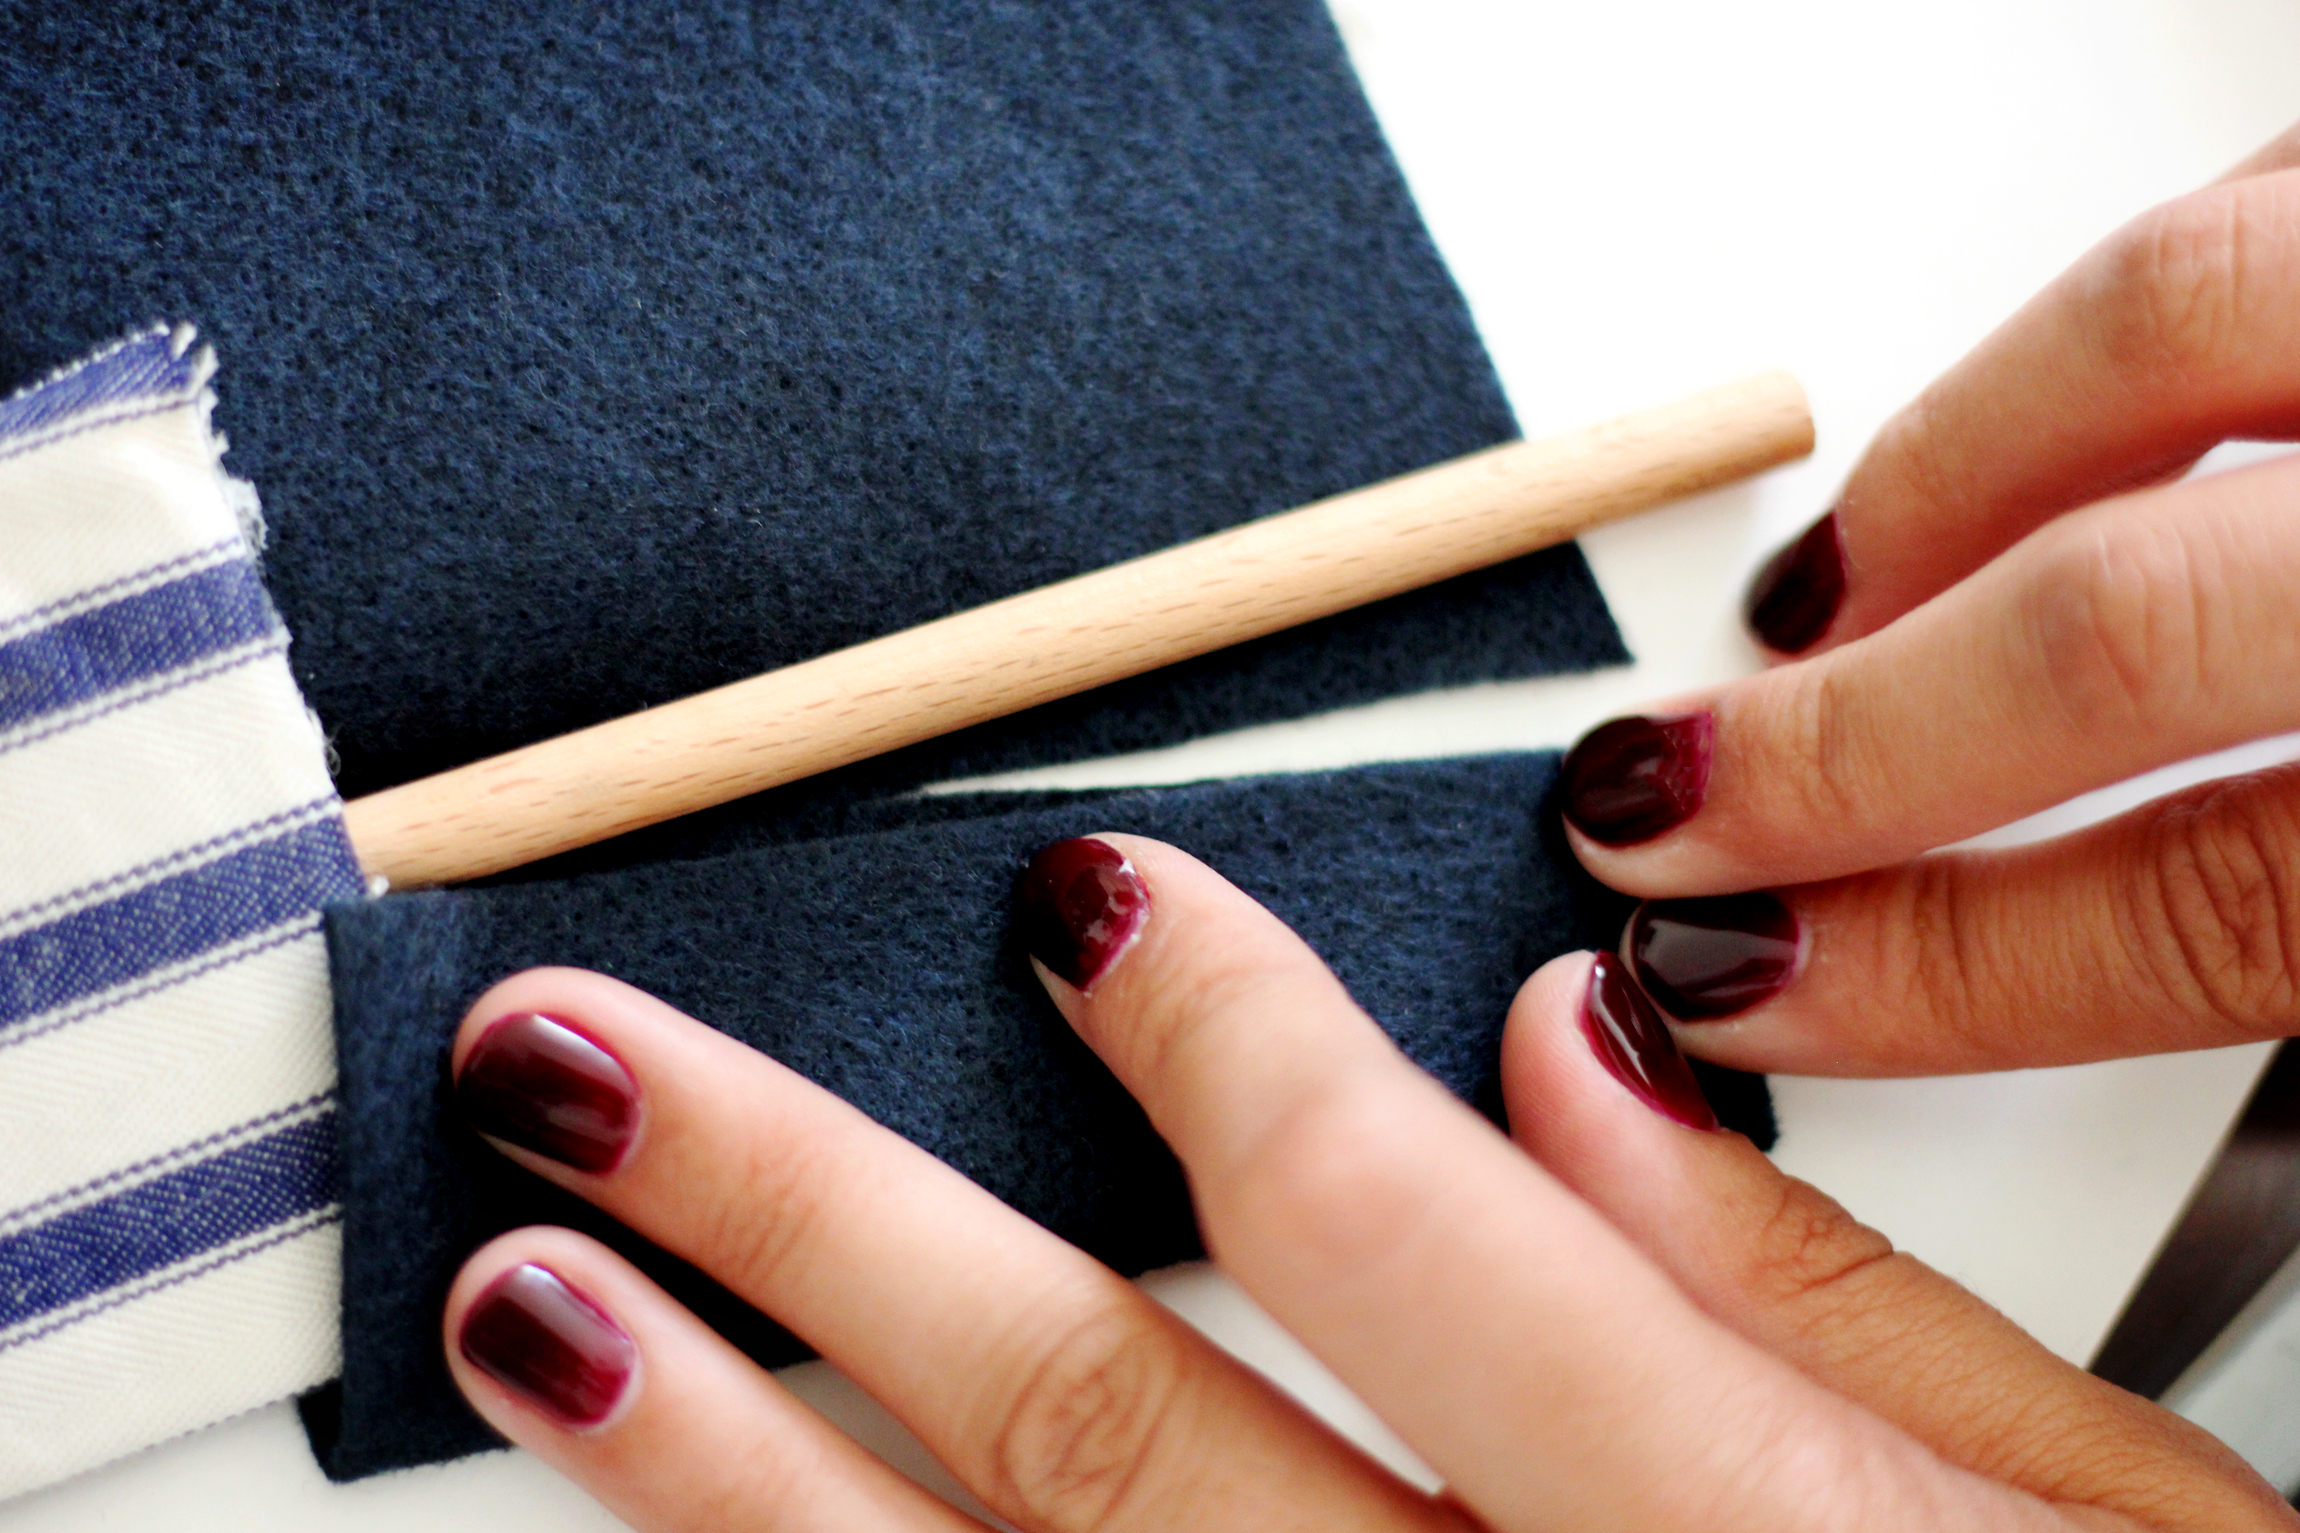
6.) Cut a slit at a small angle as you can see below. Fold the left side of your jeans to meet that cut. Before gluing, take a piece of your Aspen wood excelsior and bunch it up. You will glue this to the inside of your pant leg as modeled below, these will be the scarecrow's feet. Once you've repeated these steps on the right side, cut the excess fabric in the middle, this will form a sharp triangle. Then voila!! You have scarecrow legs and feet wearing stylish skinny jeans :) .


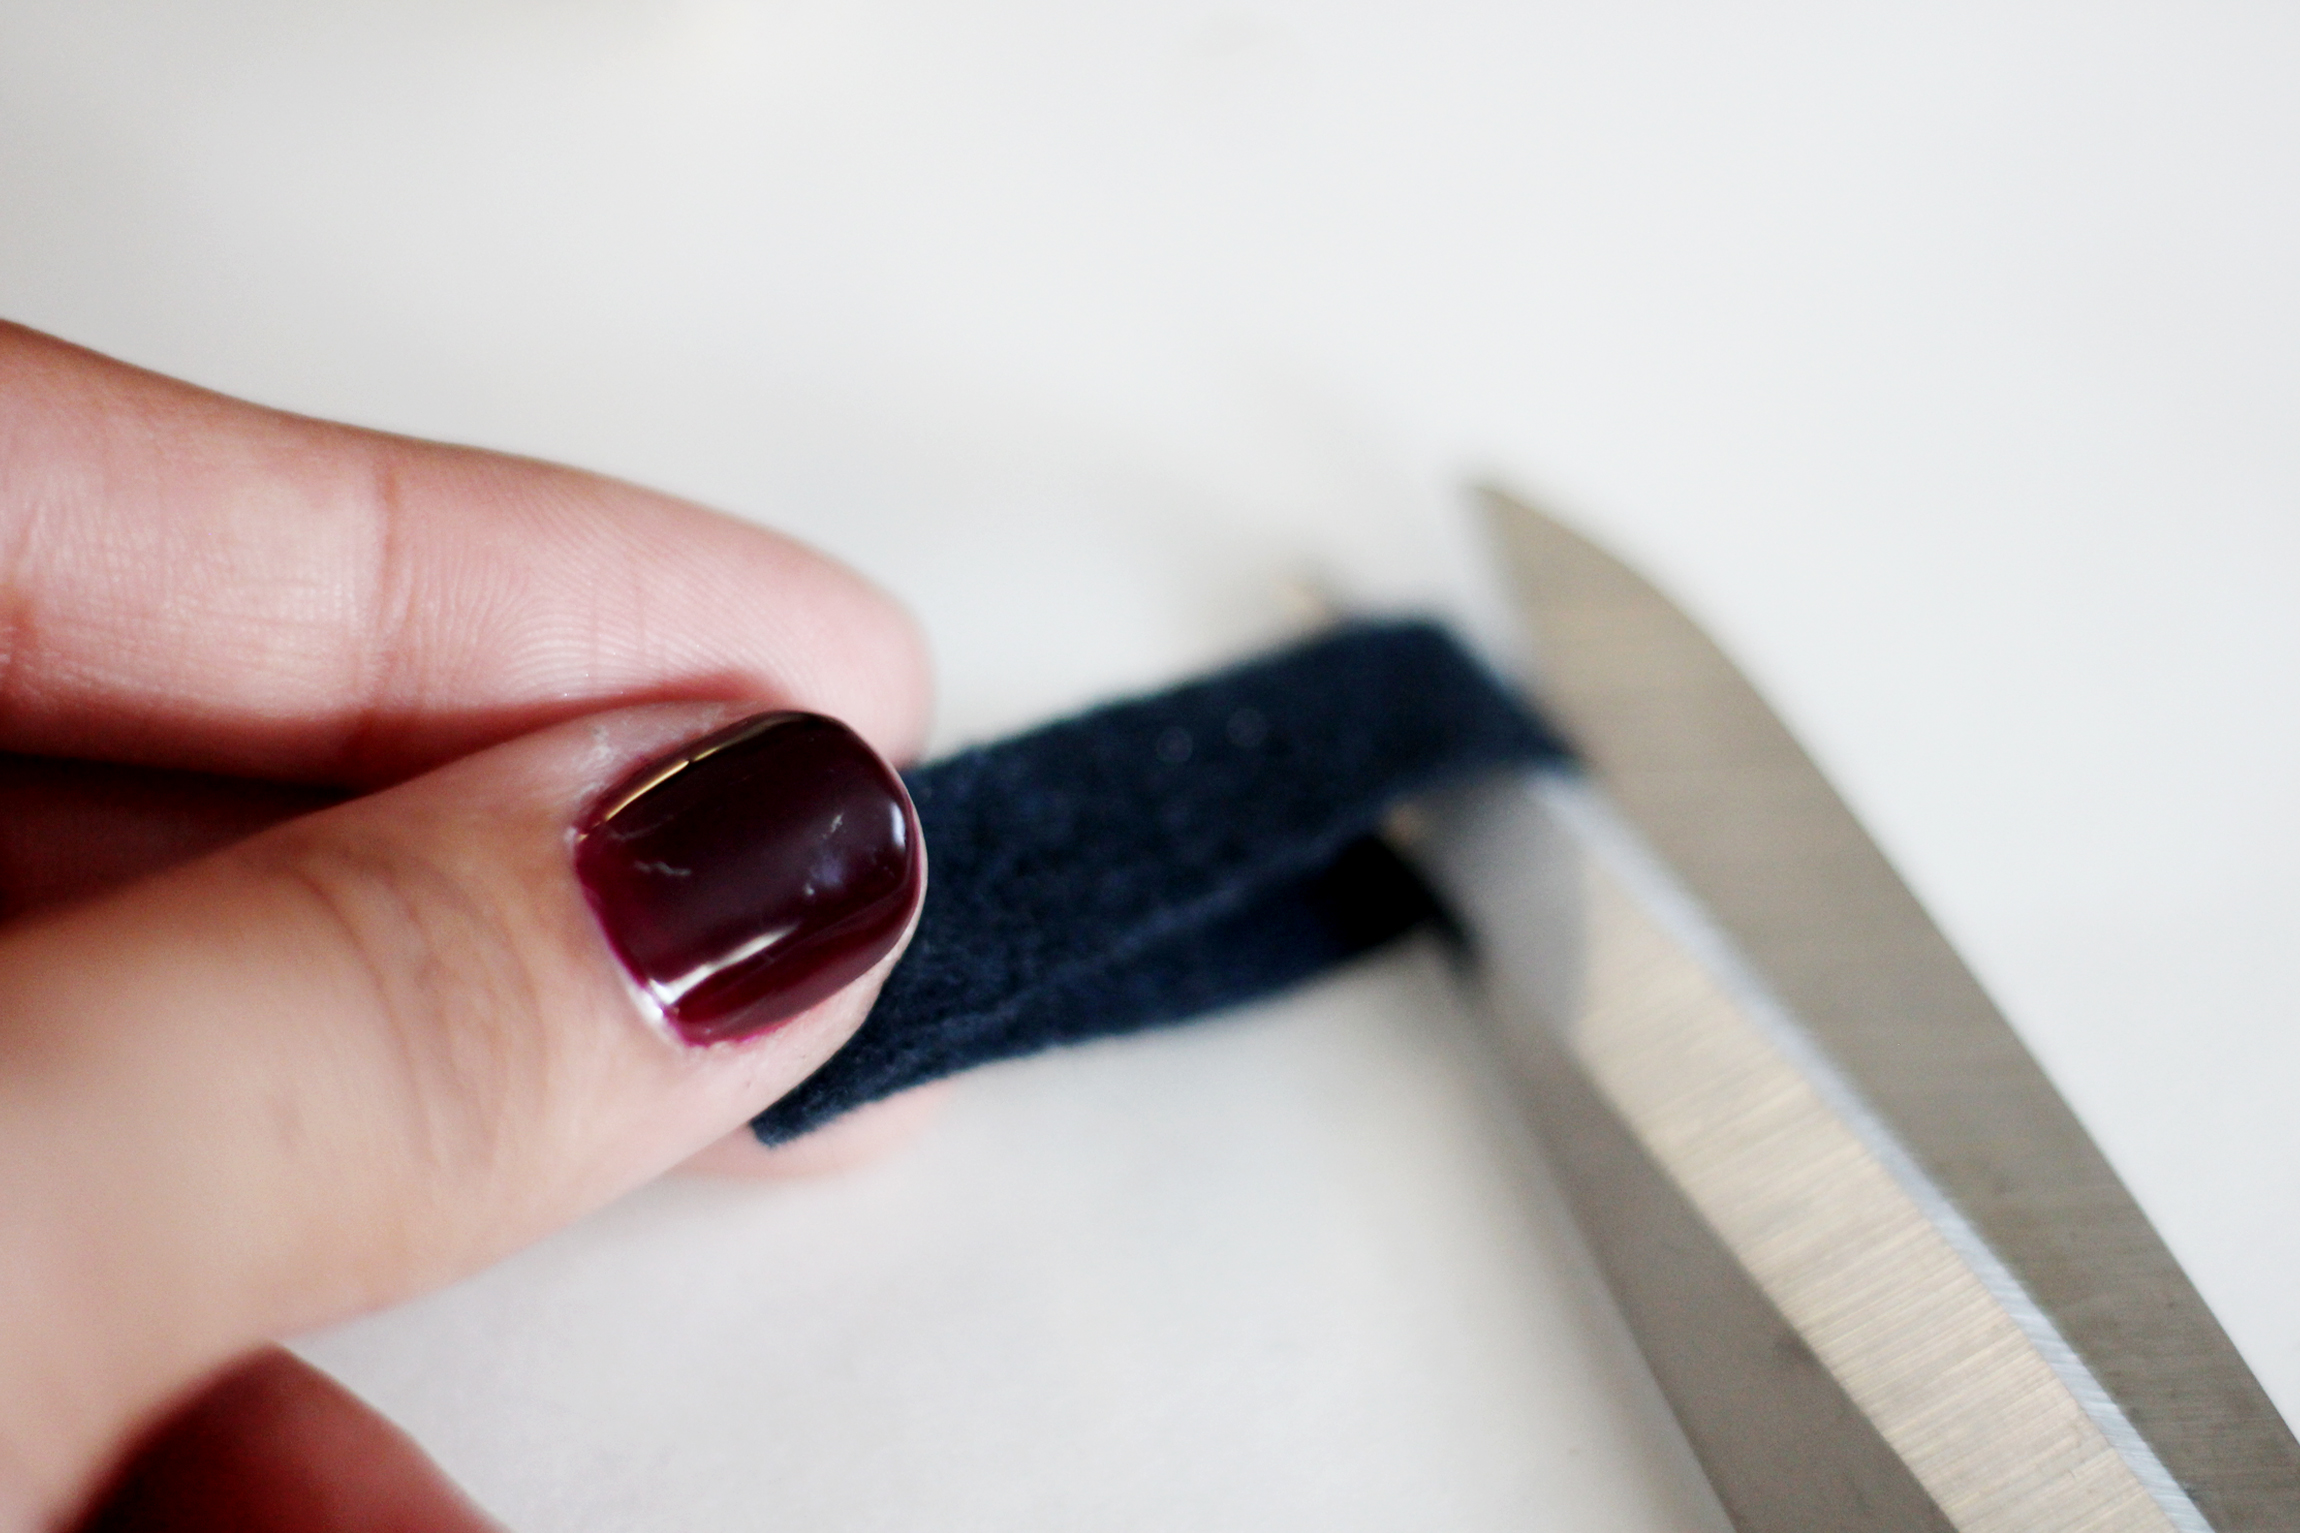
7.) Since we LOVE cuffed skinny jeans, I cut a small strip of felt to glue to the bottom of each pant leg to form a cuff. This step is completely optional and if cuffed jeans aren't your thing, go ahead and skip ahead to the next step!


// Aren't they SO cute?! 😍
8.) For the scarecrow's shirt sleeves, you're basically going to do the same thing that you did for the pant legs except for you're just going to cut 2 rectangle pieces, ours measured out to 4 1/2 x 2 inches. Then you'll just insert the wood excelsior for the hands and for the sleeve over in half + glue it shut except for you'll leave the top inner part unglued. That will be glued to the top of the rectangle that makes the scarecrow's torso. You open it, put glue in the gap with your glue gun and slide the top corner of the torso into the slit which ends up gluing the "arm" to both the front and back of the scarecrows' torso, creating a "shoulder". Do this to the other arm as well.


9.) Now you're ready to create the top part of your scarecrows' overalls! If you like how your scarecrow looks wearing the skinny jeans and top then you're done with this part. You can scroll down to creating your scarecrow's face. If you want to create the overalls then continue on ... measure a rectangle that will cover the front of the shirt and cut the corners so they get more of an "overall" look. Do the same with another piece of felt for the back of the overalls as well. Then glue them down to the front and back of your scarecrows' shirt.

10.) We created overall straps by cutting thin pieces of felt that are 1/2 and inch wide and about 2 inches long. The straps measured out to reach both the front and back of the overall tops. Cut any excess fabric and glue those to your overalls as well.


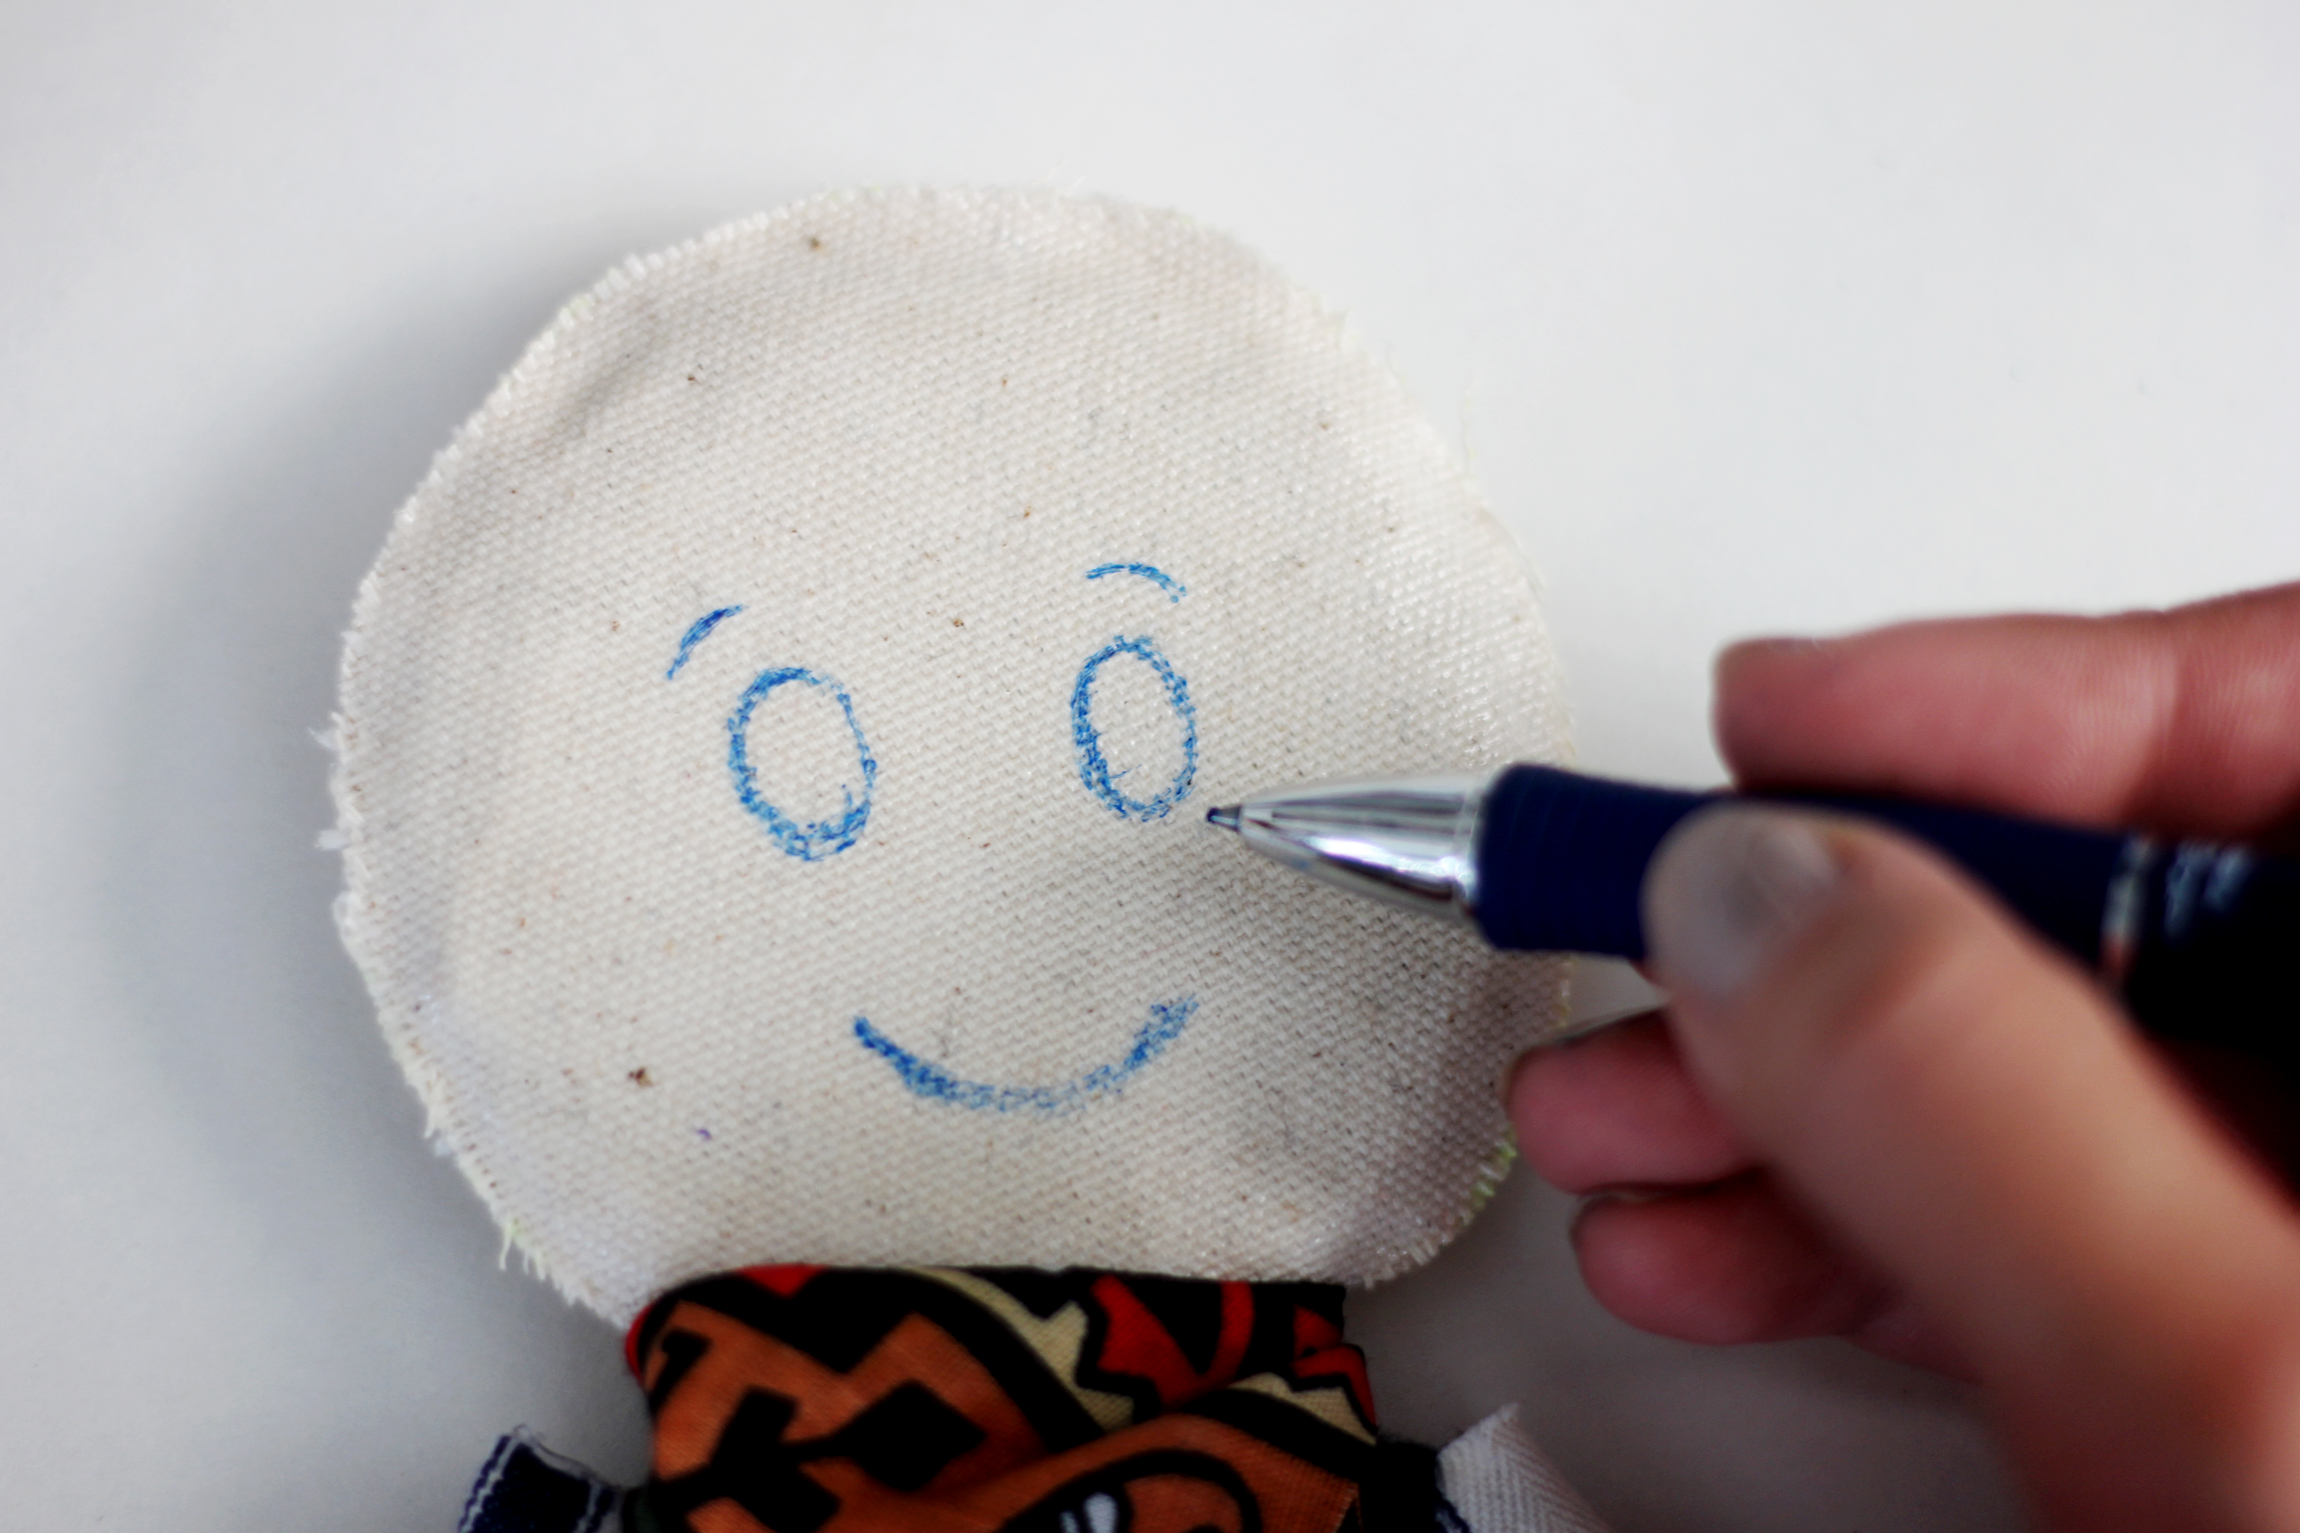
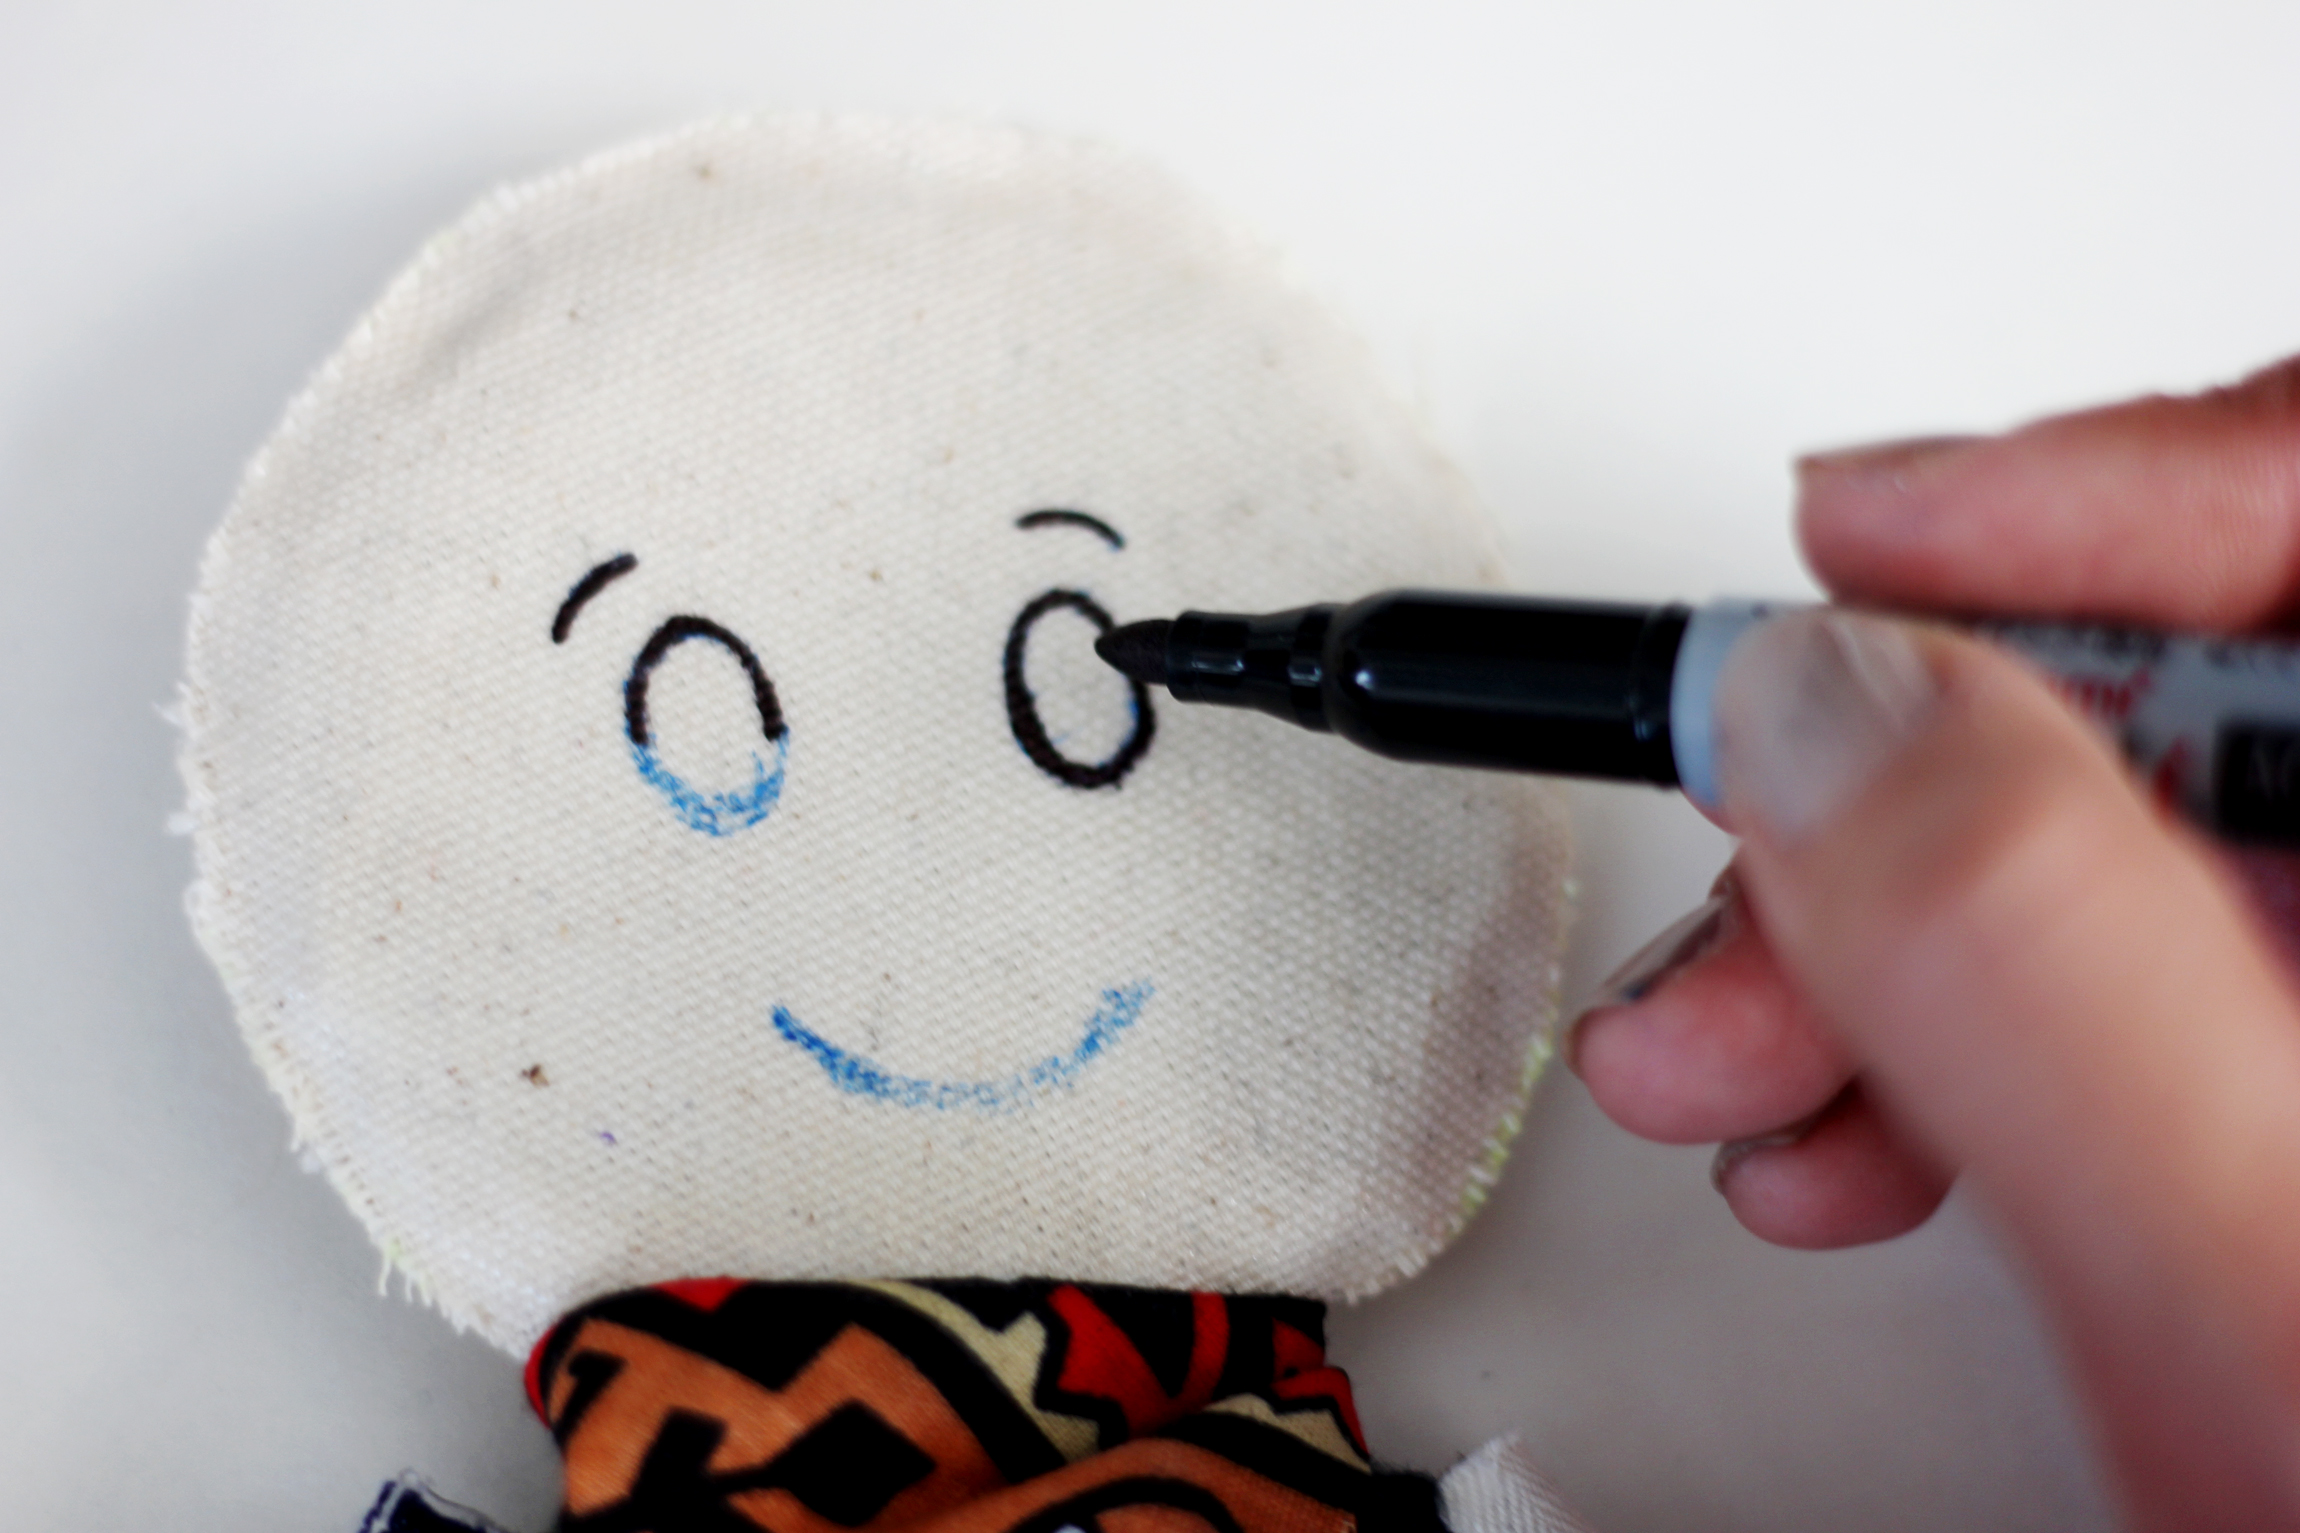
11.) How fun is it to draw scarecrow faces?! This is the part where you get to make your scarecrow look however you want! We prepped our canvas with two layers of an acrylic polymer so that it wouldn't bleed when we drew or painted our faces on. You can use a clear gesso or any transparent paint prep liquid as well. Paint one coat on, let dry well and do the same to the second coat. Now you have a prepped surface that won't create ink or paint bleeds on your scarecrows' face. If you don't mind that effect, then you don't have to prep it. What worked really well for us was drawing the face first then filling it in with a sharpie. We also painted over the sharpie with black acrylic paint for a darker look!

12.) Now the funnest part: accessorizing your scarecrow! We added hair, a beanie, an overall pocket to the top of his overalls and a neck scarf! We also made our scarecrow a friend! She has bangs, a bob haircut, cool glasses, rosy cheeks, a neck scarf and wears a denim vest and skirt with cool patterned leggings! We love our little hipster scarecrows and hope that you love the ones you create too!


KID COSTUMES : BLUE ANGELS FIGHTER JET PILOTS ✈️
We definitely get into costume picking and creation in our house. I love to include our kiddos in the whole process: choosing what to be, shopping for materials and making whatever it is that we need to make together, that's what makes it so fun! It's something we've always done and I plan to continue making it happen as a family tradition!

This year, when I asked our boys: "What do you want to be for Halloween?" The answer from our oldest: "JET PILOOOOOTTTTT" was instant. It was followed by a mini (and oh so adorable) "PILOOOOTTTTT" from our littlest little. Then they both screamed: "BLUE ANGELS JETSSSS VROOOM VROOOOOM" and they ran around making jet noises with their arms spread in the air like jet wings.

So there you have it, that's how these costumes came to be! We started hunting for clothes and accessories, and lastly making the props come to life.


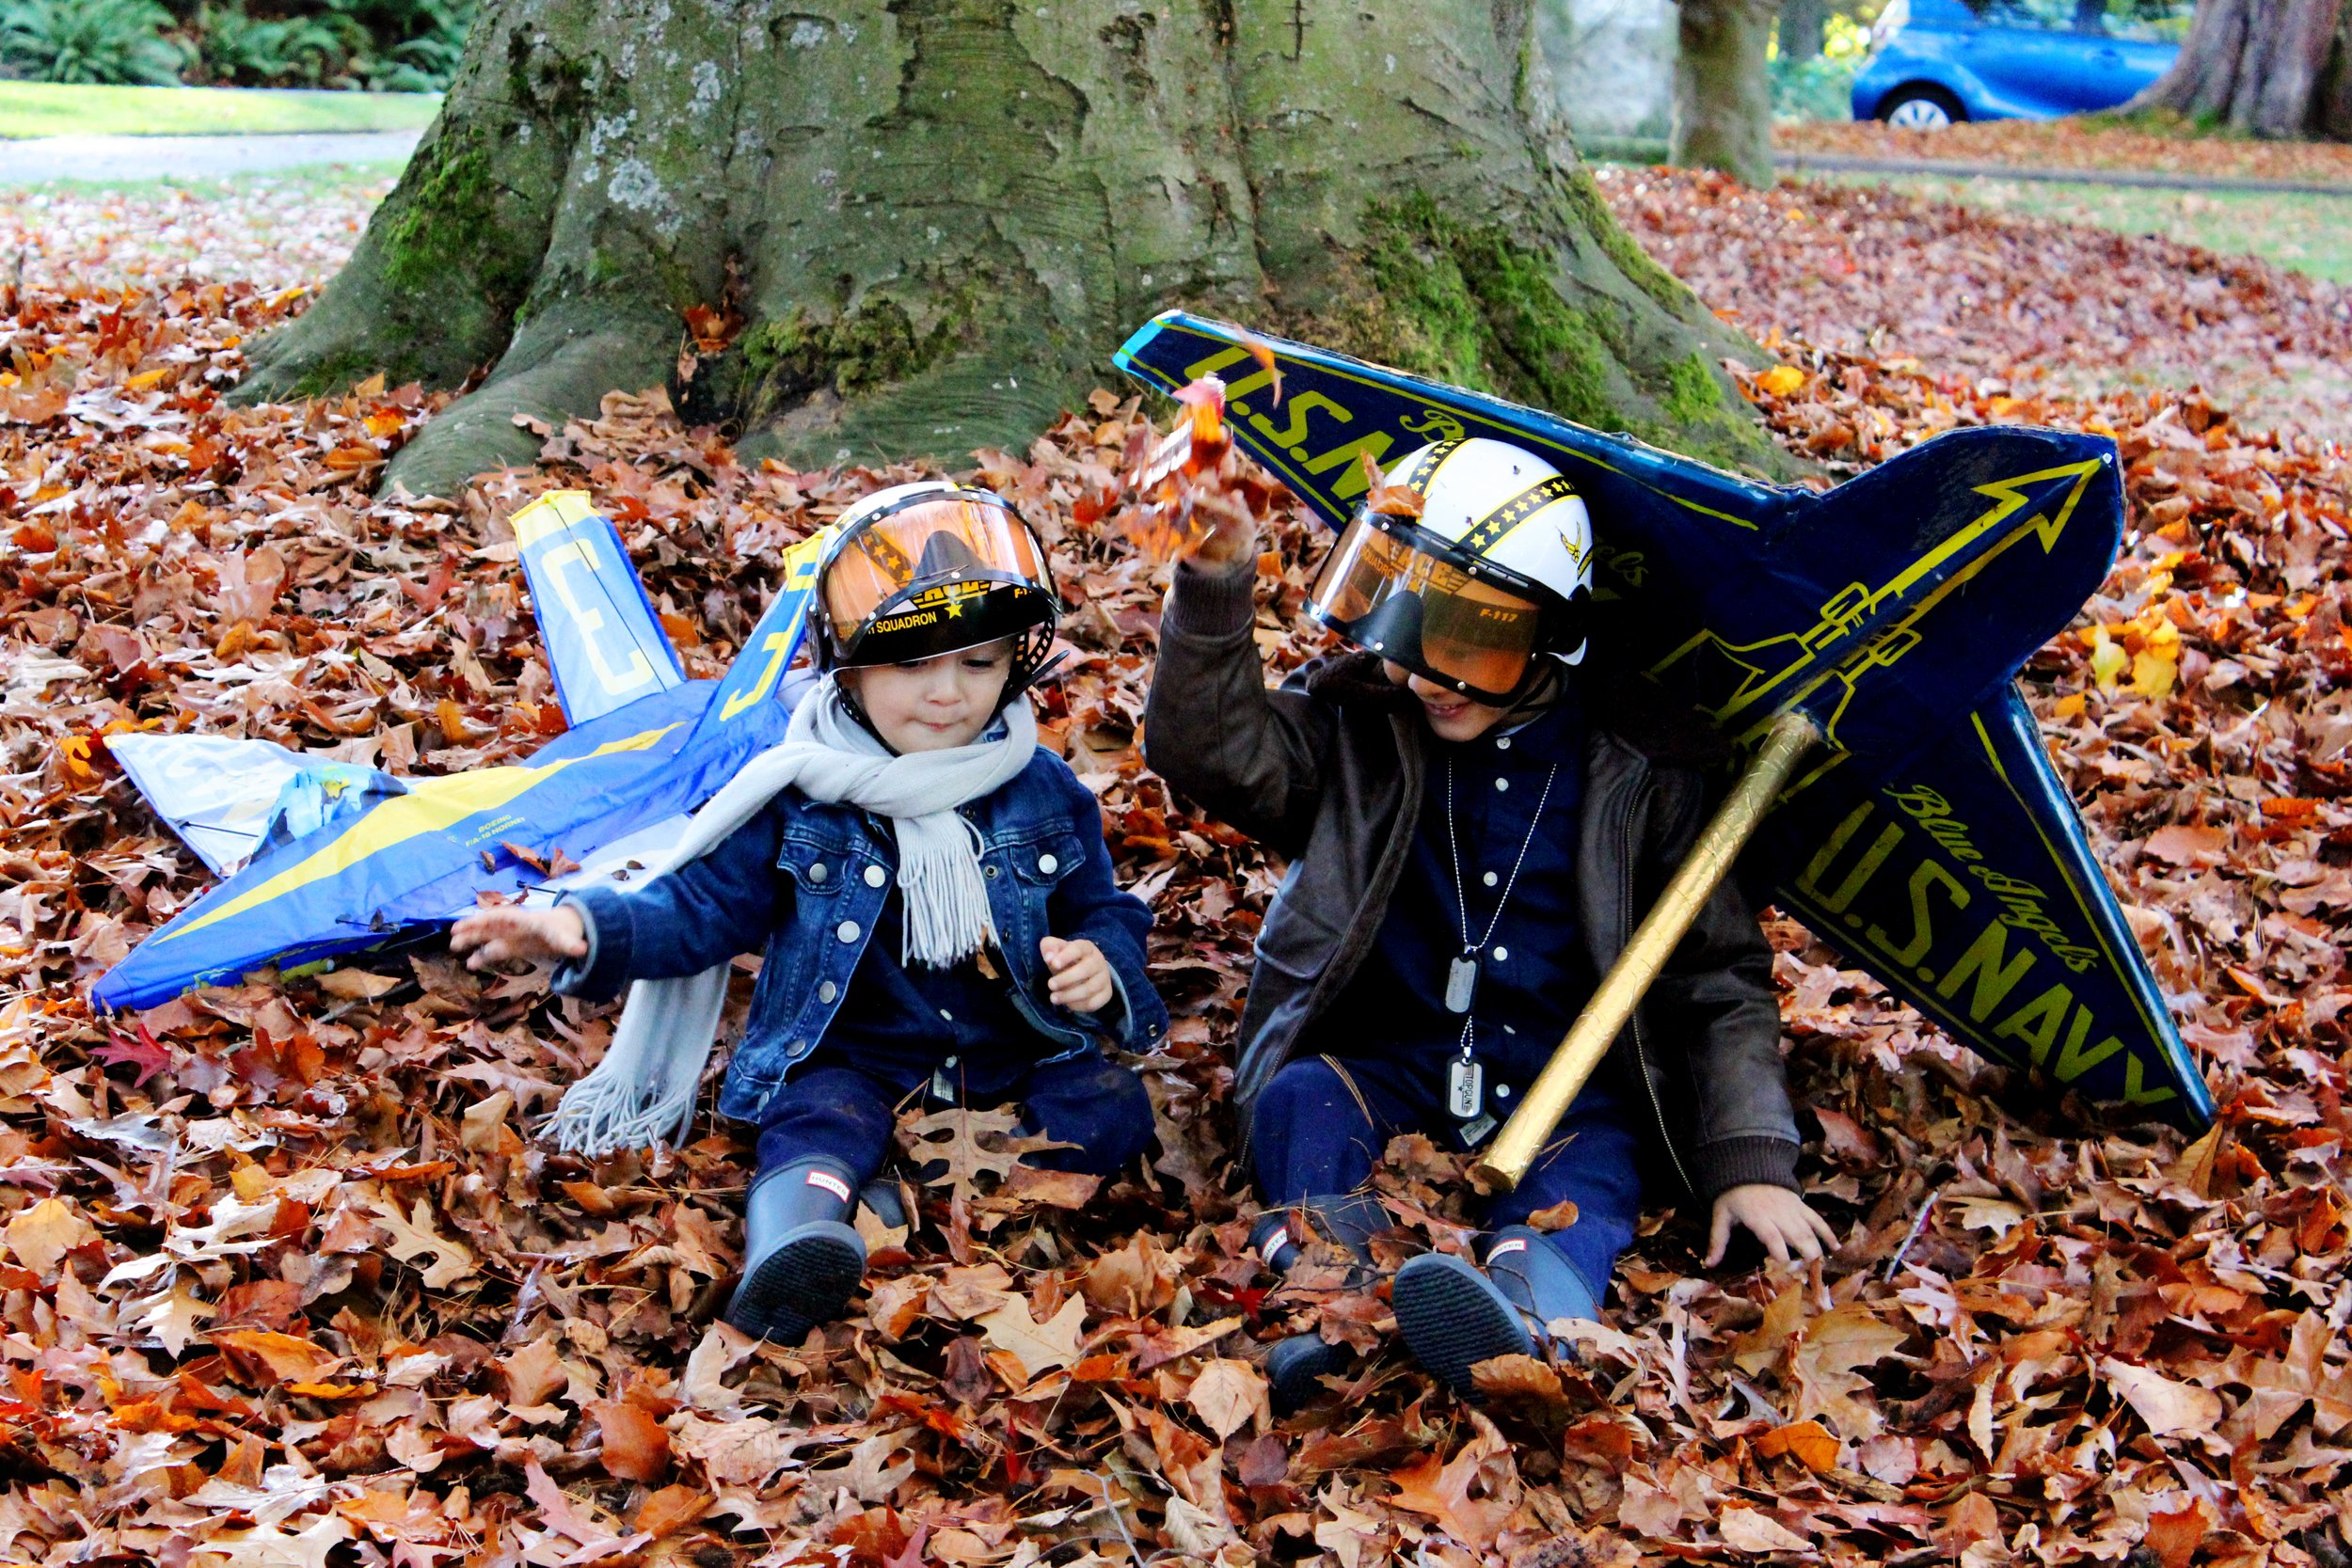
I really thought that making one costume look like a vintage air pilot and one look like a modern little hipster pilot would be fun! You can find the costume details below! We hope you have so much fun choosing and/or creating costumes with YOUR kiddos! All Kids are Gifted wishes you a super fun and safe Halloween loves! 🎃❤️
• • •
COSTUME DETAILS:
SHIRTS: H&M // Shop similar HERE
PANTS: H&M // Shop HERE
BOOTS: Hunter Boots // Shop HERE
DENIM JACKET: Thrifted // Shop similar lighter wash HERE
BOMBER JACKET: Thrifted, older Baby Gap
HELMETS: Halloweencostumes.com // Shop HERE
BLUE ANGELS KITE (on the left) Onlinesports.com: Shop HERE
BLUE ANGELS HANDHELD PROP (on the right): Purchased kite + handmade support & handle @ All Kids workspace.


HAPPY DECEMBER! It looks like so many have been getting ready for Christmas earlier this year—putting up Christmas trees, decor, etc. and I ABSOLUTELY LOOOVE this!